How To Set Up Surveillance Camera ?
To set up a surveillance camera, first, choose a suitable location for the camera that provides a wide view of the area you want to monitor. Ensure that the camera is placed at an appropriate height and angle for optimal coverage. Next, mount the camera securely using brackets or screws. Connect the camera to a power source, either through an electrical outlet or using a power over Ethernet (PoE) connection. If the camera is wireless, follow the manufacturer's instructions to connect it to your Wi-Fi network. Configure the camera's settings, such as resolution, motion detection, and recording options, using the camera's software or mobile app. Finally, test the camera to ensure it is functioning properly and adjust the settings as needed. It is also important to consider any legal requirements or privacy concerns related to surveillance cameras in your area.
1、 Camera Placement and Field of View
To set up a surveillance camera, it is crucial to consider camera placement and field of view. These factors play a significant role in ensuring effective monitoring and maximizing the camera's capabilities. Here's a step-by-step guide on how to set up surveillance cameras:
1. Determine the purpose: Identify the areas you want to monitor and the specific objectives you aim to achieve with the surveillance system. This will help you decide the number and type of cameras required.
2. Conduct a site survey: Assess the location where the cameras will be installed. Look for potential blind spots, areas with poor lighting, and any obstructions that may hinder the camera's view.
3. Choose the right camera: Select cameras that are suitable for the environment and purpose. Consider factors such as resolution, night vision capabilities, weather resistance, and connectivity options.
4. Camera placement: Position the cameras strategically to cover the desired areas. Common locations include entrances, parking lots, hallways, and high-value assets. Ensure the cameras are mounted securely and at an appropriate height to capture the required field of view.
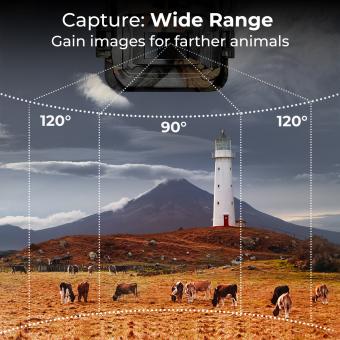
5. Field of view: Adjust the camera's field of view to cover the intended area effectively. This can be done by adjusting the lens focal length or using pan, tilt, and zoom features if available. Consider the camera's angle of view and the distance from the target area to ensure optimal coverage.
6. Test and adjust: After installation, test the cameras to ensure they are capturing the desired footage. Make any necessary adjustments to the camera angles or settings to improve the field of view.
7. Consider the latest advancements: With the rapid advancements in surveillance technology, consider utilizing features like artificial intelligence (AI) for advanced analytics, remote monitoring capabilities, and cloud storage options for enhanced security and convenience.
Remember to comply with local laws and regulations regarding surveillance camera placement and privacy. Regular maintenance and monitoring of the surveillance system are also essential to ensure its continued effectiveness.
2、 Camera Resolution and Image Quality
Camera Resolution and Image Quality
When setting up a surveillance camera, it is crucial to consider camera resolution and image quality. These factors play a significant role in capturing clear and detailed footage, ensuring that the camera serves its purpose effectively. Here is a guide on how to set up surveillance cameras with optimal resolution and image quality.
1. Determine the camera resolution: Camera resolution is measured in pixels and determines the level of detail captured. Higher resolution cameras, such as 4K or 8K, offer sharper images and better clarity. However, it is essential to consider the specific requirements of your surveillance area and balance it with your budget.
2. Choose the right camera lens: The lens determines the field of view and focal length of the camera. Wide-angle lenses capture a broader area, while telephoto lenses focus on distant objects. Select a lens that suits your surveillance needs and ensures the desired level of detail.
3. Position the camera correctly: Proper camera placement is crucial for capturing clear images. Consider factors such as lighting conditions, potential obstructions, and the area you want to monitor. Avoid placing the camera too high or too low, as it may affect the image quality.
4. Optimize lighting conditions: Adequate lighting is essential for capturing clear footage. Ensure that the surveillance area is well-lit, either naturally or artificially. In low-light conditions, consider cameras with infrared capabilities or install additional lighting sources.
5. Regularly clean and maintain the camera: Dust, dirt, and debris can affect the image quality. Clean the camera lens regularly and ensure that it is free from any obstructions. Additionally, check for any loose connections or damaged cables that may impact the camera's performance.
The latest advancements in surveillance camera technology have introduced features like high dynamic range (HDR) and advanced video analytics. HDR helps in capturing clear images in challenging lighting conditions, while video analytics can enhance the camera's functionality by providing intelligent insights.
In conclusion, setting up surveillance cameras with optimal resolution and image quality is crucial for effective monitoring. By considering camera resolution, lens selection, proper positioning, lighting conditions, and regular maintenance, you can ensure that your surveillance system captures clear and detailed footage. Stay updated with the latest advancements in camera technology to make informed decisions and enhance the overall security of your premises.
3、 Recording and Storage Options
Recording and Storage Options for Surveillance Cameras
Setting up a surveillance camera is an essential step in ensuring the security and safety of your home or business. Once you have installed the camera, it is crucial to determine the most suitable recording and storage options to effectively monitor and store the footage.
One of the most common recording options is a digital video recorder (DVR). DVRs are capable of recording and storing footage from multiple cameras simultaneously. They offer various storage capacities, allowing you to choose the one that best suits your needs. Additionally, DVRs often come with motion detection capabilities, which can help conserve storage space by only recording when there is activity in the camera's field of view.
Another popular option is a network video recorder (NVR). NVRs are similar to DVRs but are designed to work with IP cameras. They offer advanced features such as remote access to live and recorded footage, as well as the ability to easily expand the system by adding more cameras.
Cloud storage is also gaining popularity as a recording and storage option. With cloud storage, the footage is securely stored on remote servers, eliminating the need for physical storage devices. This option provides the advantage of accessing the footage from anywhere with an internet connection. However, it is important to consider the potential security risks associated with cloud storage and choose a reputable provider.
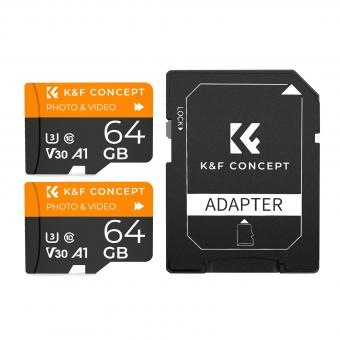
In recent years, the use of microSD cards for local storage has become increasingly common. Many surveillance cameras now have built-in microSD card slots, allowing for convenient and cost-effective storage. However, it is important to regularly back up the footage from the microSD card to prevent data loss.
When setting up a surveillance camera, it is crucial to consider the recording and storage options that best suit your needs. Whether you choose a DVR, NVR, cloud storage, or microSD cards, it is important to ensure that the chosen option provides sufficient storage capacity, easy access to the footage, and adequate security measures to protect the stored data.
4、 Power and Connectivity Requirements
Power and Connectivity Requirements for setting up a surveillance camera have evolved significantly in recent years. With advancements in technology, surveillance cameras have become more efficient and user-friendly. Here is a guide on how to set up a surveillance camera, focusing on power and connectivity requirements.
1. Power Requirements: Surveillance cameras can be powered in various ways, including through a power outlet, Power over Ethernet (PoE), or battery-operated. If you opt for a power outlet, ensure that the camera is located near one. PoE cameras are becoming increasingly popular as they eliminate the need for separate power cables. These cameras receive power and transmit data through a single Ethernet cable, simplifying installation.
2. Connectivity Requirements: Surveillance cameras require a stable internet connection for remote viewing and recording. Wired connections, such as Ethernet cables, provide a more reliable connection compared to wireless options. However, wireless cameras are more flexible and easier to install, especially in areas where running cables is challenging. Ensure that the camera is within range of your Wi-Fi router for a strong signal.
3. Latest Point of View: The latest trend in surveillance camera connectivity is the integration of cameras with smart home systems. This allows users to control and monitor their cameras through voice commands or smartphone apps. Additionally, cloud storage options have gained popularity, enabling users to store footage remotely and access it from anywhere. This eliminates the need for on-site storage devices and provides a more secure backup solution.
In conclusion, setting up a surveillance camera requires considering power and connectivity requirements. The latest advancements in technology have made surveillance cameras more efficient and user-friendly. By understanding these requirements and staying updated with the latest trends, you can ensure a seamless installation and optimal performance of your surveillance camera system.












There are no comments for this blog.