How To Setup Dvr Camera System ?
To set up a DVR camera system, you will need to follow these basic steps:
1. Choose the right DVR system: Select a DVR system that meets your needs in terms of the number of cameras, storage capacity, and features.
2. Install the cameras: Install the cameras in the desired locations, making sure they are securely mounted and aimed in the right direction.
3. Connect the cameras to the DVR: Connect the cameras to the DVR using the appropriate cables and connectors.
4. Configure the DVR: Configure the DVR settings, including the date and time, recording schedule, and motion detection settings.
5. Test the system: Test the system to ensure that the cameras are working properly and that the DVR is recording footage.
6. Monitor the system: Monitor the system regularly to ensure that it is functioning properly and to review footage as needed.
By following these steps, you can set up a DVR camera system that will provide you with reliable surveillance and security for your home or business.
1、 Hardware Requirements
Hardware Requirements for Setting up a DVR Camera System:
1. DVR (Digital Video Recorder): This is the central component of the system that records and stores the video footage from the cameras. It is important to choose a DVR with enough storage capacity to meet your needs.
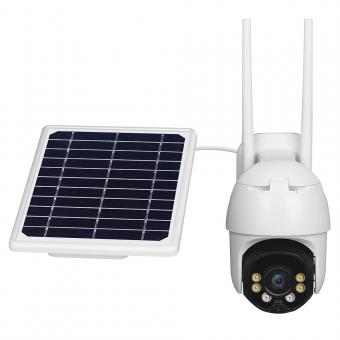
2. Cameras: The number and type of cameras you need will depend on the size and layout of the area you want to monitor. There are many different types of cameras available, including dome, bullet, and PTZ (pan-tilt-zoom) cameras.
3. Cables: You will need cables to connect the cameras to the DVR. The type of cable you need will depend on the type of camera you are using. Coaxial cables are commonly used for analog cameras, while Ethernet cables are used for IP cameras.
4. Power Supply: Cameras require power to operate, so you will need a power supply for each camera. Some cameras can be powered over Ethernet (PoE), which simplifies the installation process.
5. Monitor: You will need a monitor to view the video footage from the cameras. The size and type of monitor you need will depend on your preferences and the size of the area you are monitoring.
6. Internet Connection: If you want to access the video footage remotely, you will need an internet connection and a router. This will allow you to view the footage from your smartphone, tablet, or computer.
7. Backup Storage: It is important to have a backup storage solution in case the DVR fails or the footage is lost. This can be a separate hard drive or a cloud-based storage solution.
In summary, setting up a DVR camera system requires a DVR, cameras, cables, power supply, monitor, internet connection, and backup storage. It is important to choose high-quality components that meet your needs and budget. Additionally, it is recommended to consult with a professional installer to ensure proper installation and configuration of the system.
2、 Network Configuration
Network Configuration is an essential step in setting up a DVR camera system. It allows the cameras to be accessed remotely and enables the user to view the footage from anywhere in the world. Here are the steps to set up the network configuration:
1. Connect the DVR to the router using an Ethernet cable.
2. Assign a static IP address to the DVR. This can be done by accessing the router's settings and assigning a unique IP address to the DVR.
3. Enable port forwarding on the router. This allows the user to access the DVR remotely by forwarding the incoming traffic to the DVR's IP address.
4. Configure the DVR's network settings. This includes setting up the DNS server, gateway, and subnet mask.
5. Set up remote access. This can be done by installing the manufacturer's software on a computer or mobile device and configuring it to connect to the DVR.
6. Test the remote access. Ensure that the remote access is working correctly by accessing the DVR from a remote location.
It is essential to keep the DVR's firmware up to date to ensure that it is secure and protected from vulnerabilities. Additionally, it is recommended to use strong passwords and enable two-factor authentication to prevent unauthorized access to the DVR.
3、 DVR Setup and Configuration
DVR Setup and Configuration is an essential process for anyone who wants to install a DVR camera system. The process involves several steps that must be followed carefully to ensure that the system is set up correctly and functions optimally. Here are the steps to follow when setting up a DVR camera system:
Step 1: Choose the right DVR camera system. There are many different types of DVR camera systems available on the market, so it's important to choose one that meets your specific needs. Consider factors such as the number of cameras you need, the resolution you require, and the storage capacity you need.
Step 2: Install the cameras. Once you have chosen your DVR camera system, you need to install the cameras in the locations where you want to monitor. Make sure that the cameras are installed securely and that they are positioned to capture the areas you want to monitor.
Step 3: Connect the cameras to the DVR. Once the cameras are installed, you need to connect them to the DVR. This is usually done using coaxial cables or Ethernet cables, depending on the type of cameras you have.
Step 4: Configure the DVR. Once the cameras are connected to the DVR, you need to configure the DVR to ensure that it is set up correctly. This involves setting up the recording schedule, configuring the motion detection settings, and setting up remote access.
Step 5: Test the system. Once the DVR is configured, you need to test the system to ensure that it is working correctly. This involves checking that the cameras are recording correctly, that the motion detection settings are working, and that you can access the system remotely.
In conclusion, setting up a DVR camera system requires careful planning and execution. By following the steps outlined above, you can ensure that your system is set up correctly and functions optimally. It's also important to keep up with the latest developments in DVR camera technology to ensure that your system is up-to-date and secure.
4、 Camera Installation and Configuration

How to setup DVR camera system:
1. Choose the right DVR: The first step in setting up a DVR camera system is to choose the right DVR. Make sure the DVR is compatible with the cameras you plan to use and has enough channels to accommodate all the cameras.
2. Install the cameras: Once you have chosen the right DVR, the next step is to install the cameras. Make sure the cameras are installed in the right location and are pointing in the right direction.
3. Connect the cameras to the DVR: After installing the cameras, connect them to the DVR using the appropriate cables. Make sure the cables are properly connected and secured.
4. Configure the DVR: Once the cameras are connected to the DVR, you need to configure the DVR. This involves setting up the recording schedule, motion detection, and other settings.
5. Test the system: After configuring the DVR, test the system to make sure everything is working properly. Check the video quality, playback, and other features to ensure the system is functioning as expected.
6. Monitor the system: Once the system is set up and tested, it is important to monitor it regularly. This involves checking the video feed, reviewing recordings, and making any necessary adjustments to the system.
In addition to these steps, it is important to keep up with the latest advancements in DVR camera systems. New technologies and features are constantly being developed, so it is important to stay informed and make upgrades as necessary to ensure your system is up-to-date and functioning at its best.


