How To Take Microscope Photos ?
To take microscope photos, you will need to follow these steps:
1. Prepare your microscope: Ensure that your microscope is clean and properly set up. Adjust the lighting and focus as needed.
2. Mount your specimen: Place the specimen you want to photograph on a microscope slide and secure it with a coverslip if necessary.
3. Connect your camera: If your microscope has a built-in camera, connect it to your computer or other recording device. Alternatively, you can use an external camera by attaching it to the eyepiece of the microscope.
4. Adjust camera settings: Set the camera to the appropriate mode for capturing still images. Adjust the exposure, focus, and other settings as needed.
5. Position and focus: Position the microscope so that the specimen is in the center of the field of view. Use the microscope's focus knobs to bring the specimen into sharp focus.
6. Capture the image: Once the specimen is in focus, use the camera's shutter button or software to capture the image. Take multiple shots from different angles or focal planes if desired.
7. Review and edit: Transfer the captured images to your computer and review them. Use image editing software to enhance or adjust the images if necessary.
Remember to consult your microscope's user manual for specific instructions and to experiment with different settings to achieve the best results.
1、 Microscope Photography Techniques
Microscope photography is a fascinating field that allows us to capture the intricate details of microscopic objects. To take microscope photos, follow these techniques:
1. Set up your microscope: Ensure your microscope is properly set up and calibrated. Adjust the lighting and focus to achieve a clear image.
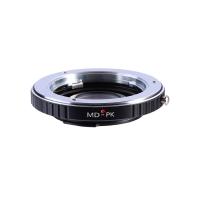
2. Use a camera adapter: Attach a camera adapter to your microscope to connect your camera. This allows you to capture the images directly through the microscope lens.
3. Choose the right camera: Use a camera with manual settings and a high-resolution sensor. DSLR cameras are commonly used for microscope photography due to their versatility and image quality.
4. Adjust exposure settings: Experiment with different exposure settings to achieve the desired level of brightness and contrast. Manual mode allows you to have full control over the exposure settings.
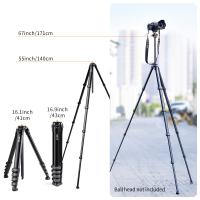
5. Use a tripod: To avoid camera shake and ensure sharp images, mount your camera on a tripod. This is especially important when using high magnification.
6. Experiment with magnification: Microscopes offer various magnification levels. Start with low magnification to locate your subject, then gradually increase the magnification to capture finer details.
7. Focus stacking: When capturing images at high magnification, depth of field becomes shallow. To overcome this, take multiple images at different focal points and combine them using focus stacking software.
8. Post-processing: After capturing the images, use photo editing software to enhance the colors, contrast, and sharpness. Avoid excessive editing that may alter the scientific accuracy of the image.
In recent years, advancements in technology have led to the development of digital microscopes and smartphone adapters, making microscope photography more accessible. These tools allow you to directly connect your smartphone to the microscope, enabling easy image capture and sharing.
Additionally, some microscopes now come with built-in cameras and software, simplifying the process of capturing and analyzing microscopic images. These advancements have made it easier for researchers, educators, and enthusiasts to document and share their findings.
Remember, practice and experimentation are key to mastering microscope photography. Each microscope and camera setup may require slight adjustments, so don't be afraid to try different techniques and settings to achieve the best results.
2、 Choosing the Right Microscope for Photography
Taking microscope photos can be a fascinating way to capture the intricate details of microscopic specimens. However, to achieve high-quality images, it is crucial to choose the right microscope for photography. Here are some key factors to consider when selecting a microscope for this purpose.
1. Magnification and Resolution: Look for a microscope with high magnification capabilities and excellent resolution. This will ensure that you can capture fine details and produce sharp, clear images.
2. Camera Compatibility: Check if the microscope is compatible with a camera attachment. Many microscopes have a dedicated camera port or an eyepiece adapter that allows you to connect a camera. Ensure that the camera you plan to use is compatible with the microscope's attachment system.
3. Lighting Options: Adequate lighting is essential for capturing microscope images. Look for a microscope that offers various lighting options, such as built-in LED illumination or the ability to attach external light sources. Adjustable lighting will allow you to control the brightness and contrast of your images.
4. Stage and Focus Control: A stable stage and precise focus control are crucial for capturing sharp images. Choose a microscope with a sturdy stage that can securely hold your specimens. Additionally, ensure that the microscope has fine focus adjustment knobs or a focus motor for precise focusing.
5. Image Capture Software: Consider whether the microscope comes with image capture software or if it is compatible with third-party software. Having software that allows you to control camera settings, adjust image parameters, and capture images directly to your computer can greatly enhance your photography experience.
6. Latest Technological Advancements: Stay updated with the latest advancements in microscope technology. For example, some microscopes now offer digital cameras integrated into the microscope body, allowing for seamless image capture and analysis.
Remember, choosing the right microscope for photography is essential for obtaining high-quality images. Consider your specific requirements, budget, and the latest technological advancements to make an informed decision.
3、 Lighting and Illumination for Microscope Photography
To take microscope photos, it is important to consider the lighting and illumination techniques used. Proper lighting is crucial for capturing clear and detailed images. Here are some steps to follow:
1. Use a bright and even light source: Ensure that the microscope is equipped with a powerful light source, such as an LED or halogen lamp. This will provide sufficient illumination for the specimen.
2. Adjust the light intensity: Depending on the specimen and the desired effect, adjust the light intensity accordingly. Too much light can cause overexposure, while too little light can result in underexposed images.
3. Utilize diffused lighting: Direct lighting can create harsh shadows and reflections. To minimize these, use diffused lighting techniques. This can be achieved by placing a diffuser, such as a frosted glass or a diffuser filter, between the light source and the specimen.
4. Consider polarized light: Polarized light can enhance contrast and reveal specific details in certain specimens. By using polarizing filters, you can control the direction and intensity of the light, resulting in more detailed images.
5. Experiment with darkfield and phase contrast techniques: These techniques are particularly useful for transparent or translucent specimens. Darkfield illumination creates a bright specimen against a dark background, while phase contrast enhances the contrast between different parts of the specimen.
6. Use a camera adapter: Attach a camera adapter to the microscope to connect a digital camera or a smartphone. This allows you to capture the images directly through the microscope eyepiece.
7. Adjust camera settings: Set the camera to manual mode and adjust the aperture, shutter speed, and ISO settings to achieve the desired exposure and depth of field.
In recent years, advancements in technology have led to the development of digital microscope cameras and software that enable real-time image capture and analysis. These tools provide enhanced capabilities for microscope photography, allowing for precise control over lighting and illumination. Additionally, image processing techniques, such as stacking and stitching, can be employed to create high-resolution and detailed composite images.
Overall, mastering lighting and illumination techniques is essential for capturing high-quality microscope photos. Experimentation and practice will help refine your skills and enable you to capture stunning images of microscopic specimens.
4、 Camera Settings for Microscope Photography
To take microscope photos, you will need to follow a few steps and adjust your camera settings accordingly. Here is a guide on how to take microscope photos and the recommended camera settings for microscope photography.
1. Set up your microscope: Ensure that your microscope is properly set up and focused on the specimen you want to photograph. Make sure the lighting is adequate and evenly distributed.
2. Attach your camera: Connect your camera to the microscope using an appropriate adapter or mount. This will allow you to capture the magnified image seen through the microscope.
3. Adjust the camera settings: Set your camera to manual mode to have full control over the settings. Here are the recommended camera settings for microscope photography:
- ISO: Use a low ISO setting (e.g., ISO 100 or 200) to minimize noise and maintain image quality.
- Aperture: Choose a small aperture (e.g., f/8 or higher) to increase depth of field and ensure sharp focus throughout the image.
- Shutter speed: Use a fast shutter speed to avoid motion blur. Experiment with different speeds depending on the lighting conditions and movement of the specimen.
- White balance: Set the white balance according to the lighting conditions to ensure accurate color reproduction.
4. Focus and compose: Use the microscope's focus knobs to achieve a sharp focus on the specimen. Adjust the composition by moving the microscope stage or adjusting the camera position.
5. Capture the photo: Once everything is set up, press the shutter button to capture the photo. Use a remote shutter release or a timer to minimize camera shake.
It's worth noting that the latest point of view in microscope photography involves using digital cameras with higher megapixel counts and advanced image processing capabilities. This allows for capturing more detailed and high-resolution microscope images. Additionally, some cameras now offer built-in Wi-Fi or Bluetooth connectivity, enabling wireless transfer of images to a computer or smartphone for immediate analysis or sharing.
Remember to experiment with different camera settings and techniques to achieve the desired results. Practice and patience are key to mastering microscope photography.


