How To Take Photos Using Tripod ?
To take photos using a tripod, first, set up your tripod on a stable surface. Extend the legs and adjust the height according to your preference. Attach your camera securely to the tripod using the mounting plate or quick-release mechanism. Make sure the camera is level and secure.
Next, adjust the tripod head to position your camera in the desired angle and composition. Use the tripod's pan and tilt controls to fine-tune the framing. If needed, adjust the tripod's height or leg angles to achieve the desired perspective.
Once your camera is set up, use the camera's timer or a remote shutter release to minimize camera shake when pressing the shutter button. This will help ensure sharp images. Additionally, consider using a low ISO setting and a longer shutter speed to capture more light and reduce the risk of camera shake.
Finally, review your images on the camera's LCD screen to ensure they meet your expectations. Adjust the tripod or camera settings as needed to achieve the desired results.
1、 Setting up the tripod for stability and balance
How to take photos using a tripod: Setting up the tripod for stability and balance
Using a tripod is essential for capturing sharp and steady photos, especially in low light conditions or when using longer exposure times. To ensure stability and balance, follow these steps when setting up your tripod:
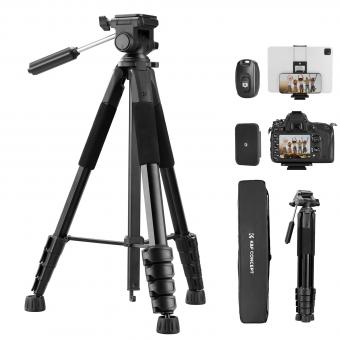
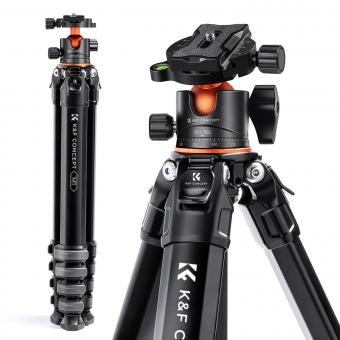
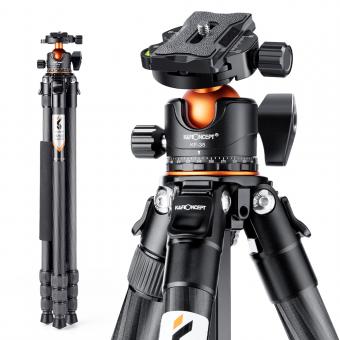
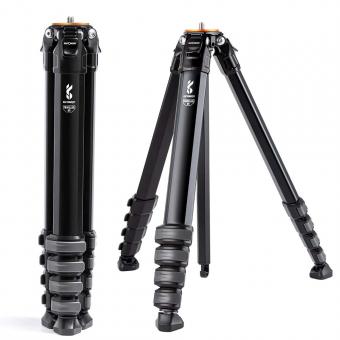
1. Choose a sturdy tripod: Invest in a tripod that is made of high-quality materials and has a weight capacity suitable for your camera and lens setup. Look for features like adjustable legs, a center column, and a ball head for added flexibility.
2. Extend the legs: Start by extending the tripod legs to your desired height. Most tripods have multiple leg sections that can be adjusted independently. Ensure that the legs are securely locked in place to prevent any wobbling.
3. Spread the legs: Position the tripod legs in a wide stance to maximize stability. This is especially important when shooting in windy conditions or on uneven terrain. If possible, avoid extending the center column fully as it can compromise stability.
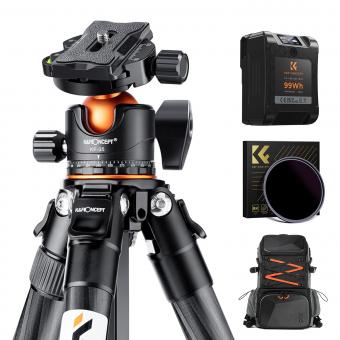
4. Adjust the tripod head: The tripod head is where you attach your camera. Depending on the type of tripod head you have, adjust it to the desired angle and tighten the knobs to secure it in place. A ball head allows for smooth movement in all directions, while a pan-tilt head offers more precise control.
5. Attach the camera: Use the quick-release plate or mounting plate to attach your camera securely to the tripod head. Ensure that the camera is properly balanced and tightened to prevent any accidental movement.
6. Fine-tune the position: Adjust the tripod legs and head as needed to frame your shot. Use the built-in bubble level or a separate bubble level to ensure that the tripod is perfectly level.
7. Use a remote shutter release or self-timer: To minimize camera shake, use a remote shutter release or the self-timer function on your camera. This will allow you to trigger the shutter without physically touching the camera.
In addition to these steps, it's important to consider the latest point of view when using a tripod. With advancements in technology, many tripods now come with features like built-in smartphone mounts or compatibility with 360-degree cameras. These additions allow for more versatility and creativity in your photography.
Remember, using a tripod not only helps in achieving sharp images but also allows for more precise composition and control over your camera settings. So, take your time to set up your tripod properly, and enjoy capturing stunning photos with stability and balance.
2、 Adjusting the tripod height and angle for desired composition
To take photos using a tripod, one of the essential steps is adjusting the tripod height and angle for the desired composition. This ensures stability and allows you to capture the perfect shot. Here's a step-by-step guide on how to do it effectively:
1. Set up your tripod: Start by extending the tripod legs to a comfortable height. Make sure the tripod is stable on the ground and the legs are securely locked in place.
2. Attach your camera: Most tripods come with a quick-release plate or mounting screw. Attach your camera securely to the tripod head, ensuring it is tightly fastened.
3. Adjust the tripod height: Depending on your composition, adjust the tripod height accordingly. If you want a lower angle, you can lower the tripod legs or use a center column if your tripod has one. For higher angles, extend the tripod legs fully or use a step stool or ladder if needed.
4. Level the tripod: Use the built-in bubble level or a separate leveling tool to ensure your tripod is perfectly level. This is crucial for avoiding tilted horizons or skewed compositions.
5. Adjust the tripod angle: Tilt the tripod head to the desired angle. This allows you to compose your shot precisely. You can adjust the angle by loosening the tripod head's locking knob and tightening it once you have the desired composition.
6. Fine-tune the composition: Once you have set the height and angle, take a moment to review your composition through the camera's viewfinder or LCD screen. Make any necessary adjustments to achieve the desired framing.
7. Lock the tripod: Once you are satisfied with the composition, tighten all the tripod locks to secure the position. This ensures stability during the exposure.
Remember, while adjusting the tripod height and angle is crucial, it's also essential to consider other factors such as lighting, exposure settings, and focusing to capture the best possible photo. Experiment with different heights and angles to find the most creative and visually appealing compositions.
3、 Using a remote shutter release or self-timer for stability
How to take photos using a tripod:
Using a tripod is an excellent way to ensure stability and capture sharp, high-quality images. Here's a step-by-step guide on how to take photos using a tripod:
1. Set up your tripod: Choose a stable location and extend the tripod legs to your desired height. Make sure the tripod is secure and level.
2. Attach your camera: Most tripods have a quick-release plate that attaches to the camera's tripod mount. Align the plate with the camera's base and tighten the screw to secure it in place.
3. Adjust the camera position: Use the tripod's pan and tilt controls to position the camera at the desired angle and composition. Take your time to find the perfect framing.
4. Use a remote shutter release or self-timer: To minimize camera shake, it's best to avoid physically pressing the shutter button. Instead, use a remote shutter release or the camera's self-timer function. This will allow you to trigger the shutter without touching the camera, resulting in sharper images.
Using a remote shutter release is particularly advantageous as it provides more control and flexibility. Some remote releases even offer additional features like interval shooting or long exposure capabilities. Alternatively, if you don't have a remote release, you can use the camera's self-timer function, typically set to a 2 or 10-second delay. This allows you to press the shutter button and step away from the camera before the photo is taken.
In recent years, advancements in technology have introduced wireless remote shutter releases that can be controlled through smartphone apps. These apps offer added convenience and functionality, allowing photographers to trigger the shutter remotely, adjust settings, and even preview the image on their phone's screen.
Remember, using a tripod and a remote shutter release or self-timer is essential for achieving sharp, blur-free images. So, next time you're out shooting, make sure to utilize these techniques to enhance your photography skills.
4、 Utilizing tripod features for panning or tilting shots
How to Take Photos Using a Tripod: Utilizing Tripod Features for Panning or Tilting Shots
Using a tripod is an excellent way to ensure stability and capture sharp, high-quality photos. While most people are familiar with using a tripod for stationary shots, it can also be a valuable tool for capturing dynamic images with panning or tilting movements. Here's a guide on how to take photos using a tripod, specifically focusing on utilizing tripod features for panning or tilting shots.
1. Choose the right tripod: Ensure that your tripod is sturdy and can handle the weight of your camera and lens. Look for a tripod with a fluid head, which allows for smooth panning and tilting movements.
2. Set up your tripod: Find a stable surface and extend the tripod legs to your desired height. Make sure the tripod is level by using a bubble level or the built-in level on some tripods.
3. Attach your camera: Securely mount your camera onto the tripod head using the quick-release plate. Ensure that it is tightly fastened to prevent any movement during the shot.
4. Adjust the tripod head: Depending on the type of shot you want to capture, adjust the tripod head accordingly. For panning shots, loosen the horizontal axis and smoothly move the camera from left to right or vice versa. For tilting shots, loosen the vertical axis and tilt the camera up or down.
5. Practice your movements: Panning and tilting shots require smooth and controlled movements. Practice moving the camera at a consistent speed to achieve the desired effect. Experiment with different speeds to capture different levels of motion blur.
6. Use a remote shutter release or self-timer: To avoid any camera shake caused by pressing the shutter button, use a remote shutter release or the self-timer function on your camera.
7. Review and adjust: After taking a few shots, review them on your camera's LCD screen. Adjust the tripod head or your movements as needed to achieve the desired effect.
The latest point of view in utilizing tripod features for panning or tilting shots is the integration of advanced technology. Some tripods now come with motorized heads that can be controlled remotely using a smartphone app. This allows for precise and automated panning or tilting movements, making it easier to capture professional-looking shots. Additionally, some tripods have built-in stabilizers that further enhance stability and reduce vibrations, resulting in even sharper images.
In conclusion, using a tripod for panning or tilting shots can add a dynamic element to your photography. By following these steps and considering the latest advancements in tripod technology, you can capture stunning images with ease and precision.
