How To Take Picture With Tripod ?
To take a picture with a tripod, first, set up the tripod on a stable surface. Attach your camera securely to the tripod using the mounting plate or screw. Adjust the height and position of the tripod to frame your shot as desired. Use the tripod's controls to level the camera if needed. Set your camera to the desired shooting mode, such as manual or automatic. Use a remote shutter release or the camera's self-timer function to minimize camera shake when taking the picture. Finally, press the shutter button to capture the image.
1、 Setting up the tripod for stability and balance
To take a picture with a tripod, you need to set it up properly for stability and balance. Here's a step-by-step guide on how to do it:
1. Choose a suitable location: Find a flat and stable surface to place your tripod. Avoid areas with strong winds or uneven ground that could cause the tripod to wobble.
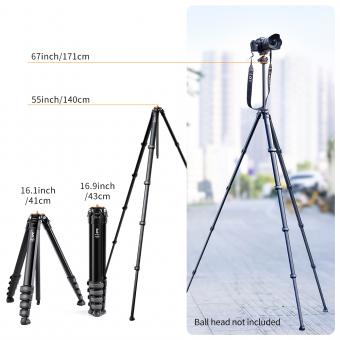
2. Extend the legs: Start by loosening the leg locks and extending the tripod legs to your desired height. Make sure all three legs are extended evenly to maintain balance.
3. Adjust the center column: If your tripod has a center column, adjust it to the desired height. The center column can provide additional height but may reduce stability, so use it sparingly.
4. Lock the legs: Once you have set the desired height, tighten the leg locks to secure the tripod in place. Ensure that all the locks are tightened properly to prevent any accidental movement.
5. Attach the camera: Most tripods come with a quick-release plate or mounting platform. Attach this plate to the bottom of your camera and then attach it securely to the tripod head. Make sure it is tightened properly to avoid any wobbling.
6. Level the camera: Use the built-in bubble level on the tripod or the one on your camera to ensure that it is level. Adjust the tripod legs if necessary to achieve a balanced and straight composition.
7. Fine-tune the composition: Once your camera is level, adjust the tripod head to frame your shot exactly as you want it. Use the pan and tilt controls on the tripod head to make precise adjustments.
8. Use a remote or timer: To avoid camera shake, use a remote shutter release or the self-timer function on your camera to take the picture. This will minimize any movement caused by pressing the shutter button.
Remember, stability is key when using a tripod. Avoid touching the camera or tripod while taking the picture to ensure sharp and clear images. Additionally, always be mindful of your surroundings and consider using a weight bag or sandbag for added stability in windy conditions.
2、 Adjusting the camera's settings for optimal image quality
To take a picture with a tripod, follow these steps:
1. Set up the tripod: Choose a stable location and extend the tripod legs to the desired height. Make sure the tripod is secure and level.
2. Attach the camera: Most tripods have a quick-release plate that attaches to the camera's tripod mount. Align the plate with the mount and tighten the screw to secure the camera.
3. Adjust the camera's position: Use the tripod's pan and tilt controls to position the camera in the desired direction. Ensure that the camera is level and properly framed.
4. Adjust the camera's settings: To achieve optimal image quality, adjust the camera's settings based on the shooting conditions. Here are a few key settings to consider:
- ISO: Set the ISO to the lowest value possible (e.g., ISO 100) to minimize noise and maintain image quality.
- Aperture: Choose an appropriate aperture based on the desired depth of field. A smaller aperture (higher f-number) will result in a larger depth of field.
- Shutter speed: Use a longer shutter speed to capture more light in low-light conditions or for creative effects like motion blur. Alternatively, use a faster shutter speed to freeze action.
- White balance: Set the white balance according to the lighting conditions to ensure accurate color reproduction.
5. Use a remote or self-timer: To avoid camera shake, use a remote shutter release or the camera's self-timer function to trigger the shutter without physically touching the camera.
6. Take the picture: Once everything is set up, press the shutter button or activate the remote to capture the image.
Remember to experiment with different settings and compositions to achieve the desired results. Additionally, stay updated with the latest advancements in camera technology and techniques to enhance your photography skills.
3、 Composing the shot using the tripod's flexibility
To take a picture with a tripod, you need to follow a few simple steps. First, set up your tripod on a stable surface, ensuring that all the legs are securely locked in place. Adjust the height of the tripod to your desired level by extending or retracting the legs.
Next, attach your camera to the tripod using the mounting plate or quick-release system. Make sure the camera is securely fastened to avoid any accidental falls. Once your camera is attached, adjust the position and angle of the camera by using the tripod's flexibility. Most tripods allow you to pan horizontally, tilt vertically, and even rotate the camera.
Composing the shot using the tripod's flexibility is crucial for capturing a well-framed and balanced image. Take your time to experiment with different angles and perspectives. You can adjust the height of the tripod to capture shots from a higher or lower vantage point. Tilting the camera up or down can help you frame the subject more effectively, while panning horizontally can capture wider scenes.
Additionally, some tripods come with a center column that can be extended or tilted, allowing for even more flexibility in composing your shot. This feature can be particularly useful for shooting macro photography or capturing unique angles.
Remember to use a remote shutter release or the camera's self-timer function to minimize any camera shake when taking the picture. This will ensure a sharp and clear image.
In conclusion, taking a picture with a tripod involves setting up the tripod securely, attaching the camera, and utilizing the tripod's flexibility to compose the shot effectively. Experiment with different angles and perspectives to capture the best possible image.
4、 Utilizing remote shutter release or self-timer for minimal camera shake
To take a picture with a tripod, there are a few key steps to follow. First, set up your tripod on a stable surface, ensuring that it is level and secure. Next, attach your camera to the tripod using the appropriate mounting plate or screw. Adjust the tripod height and position to frame your shot as desired.
One important technique to minimize camera shake is to utilize a remote shutter release or self-timer. This allows you to trigger the camera without physically touching it, reducing the risk of introducing vibrations that can blur the image. A remote shutter release is a device that connects to your camera and allows you to trigger the shutter from a distance. This is particularly useful for situations where you want to be in the frame or when shooting long exposures.
Alternatively, most cameras have a built-in self-timer function. By setting a short delay, such as 2 or 10 seconds, you can press the shutter button and step away from the camera before it takes the picture. This eliminates any potential camera shake caused by pressing the button.
In recent years, advancements in technology have introduced wireless remote shutter releases that can be controlled through smartphone apps. These apps offer additional features like intervalometer settings for time-lapse photography or bulb mode control for long exposures.
Remember to also use mirror lock-up if your camera has this feature, as it further reduces vibrations caused by the mirror movement inside the camera.
By utilizing a remote shutter release or self-timer, you can ensure minimal camera shake and capture sharp, high-quality images when using a tripod.

















There are no comments for this blog.