How To Transfer Images From Samsung Sd Mount ?
To transfer images from a Samsung SD card, you can follow these steps:
1. Insert the SD card into the SD card slot on your Samsung device or use an SD card reader to connect it to your computer.
2. On your Samsung device, go to the Gallery app or any other file manager app that allows you to access the SD card.
3. Locate the images you want to transfer and select them.
4. Tap on the share or export option, which is usually represented by a share icon or three dots.
5. Choose the method of transfer you prefer, such as Bluetooth, email, messaging apps, or cloud storage services like Google Drive or Dropbox.
6. Follow the on-screen instructions to complete the transfer process.
If you are using a computer, follow these steps:
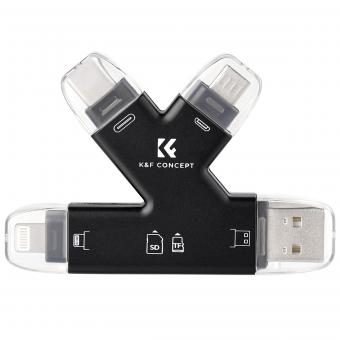
1. Connect the SD card reader to your computer's USB port.
2. Insert the SD card into the card reader.
3. Open the file explorer or any other file management software on your computer.
4. Locate the SD card in the list of connected devices or drives.
5. Open the SD card and navigate to the folder containing the images you want to transfer.
6. Select the images and copy them.
7. Open the destination folder on your computer where you want to transfer the images.
8. Paste the copied images into the destination folder.
Note: The exact steps may vary slightly depending on the specific Samsung device or computer operating system you are using.
1、 Connecting the Samsung SD card to a computer
To transfer images from a Samsung SD card to a computer, you can follow these steps:
1. Connecting the Samsung SD card to a computer: First, locate the SD card slot on your computer. If your computer doesn't have an SD card slot, you can use an external SD card reader. Insert the Samsung SD card into the appropriate slot or connect the SD card reader to your computer's USB port.
2. Accessing the SD card: Once the SD card is connected, your computer should recognize it as a removable storage device. Open the file explorer on your computer and navigate to the SD card. It is usually labeled as "Removable Disk" or with the SD card's name.
3. Transferring images: Locate the folder on the SD card where your images are stored. This could be in a "DCIM" folder or a specific folder created by your camera app. Open the folder and select the images you want to transfer. You can either drag and drop the selected images to a folder on your computer or use the copy-paste function.
4. Safely ejecting the SD card: After transferring the images, it is important to safely eject the SD card from your computer. Right-click on the SD card icon in the file explorer and select "Eject" or "Safely Remove Hardware." Wait for the notification that it is safe to remove the SD card, then physically remove it from the computer or card reader.
It is worth mentioning that the latest point of view is that some newer computers, especially laptops, may not have built-in SD card slots. In such cases, you may need to use an external SD card reader or a USB-C adapter to connect the SD card to your computer. Additionally, some Samsung devices also support wireless transfer options, such as using cloud storage or Samsung's Smart Switch app, which allows you to transfer images wirelessly between your phone and computer.
2、 Transferring images from the Samsung SD card to a computer
To transfer images from a Samsung SD card to a computer, you can follow these steps:
1. Insert the Samsung SD card into the SD card slot on your computer or use an SD card reader if your computer doesn't have a built-in slot.
2. Once the SD card is connected, your computer should recognize it as a removable storage device. Open the file explorer or Finder on your computer.
3. Navigate to the location where the SD card is mounted. It is usually labeled as "Removable Disk" or "SD Card."
4. Open the SD card folder and locate the folder containing your images. This folder might be named "DCIM" or "Pictures."
5. Select the images you want to transfer by either dragging and dropping them to a desired location on your computer or by copying and pasting them.
6. Wait for the transfer process to complete. This may take some time depending on the size and number of images being transferred.
7. Once the transfer is finished, safely eject the SD card from your computer. Right-click on the SD card icon and select "Eject" or "Safely Remove Hardware."
It's worth noting that some newer computers may not have an SD card slot, in which case you can use an external SD card reader that connects via USB. Additionally, if you prefer a wireless transfer, you can use apps or cloud storage services that allow you to upload the images from your Samsung SD card to the cloud and then download them onto your computer.
3、 Using file transfer software to move images from Samsung SD card
To transfer images from a Samsung SD card, you can use file transfer software. This method allows you to easily move your images from the SD card to your computer or another device.
First, you will need to connect your Samsung SD card to your computer using an SD card reader or by inserting it into the SD card slot if your computer has one. Once connected, your computer should recognize the SD card as a removable storage device.
Next, you will need to download and install file transfer software on your computer. There are several options available, such as Samsung Smart Switch, Android File Transfer, or third-party software like iMobie AnyTrans. Choose the software that is compatible with your computer's operating system.
Once the software is installed, open it and follow the on-screen instructions to connect your Samsung SD card. The software should detect the SD card and display its contents.
Navigate to the folder where your images are stored on the SD card. Select the images you want to transfer and choose the destination folder on your computer where you want to save them. Click on the "Transfer" or "Copy" button to initiate the transfer process.
The software will then transfer the selected images from the Samsung SD card to your computer. The time it takes will depend on the number and size of the images being transferred.
Using file transfer software provides a convenient and efficient way to move images from a Samsung SD card. It ensures that your images are safely transferred without any loss of quality. Additionally, some software may offer additional features like organizing and managing your image files.
4、 Transferring images wirelessly from Samsung SD card to another device
To transfer images wirelessly from a Samsung SD card to another device, you can follow these steps:
1. Ensure that both devices have Wi-Fi capabilities and are connected to the same network.
2. Insert the Samsung SD card into a compatible device, such as a smartphone or tablet.
3. On the device with the SD card, go to the settings and enable the "Wireless Transfer" or "Share" option. This will allow the device to share its content wirelessly.
4. On the receiving device, open the gallery or photo app and select the option to receive files wirelessly. This option may vary depending on the device and operating system.
5. The receiving device will generate a unique code or QR code. On the device with the SD card, select the images you want to transfer and choose the option to share wirelessly.
6. Scan the QR code or enter the unique code on the device with the SD card. The transfer process will begin, and the selected images will be sent wirelessly to the receiving device.
7. Once the transfer is complete, you can access the transferred images on the receiving device's gallery or photo app.
It's worth noting that the specific steps and options may vary depending on the device and operating system version. It's always recommended to refer to the device's user manual or online support resources for detailed instructions. Additionally, there are various third-party apps available on app stores that offer wireless transfer functionality, which can be explored as an alternative method.
