How To Turn Camcorder Into Webcam Windows 10 ?
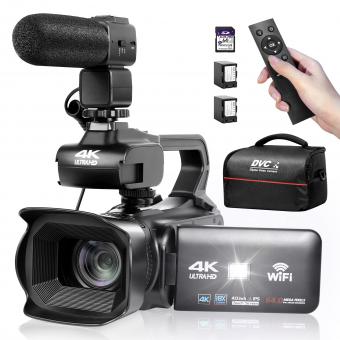
To turn a camcorder into a webcam on Windows 10, you will need to connect the camcorder to your computer using a USB cable. Once connected, you can use software such as OBS Studio or ManyCam to capture the video feed from the camcorder and use it as a webcam in video conferencing applications such as Zoom or Skype. Some camcorders may also have built-in webcam functionality that can be enabled through the device settings.
1、 Installing necessary software/drivers for camcorder
To turn your camcorder into a webcam on Windows 10, you will need to install the necessary software/drivers for your camcorder. This will allow your computer to recognize your camcorder as a webcam and use it for video conferencing, live streaming, and other applications.
The first step is to check if your camcorder is compatible with Windows 10. You can do this by visiting the manufacturer's website and checking for any available drivers or software updates. Once you have confirmed compatibility, you can proceed with the installation process.
To install the necessary software/drivers, you will need to connect your camcorder to your computer using a USB cable. Once connected, your computer should recognize the camcorder and prompt you to install the necessary drivers. Follow the on-screen instructions to complete the installation process.
If your camcorder does not come with its own software or drivers, you can use third-party software such as OBS Studio or ManyCam to turn your camcorder into a webcam. These software programs allow you to capture video from your camcorder and use it as a webcam in various applications.
In conclusion, turning your camcorder into a webcam on Windows 10 requires installing the necessary software/drivers for your camcorder. It is important to check for compatibility and follow the manufacturer's instructions to ensure a successful installation. Alternatively, you can use third-party software to achieve the same result.
2、 Connecting camcorder to computer via USB or HDMI
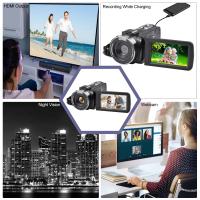
Connecting a camcorder to a computer via USB or HDMI is the most common way to turn a camcorder into a webcam on Windows 10. This method allows you to use your camcorder as a high-quality webcam for video conferencing, live streaming, or recording videos.
To connect your camcorder to your computer via USB, you will need to make sure that your camcorder has a USB output port and that your computer has a USB port. Once you have connected the camcorder to the computer, you will need to install the necessary drivers and software to use it as a webcam. Some camcorders come with their own software that allows you to use them as webcams, while others may require you to download third-party software.
If your camcorder has an HDMI output port, you can also connect it to your computer using an HDMI cable. This method provides higher quality video and audio than USB, but it requires a capture card or an HDMI-to-USB converter to connect the camcorder to the computer.
It is important to note that not all camcorders are compatible with Windows 10, so you should check the manufacturer's website to ensure that your camcorder is compatible before attempting to use it as a webcam. Additionally, some camcorders may have limited functionality when used as webcams, so you should also check the manufacturer's website for any limitations or recommended settings.
In conclusion, connecting a camcorder to a computer via USB or HDMI is the most common way to turn a camcorder into a webcam on Windows 10. However, it is important to ensure that your camcorder is compatible with Windows 10 and to check for any limitations or recommended settings before using it as a webcam.
3、 Configuring camcorder settings for use as webcam
Configuring camcorder settings for use as webcam is a great way to enhance your video conferencing experience. With the rise of remote work and virtual meetings, it's becoming increasingly important to have high-quality video and audio during online meetings. Here's how to turn your camcorder into a webcam on Windows 10:
1. Check if your camcorder is compatible with Windows 10. Most modern camcorders should work, but it's always best to check the manufacturer's website for compatibility information.
2. Connect your camcorder to your computer using a USB cable. Make sure your camcorder is turned on and set to "PC" or "webcam" mode.
3. Download and install any necessary drivers or software for your camcorder. This will vary depending on the manufacturer and model of your camcorder.
4. Open your video conferencing software (such as Zoom or Skype) and go to the settings menu. Look for the option to select your webcam and choose your camcorder from the list of available devices.
5. Adjust the settings on your camcorder to optimize the video and audio quality. This may include adjusting the focus, exposure, and microphone settings.
6. Test your camcorder to make sure everything is working properly. You should be able to see yourself on the screen and hear your audio through the computer's speakers or headphones.
It's important to note that using a camcorder as a webcam may not always provide the best quality video and audio. However, it can be a great option if you don't have a dedicated webcam or if you want to improve the quality of your video conferencing setup.
4、 Selecting camcorder as video input in video conferencing software
How to turn camcorder into webcam windows 10:
To turn your camcorder into a webcam on Windows 10, you will need a video capture device that can convert the analog signal from your camcorder into a digital signal that your computer can recognize. You can purchase a video capture device online or at your local electronics store.
Once you have the video capture device, connect your camcorder to it using the appropriate cables. Then, connect the video capture device to your computer using a USB cable. Install any necessary drivers or software that came with the video capture device.
Next, open your video conferencing software and go to the settings or preferences menu. Look for an option to select your video input device and choose the video capture device that you just connected.
Finally, test your setup by starting a video call or recording a video. Make sure that your camcorder is positioned correctly and that the audio and video quality are satisfactory.
Selecting camcorder as video input in video conferencing software:
Most video conferencing software allows you to select your preferred video input device. To select your camcorder as the video input device, go to the settings or preferences menu in the software and look for an option to choose your camera. Select your camcorder from the list of available devices.
It is important to note that not all camcorders are compatible with video conferencing software. Check the specifications of your camcorder to ensure that it can be used as a webcam. Additionally, some video conferencing software may require additional software or drivers to be installed in order to use a camcorder as the video input device.
In conclusion, turning your camcorder into a webcam on Windows 10 requires a video capture device and selecting your camcorder as the video input device in video conferencing software is typically done through the settings or preferences menu. It is important to ensure that your camcorder is compatible with video conferencing software and that any necessary software or drivers are installed.
