How To Use A Digital Voice Recorder ?
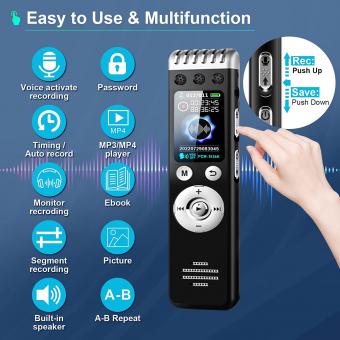
To use a digital voice recorder, first, ensure that it is charged or has fresh batteries. Then, familiarize yourself with the device's buttons and controls. To start recording, press the designated record button. To pause or stop recording, use the corresponding buttons. Some recorders may have additional features like voice activation or adjustable microphone sensitivity. To access these features, refer to the device's user manual. After recording, you can playback the audio by selecting the playback option and using the playback controls. To transfer the recorded files to a computer or other device, connect the recorder using a USB cable and follow the instructions provided by the manufacturer. Remember to save and organize your recordings for easy access and management.
1、 Powering on and off the digital voice recorder
Powering on and off a digital voice recorder is a fundamental step in using this handy device. With advancements in technology, digital voice recorders have become more user-friendly and feature-rich. Here's a step-by-step guide on how to power on and off a digital voice recorder:
1. Powering on the digital voice recorder:
- Locate the power button on the device. It is usually labeled with a power symbol or the word "Power."
- Press and hold the power button for a few seconds until the device powers on.
- Some digital voice recorders may have a separate power switch instead of a button. In that case, simply flip the switch to the "On" position.
2. Powering off the digital voice recorder:
- Locate the power button or switch again.
- Press and hold the power button for a few seconds until the device powers off.
- If your digital voice recorder has a power switch, flip it to the "Off" position.
It's worth noting that some digital voice recorders may have additional features related to powering on and off. For example, some devices may have a sleep mode that conserves battery power when the recorder is not in use for a certain period. In such cases, pressing the power button briefly may activate the device from sleep mode.
Additionally, some digital voice recorders may have an automatic power-off feature that turns off the device after a certain period of inactivity. This feature helps conserve battery life and can be adjusted in the device's settings.
Always refer to the user manual provided with your specific digital voice recorder model for detailed instructions on powering on and off, as well as any additional features it may have.

2、 Adjusting recording settings and microphone sensitivity
To use a digital voice recorder effectively, it is important to understand how to adjust recording settings and microphone sensitivity. These features allow you to optimize the quality of your recordings and ensure that you capture clear and accurate audio.
Firstly, familiarize yourself with the recording settings on your digital voice recorder. Most devices offer options such as recording format (MP3, WAV, etc.), bit rate, and sampling rate. Adjusting these settings can impact the audio quality and file size of your recordings. For instance, higher bit rates and sampling rates result in better audio quality but larger file sizes. Consider your specific needs and the available storage capacity when selecting these settings.
Additionally, many digital voice recorders allow you to adjust the microphone sensitivity. This feature determines how sensitive the microphone is to sound. Higher sensitivity settings capture more distant or softer sounds, while lower sensitivity settings focus on closer or louder sounds. Experiment with different sensitivity levels to find the optimal setting for your recording environment.
It is worth noting that some digital voice recorders now come with advanced features like noise cancellation and automatic gain control. These technologies can enhance the audio quality by reducing background noise and adjusting the microphone sensitivity automatically. If your device offers these features, explore the user manual or settings menu to enable and customize them.
In conclusion, adjusting recording settings and microphone sensitivity is crucial for maximizing the performance of your digital voice recorder. By understanding and utilizing these features effectively, you can ensure that your recordings are clear, accurate, and tailored to your specific needs.
3、 Initiating and stopping a recording session
To initiate and stop a recording session using a digital voice recorder, follow these steps:
1. Power on the device: Locate the power button on your digital voice recorder and press it to turn on the device. Some recorders may have a separate power button, while others may require you to slide a switch or hold down a specific button combination.
2. Select the recording mode: Most digital voice recorders offer different recording modes, such as high-quality, standard, or long-play. Choose the mode that suits your needs by navigating through the device's menu using the buttons or touchscreen.
3. Adjust recording settings: Depending on your recorder, you may have options to adjust settings like microphone sensitivity, recording format (MP3, WAV, etc.), or recording quality. Explore the menu or consult the user manual to make any necessary adjustments.
4. Start recording: Once you have selected the desired settings, locate the record button on your device. Press it to begin recording. Some recorders may have a dedicated button, while others may require you to navigate through the menu to find the record option.
5. Stop recording: To stop the recording, locate the stop button on your device and press it. This will end the recording session and save the file on your device.
It's worth noting that the latest digital voice recorders often come with additional features such as voice activation, which automatically starts and stops recording based on sound levels. This can be useful for hands-free operation and conserving storage space. Additionally, many recorders now offer USB connectivity or wireless options for easy file transfer to a computer or other devices.
Remember to consult the user manual specific to your digital voice recorder model for detailed instructions and to explore any additional features it may offer.
4、 Managing and organizing recorded files
Managing and organizing recorded files is an essential aspect of using a digital voice recorder effectively. With the advancements in technology, digital voice recorders have become more user-friendly and offer various features to help users efficiently manage their recordings.
To begin with, it is important to familiarize yourself with the basic functions of your digital voice recorder. This includes understanding how to start and stop recordings, adjust volume levels, and navigate through the device's menu options. Most recorders also allow you to create folders or categories to organize your recordings, making it easier to locate specific files later on.
When it comes to managing recorded files, it is advisable to create a systematic naming convention. This can involve using a combination of date, time, and a brief description of the recording. By doing so, you can quickly identify and retrieve specific recordings when needed.
Additionally, many digital voice recorders now offer the option to add tags or labels to recordings. This feature allows you to assign keywords or categories to your files, making it even easier to search and sort through your recordings. Some recorders even have voice recognition capabilities, enabling you to search for specific words or phrases within your recordings.
Furthermore, it is important to regularly transfer your recorded files to a computer or other storage devices. This not only frees up space on your recorder but also provides a backup in case of any device malfunctions or data loss. Once transferred, you can further organize your recordings on your computer by creating folders or using software applications designed for managing audio files.
In conclusion, managing and organizing recorded files is crucial for effectively using a digital voice recorder. By understanding the basic functions, creating a systematic naming convention, utilizing tags or labels, and regularly transferring files to a computer, you can ensure easy access and efficient management of your recordings.








There are no comments for this blog.