How To Use A Gimbal For Dslr ?
To use a gimbal for a DSLR, first, ensure that your gimbal is compatible with your camera's weight and size. Next, mount your DSLR securely onto the gimbal, making sure it is balanced properly. Power on the gimbal and calibrate it according to the manufacturer's instructions. Once calibrated, hold the gimbal with both hands and keep it steady. Use the joystick or controls on the gimbal to adjust the camera's position and movement. Practice smooth and controlled movements to achieve stable and professional-looking footage. Experiment with different shooting modes and settings on the gimbal to achieve desired effects. Remember to follow safety guidelines and handle the gimbal with care to avoid any damage to your camera or the gimbal itself.
1、 Balancing the gimbal for optimal stabilization
Balancing the gimbal for optimal stabilization is crucial when using a gimbal for a DSLR camera. A gimbal is a device that helps stabilize the camera and reduce shaky footage, resulting in smooth and professional-looking videos. Here's a step-by-step guide on how to use a gimbal for a DSLR:
1. Mount the camera: Start by mounting your DSLR camera securely onto the gimbal. Make sure it is properly attached and balanced.
2. Adjust the balance: Most gimbals have adjustable arms or plates to help balance the camera. Begin by loosening the knobs or screws and adjusting the arms until the camera is level. Ensure that the camera is not tilting forward, backward, or to the sides.
3. Fine-tune the balance: Once the camera is roughly balanced, use the gimbal's fine-tuning knobs or screws to make precise adjustments. This step is crucial for optimal stabilization. Take your time to ensure the camera is perfectly balanced.
4. Power on the gimbal: Turn on the gimbal and wait for it to initialize. Some gimbals may require calibration or balancing checks during startup. Follow the manufacturer's instructions for this step.
5. Hold the gimbal correctly: Hold the gimbal with both hands, one hand on the handle and the other supporting the bottom. Keep your movements smooth and steady to allow the gimbal to do its job effectively.
6. Practice and experiment: Familiarize yourself with the gimbal's controls and settings. Experiment with different shooting modes, such as follow mode, lock mode, or pan mode, to achieve the desired shots.
The latest point of view on using a gimbal for a DSLR is that it has become an essential tool for videographers and content creators. With advancements in technology, gimbals have become more compact, lightweight, and user-friendly. They offer improved stabilization and allow for creative camera movements, such as panning, tilting, and tracking shots. Additionally, many gimbals now come with smartphone apps that provide additional features and customization options.
Overall, using a gimbal for a DSLR camera can greatly enhance the quality of your videos by providing smooth and stable footage. By following the steps mentioned above and practicing with your gimbal, you can achieve professional-looking results and take your videography skills to the next level.
2、 Adjusting the gimbal settings for different shooting scenarios
Using a gimbal for a DSLR can greatly enhance the stability and smoothness of your footage. Here's a step-by-step guide on how to use a gimbal for a DSLR:
1. Mount your DSLR: Start by mounting your DSLR securely onto the gimbal. Make sure it is balanced properly to ensure smooth operation.
2. Power on the gimbal: Turn on the gimbal and ensure it is properly calibrated. Follow the manufacturer's instructions for calibration if needed.
3. Adjust the gimbal settings: Most gimbals come with various settings that can be adjusted to suit different shooting scenarios. These settings include motor strength, follow mode, and joystick sensitivity. Experiment with these settings to find the right balance for your specific needs.
4. Hold the gimbal correctly: Hold the gimbal with both hands, one hand on the handle and the other supporting the bottom. Keep your movements smooth and steady to avoid jerky footage.
5. Practice different shooting techniques: Experiment with different shooting techniques such as panning, tilting, and tracking shots. The gimbal allows you to achieve professional-looking shots with ease.
6. Use additional accessories: Consider using additional accessories like an external monitor or a wireless remote control to further enhance your shooting experience.
It's important to note that technology is constantly evolving, and new features and advancements are being introduced to gimbals regularly. Therefore, it's always a good idea to stay updated with the latest information and firmware updates from the manufacturer to make the most out of your gimbal.
3、 Properly mounting the DSLR onto the gimbal
Properly mounting the DSLR onto a gimbal is crucial to ensure smooth and stable footage. Here's a step-by-step guide on how to use a gimbal for a DSLR:
1. Choose the right gimbal: There are various gimbals available in the market, so make sure to select one that is compatible with your DSLR's weight and size.
2. Balance the gimbal: Before mounting your DSLR, it's essential to balance the gimbal properly. Start by adjusting the roll axis, followed by the pitch and yaw axes. This will ensure that the gimbal can stabilize your camera effectively.
3. Attach the camera plate: Most gimbals come with a quick-release plate. Attach it securely to the bottom of your DSLR using the provided screws. Make sure it is tightened properly to avoid any wobbling.
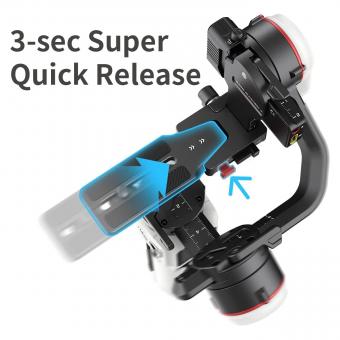
4. Mount the DSLR: Slide the camera plate onto the gimbal's mounting bracket and lock it in place. Ensure that the camera is centered and balanced on the gimbal.
5. Connect the cables: Depending on your gimbal model, you may need to connect cables from the gimbal to your DSLR. These cables allow you to control the camera's functions, such as focus and shutter, directly from the gimbal handle.
6. Power on the gimbal: Turn on the gimbal and wait for it to initialize. Some gimbals require calibration, so follow the manufacturer's instructions to complete this process.
7. Test the stabilization: Once the gimbal is powered on, gently move it around to check if the DSLR stays stable. Adjust the gimbal's settings if necessary to achieve the desired level of stabilization.
It's important to note that technology is constantly evolving, and new features and advancements are being introduced in gimbals regularly. Therefore, it's recommended to refer to the user manual or online tutorials specific to your gimbal model for the latest instructions and tips on using a gimbal for a DSLR.
4、 Mastering smooth camera movements with the gimbal
Mastering smooth camera movements with a gimbal has become an essential skill for videographers and filmmakers. A gimbal is a handheld stabilizer that helps eliminate shaky footage and allows for fluid camera movements. Here's a step-by-step guide on how to use a gimbal for a DSLR:
1. Balance the gimbal: Start by adjusting the gimbal's balance to ensure stability. Mount your DSLR on the gimbal and adjust the sliding plate until the camera is perfectly balanced. This step is crucial for smooth operation.
2. Power on and calibrate: Turn on the gimbal and let it initialize. Some gimbals require calibration, so follow the manufacturer's instructions to ensure accurate stabilization.
3. Hold the gimbal correctly: Grip the gimbal with both hands, one hand on the handle and the other supporting the bottom. Keep your movements smooth and steady, avoiding sudden jerks or shakes.
4. Practice basic movements: Begin with simple movements like panning (horizontal movement), tilting (vertical movement), and rolling (side-to-side movement). Experiment with different speeds and angles to achieve the desired effect.
5. Utilize follow modes: Most gimbals offer various follow modes, such as follow pan, follow tilt, and follow roll. These modes allow the gimbal to mimic your movements, resulting in seamless camera tracking.
6. Explore advanced techniques: Once you've mastered the basics, try more advanced techniques like walking or running shots, low-angle or high-angle shots, and even creative movements like orbiting around a subject.
7. Experiment with different lenses: Different lenses can create unique visual effects when used with a gimbal. Wide-angle lenses are great for capturing expansive shots, while telephoto lenses can create a more cinematic look.
Remember, practice is key to mastering the gimbal. Experiment with different settings, movements, and techniques to develop your own style. Stay updated with the latest tutorials and tips from professionals to enhance your skills and keep up with the ever-evolving world of gimbal technology.










There are no comments for this blog.