How To Use A Microscope Easy Steps ?
Using a microscope involves the following easy steps:
1. Place the microscope on a stable surface and ensure it is clean and free from dust.
2. Turn on the microscope's light source and adjust the intensity as needed.
3. Place the specimen on the stage and secure it using the stage clips or slide holder.
4. Start with the lowest magnification objective lens and slowly turn the coarse focus knob to bring the specimen into rough focus.
5. Fine-tune the focus using the fine focus knob until the image appears clear and sharp.
6. If available, adjust the condenser to control the amount of light passing through the specimen.
7. Rotate the nosepiece to switch to higher magnification objective lenses, refocusing as necessary.
8. Use the stage controls to move the specimen horizontally or vertically to explore different areas.
9. Observe and analyze the specimen, making note of any interesting features or structures.
10. When finished, turn off the light source, remove the specimen, and clean the microscope before storing it properly.
1、 Setting up the microscope
Setting up a microscope can seem daunting at first, but with a few easy steps, you'll be able to use it effectively. Here's a guide on how to set up a microscope:
1. Choose a suitable location: Find a clean, well-lit area to set up your microscope. Ensure there is enough space for the microscope and your sample.
2. Clean the lenses: Use a lens cleaning solution and a soft, lint-free cloth to clean the objective lenses and eyepieces. This will ensure clear and accurate observations.
3. Adjust the eyepieces: Adjust the eyepieces to your eye level by rotating them. This will provide a comfortable viewing experience.
4. Place the slide: Place your prepared slide on the stage, ensuring the sample is centered. Use the stage clips to secure the slide in place.
5. Adjust the focus: Start with the lowest magnification objective lens. Use the coarse focus knob to bring the sample into rough focus. Then, use the fine focus knob to achieve a clear image.
6. Change magnification: To increase magnification, rotate the nosepiece to switch to a higher power objective lens. Refocus using the fine focus knob.
7. Observe and record: Look through the eyepieces and observe the sample. Take notes or capture images if necessary.
8. Clean up: After use, remove the slide, clean the lenses again, and store the microscope in a safe place.
It's important to note that different microscopes may have slight variations in setup procedures. Always refer to the manufacturer's instructions for specific details.
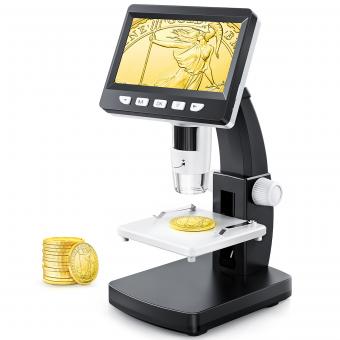
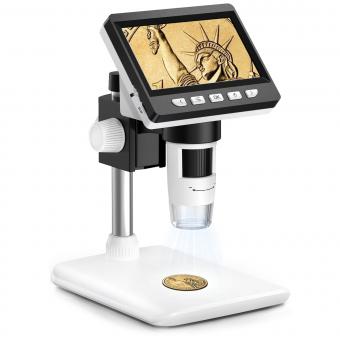
In recent years, advancements in microscope technology have led to the development of digital microscopes. These microscopes have built-in cameras and allow for easy image capture and analysis. Additionally, some microscopes now offer features like LED illumination, which provides brighter and more energy-efficient lighting. These advancements have made microscopy more accessible and user-friendly for both professionals and hobbyists alike.
2、 Adjusting the focus and magnification
Using a microscope may seem daunting at first, but with a few easy steps, you can quickly become proficient in adjusting the focus and magnification. Here's a guide to help you get started:
1. Familiarize yourself with the microscope: Before using the microscope, take a moment to understand its different parts. This includes the eyepiece, objective lenses, stage, and focus knobs. Knowing these components will make it easier to navigate the microscope.
2. Prepare your slide: Place your specimen on a glass slide and cover it with a coverslip. Ensure that the slide is clean and free from any debris or fingerprints that may obstruct your view.
3. Start with the lowest magnification: Begin by using the lowest magnification objective lens (usually 4x or 10x). This will provide a wider field of view, making it easier to locate your specimen.
4. Adjust the stage height: Use the coarse focus knob to lower the stage until the objective lens is close to the slide. Be cautious not to let the lens touch the slide, as this can damage both the lens and the specimen.
5. Rough focus: Look through the eyepiece and use the coarse focus knob to bring the specimen into view. Move the focus knob in the appropriate direction until the image becomes clearer.
6. Fine focus: Once the specimen is roughly in focus, use the fine focus knob to sharpen the image. This will help you achieve a clearer and more detailed view.
7. Adjust the magnification: If you need to increase the magnification, rotate the nosepiece to switch to a higher power objective lens. Repeat the focusing process using the coarse and fine focus knobs.
8. Take breaks: It's important to give your eyes regular breaks when using a microscope for extended periods. Staring through the eyepiece for too long can cause eye strain and fatigue.
Remember, practice makes perfect. As you become more comfortable using a microscope, you'll develop a better understanding of how to adjust the focus and magnification to suit your needs.
3、 Preparing the specimen for observation
Preparing the specimen for observation is an essential step in using a microscope. By properly preparing the specimen, you can ensure clear and accurate observations. Here are some easy steps to follow:
1. Obtain the specimen: Choose the specimen you want to observe under the microscope. It can be a small organism, a thin slice of tissue, or a cell culture.
2. Fixation: If the specimen is living, it needs to be fixed to preserve its structure. This can be done by using chemicals like formaldehyde or by freezing the specimen.
3. Sectioning: In some cases, the specimen may need to be sectioned to obtain a thin slice for observation. This is commonly done with tissues or larger organisms. Specialized tools like microtomes can be used for this purpose.
4. Staining: Staining the specimen can enhance its visibility under the microscope. Different stains are used for different purposes, such as highlighting specific structures or differentiating between cell types.
5. Mounting: Place the specimen on a microscope slide and add a mounting medium, such as a drop of water or a specialized mounting solution. This helps to keep the specimen in place and prevents it from drying out.
6. Cover slip: Gently place a cover slip over the specimen to protect it and prevent any damage during observation. Be careful to avoid air bubbles, as they can interfere with the clarity of the image.
7. Cleaning: Before placing the slide on the microscope stage, ensure that both the slide and the microscope lens are clean. Use lens paper or a soft cloth to remove any dust or smudges.
It is important to note that the specific steps may vary depending on the type of specimen and the purpose of observation. Always refer to the instructions provided with your microscope and consult relevant scientific literature for the most up-to-date techniques and protocols.
4、 Placing the specimen on the microscope stage
Placing the specimen on the microscope stage is an essential step in using a microscope effectively. Here are some easy steps to follow:
1. Prepare the specimen: Start by preparing the specimen you want to observe under the microscope. This could be a thin slice of a plant or animal tissue, a drop of liquid, or a small organism. Ensure that the specimen is clean and properly mounted on a slide if necessary.
2. Turn on the microscope: Before placing the specimen, turn on the microscope and adjust the light intensity to a comfortable level. This will provide adequate illumination for observing the specimen.
3. Lower the stage: Lower the microscope stage to its lowest position using the coarse adjustment knob. This will create enough space to place the slide with the specimen.
4. Place the slide: Carefully place the slide on the stage, ensuring that the specimen is positioned directly above the light source. Use the stage clips to secure the slide in place, preventing any movement during observation.
5. Center the specimen: Use the stage controls to move the slide until the specimen is centered in the field of view. This can be done by adjusting the stage position using the stage control knobs.
6. Focus the microscope: Begin with the lowest magnification objective lens and use the coarse adjustment knob to bring the specimen into rough focus. Then, use the fine adjustment knob to achieve a clear and sharp image.
7. Adjust the magnification: If necessary, switch to higher magnification objective lenses to observe the specimen in more detail. Remember to refocus the microscope each time you change the magnification.
From a latest point of view, it is worth mentioning that digital microscopes are becoming increasingly popular. These microscopes have a built-in camera that allows you to view the specimen on a computer screen or capture images and videos. The process of placing the specimen on the microscope stage remains the same, but the observation can be done more conveniently using digital technology. Additionally, some microscopes now have automated stage controls, making it easier to move the slide and center the specimen. These advancements in microscope technology have made the process of using a microscope more user-friendly and accessible to a wider range of users.
