How To Use A Microscope Simple ?
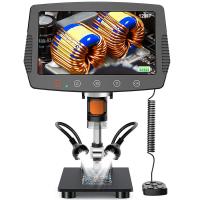
To use a microscope, first, place the slide or specimen on the stage of the microscope. Adjust the stage height and position the specimen under the objective lens. Start with the lowest magnification objective lens and use the coarse focus knob to bring the specimen into rough focus. Then, use the fine focus knob to bring the specimen into sharp focus. Adjust the condenser and diaphragm to control the amount of light passing through the specimen. Finally, look through the eyepiece and use the focus knobs to achieve a clear image. Move to higher magnification objective lenses if desired, making sure to refocus each time.
1、 Microscope Parts and Functions
A microscope is a powerful tool used to magnify and observe small objects that are not visible to the naked eye. Understanding the different parts and functions of a microscope is essential for proper usage. Here is a simple guide on how to use a microscope and its various components.
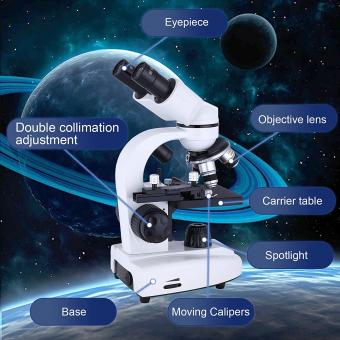
1. Eyepiece: The eyepiece, also known as the ocular lens, is the part you look through to view the specimen. It typically magnifies the image by 10x.
2. Objective lenses: Microscopes have multiple objective lenses with different magnification powers, such as 4x, 10x, 40x, and 100x. To change the magnification, rotate the nosepiece to select the desired objective lens.
3. Stage: The stage is where you place the specimen for observation. It usually has clips or a mechanical stage to hold the slide in place.
4. Coarse and fine focus knobs: The coarse focus knob is used to bring the specimen into rough focus, while the fine focus knob is used for fine-tuning the focus.
5. Condenser: The condenser is located beneath the stage and helps focus the light onto the specimen. Adjusting the condenser can improve the clarity and contrast of the image.
6. Light source: Most microscopes have a built-in light source, usually an LED or halogen lamp, to illuminate the specimen. Adjust the intensity of the light to achieve optimal visibility.
To use a microscope, start by placing the specimen on the stage and securing it with the clips or mechanical stage. Adjust the objective lens to the lowest magnification (usually 4x) and use the coarse focus knob to bring the specimen into rough focus. Then, use the fine focus knob to sharpen the image. If the image is too dim, adjust the condenser or light intensity. Once you have a clear image, you can switch to higher magnifications by rotating the nosepiece and refocusing as needed.
It is important to handle the microscope with care, avoiding any sudden movements or rough adjustments that could damage the delicate components. Additionally, keep the lenses clean and store the microscope in a dust-free environment when not in use.
In recent years, advancements in microscopy technology have led to the development of more sophisticated microscopes, such as confocal and electron microscopes. These instruments offer higher resolution and imaging capabilities, allowing scientists to explore the microscopic world in greater detail. However, the basic principles of using a microscope remain the same, regardless of the type or complexity of the instrument.
In conclusion, understanding the parts and functions of a microscope is crucial for proper usage. By following the simple steps outlined above, you can effectively use a microscope to observe and study a wide range of specimens.

2、 Microscope Setup and Calibration
Microscope Setup and Calibration
Setting up and calibrating a microscope is essential to ensure accurate and reliable observations. Here is a simple guide on how to use a microscope:
1. Place the microscope on a stable surface: Start by placing the microscope on a flat and stable surface to prevent any vibrations or movement during use.
2. Adjust the lighting: Most microscopes have a built-in light source or an illuminator. Adjust the lighting to the desired intensity using the controls provided. Proper lighting is crucial for clear and detailed observations.
3. Select the appropriate objective lens: Microscopes typically have multiple objective lenses with different magnification powers. Start with the lowest magnification lens and gradually increase as needed.
4. Prepare the specimen: Place the specimen on a glass slide and cover it with a coverslip. Ensure that the specimen is properly mounted and secured to prevent any movement during observation.
5. Focus the microscope: Use the coarse adjustment knob to bring the specimen into rough focus. Then, use the fine adjustment knob to achieve a clear and sharp image. Adjust the focus until the desired level of detail is achieved.
6. Observe and record: Once the specimen is in focus, observe it carefully. Take note of any interesting features or structures. If needed, use the microscope's stage controls to move the specimen and explore different areas.
7. Clean and store the microscope: After use, clean the lenses and stage with a lens cleaning solution and a soft cloth. Store the microscope in a clean and dust-free environment to prevent damage.
It is important to note that different microscopes may have specific setup and calibration procedures, so it is always advisable to consult the manufacturer's instructions for the specific model being used.
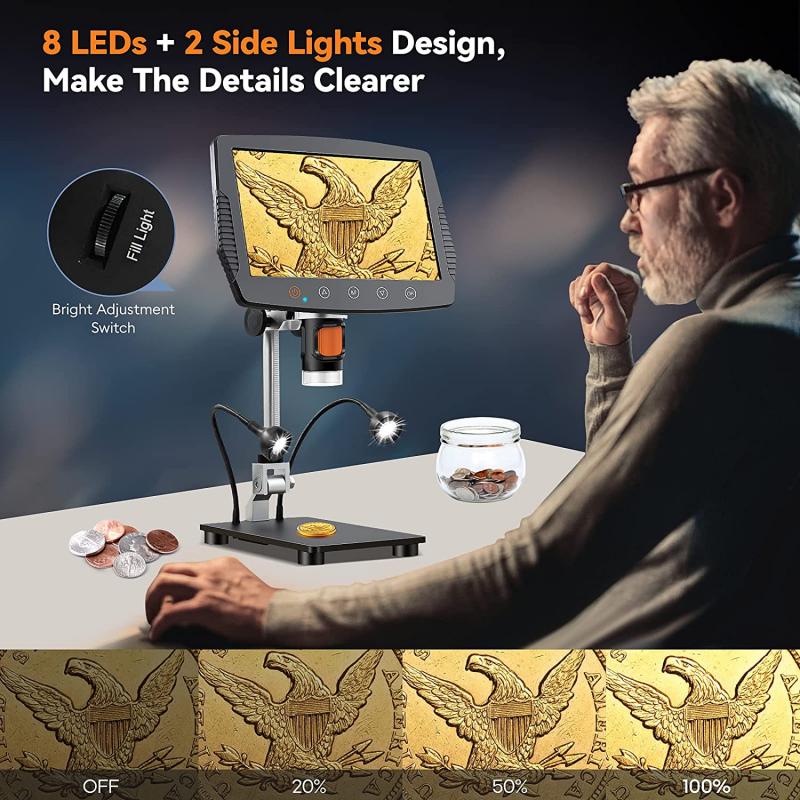
In recent years, advancements in microscope technology have led to the development of digital microscopes. These microscopes incorporate digital imaging capabilities, allowing users to capture and analyze images directly on a computer. Additionally, some microscopes now offer automated focusing and image stitching features, making the process even more efficient and user-friendly.
Overall, setting up and calibrating a microscope is a straightforward process that requires attention to detail and proper handling. By following these simple steps, users can ensure accurate and reliable observations for a wide range of applications, including scientific research, medical diagnostics, and educational purposes.

3、 Sample Preparation for Microscopy
Sample Preparation for Microscopy
Sample preparation is a crucial step in using a microscope effectively. It involves preparing the sample in a way that allows for clear and accurate observation under the microscope. Here is a simple guide on how to prepare samples for microscopy:
1. Collect the sample: Depending on the type of sample you are studying, collect it using appropriate techniques. For example, if you are studying a biological sample, use a sterile technique to collect it.
2. Fixation: Fixation is the process of preserving the sample's structure and preventing decay. It involves treating the sample with a fixative solution, such as formaldehyde or glutaraldehyde. This step is particularly important for biological samples.
3. Dehydration: Dehydration removes water from the sample, allowing it to be embedded in a solid medium. This is typically done by gradually replacing water with alcohol or acetone through a series of increasing concentrations.
4. Embedding: Embedding involves placing the dehydrated sample in a solid medium, such as paraffin wax or resin. This provides support and allows for thin sectioning of the sample.
5. Sectioning: Thin sectioning is the process of cutting the embedded sample into thin slices using a microtome. These slices are then mounted onto glass slides for observation.
6. Staining: Staining is often used to enhance contrast and highlight specific structures within the sample. Different stains are used depending on the type of sample and the structures of interest.
7. Mounting: Once the sample is stained and dried, it is mounted onto a glass slide using a mounting medium, such as a coverslip and mounting media. This protects the sample and allows for easy observation under the microscope.
It is important to note that sample preparation techniques may vary depending on the type of sample and the specific microscopy technique being used. It is always recommended to consult relevant literature or seek guidance from experts in the field for specific sample preparation protocols.
In recent years, there have been advancements in sample preparation techniques, such as the development of new fixatives and embedding materials. Additionally, techniques like cryo-electron microscopy have gained popularity, allowing for the observation of samples in their native, hydrated state without the need for fixation and embedding.
Overall, proper sample preparation is essential for obtaining high-quality microscopy images and accurate interpretation of the observed structures.
4、 Adjusting Magnification and Focus
How to Use a Microscope: Adjusting Magnification and Focus
Using a microscope may seem daunting at first, but with a little practice, it becomes a simple and fascinating tool for exploring the microscopic world. One of the most important aspects of using a microscope is adjusting the magnification and focus to obtain clear and detailed images.
To begin, place the specimen on the stage of the microscope and secure it with the stage clips. Start with the lowest magnification objective lens (usually 4x or 10x) and position it over the specimen. Look through the eyepiece and use the coarse adjustment knob to bring the specimen into rough focus. This knob moves the stage up and down, allowing you to adjust the distance between the objective lens and the specimen.
Once the specimen is roughly in focus, use the fine adjustment knob to fine-tune the focus. This knob moves the stage in smaller increments, allowing for precise focusing. Slowly turn the knob until the image becomes clear and sharp. It is important to make small adjustments to avoid overshooting the focus point.
After achieving the desired focus, you can increase the magnification by rotating the nosepiece to switch to a higher power objective lens. Repeat the focusing process using the coarse and fine adjustment knobs to obtain a clear image at the new magnification.
It is worth noting that some microscopes now come with digital features, such as built-in cameras or the ability to connect to a computer. These advancements allow for easier image capture and analysis, enhancing the overall microscopy experience.
In conclusion, using a microscope is a simple process that involves adjusting the magnification and focus. With practice, you can explore the intricate details of the microscopic world and gain a deeper understanding of the objects and organisms that surround us.


