How To Use A Polarizing Filter Camera ?
To use a polarizing filter on a camera, follow these steps:
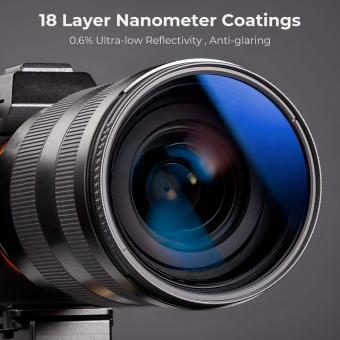
1. Attach the filter: Screw the polarizing filter onto the front of your camera lens. Make sure it is securely attached.
2. Adjust the orientation: Rotate the filter to achieve the desired effect. Polarizing filters have a front and back side, so you need to align it correctly. Look through the viewfinder or LCD screen and rotate the filter until you see the desired level of polarization.
3. Observe the effect: Polarizing filters help reduce glare and reflections, enhance colors, and improve contrast. They are particularly useful when shooting landscapes, water bodies, or any scene with reflective surfaces.
4. Experiment with angles: The effect of a polarizing filter varies depending on the angle of the light source. Rotate the filter to experiment with different angles and observe the changes in the image.
5. Adjust exposure settings: Polarizing filters can reduce the amount of light entering the camera, so you may need to adjust your exposure settings accordingly. Increase the exposure time, open up the aperture, or raise the ISO to compensate for the light loss.
Remember to remove the polarizing filter when not needed, as it can reduce the amount of light reaching the sensor and potentially affect the overall image quality.
1、 Understanding Polarizing Filters: Types and Functions in Photography
Understanding Polarizing Filters: Types and Functions in Photography
A polarizing filter is a valuable tool for photographers looking to enhance their images by reducing glare and improving color saturation. It is commonly used in landscape, nature, and outdoor photography to capture vibrant and captivating scenes. Here is a guide on how to use a polarizing filter with your camera.
1. Choose the right type of polarizing filter: There are two main types of polarizing filters - linear and circular. Circular polarizing filters are the most commonly used in modern cameras as they work effectively with autofocus and metering systems.
2. Attach the filter to your camera lens: Screw the filter onto the front of your lens, ensuring it is securely attached. Make sure the filter size matches the lens diameter.
3. Adjust the filter's orientation: Once the filter is attached, rotate it to achieve the desired effect. Polarizing filters work by blocking certain light waves, so rotating the filter allows you to control the amount of polarization. Experiment with different angles to find the best effect for your shot.
4. Observe the changes through the viewfinder: Look through the camera's viewfinder or use the live view mode to see the impact of the polarizing filter in real-time. You will notice a reduction in reflections and glare, resulting in richer colors and increased contrast.
5. Fine-tune the settings: Depending on the scene and lighting conditions, you may need to adjust your camera's exposure settings. Polarizing filters can reduce the amount of light entering the lens, so you may need to compensate by increasing the exposure or using a slower shutter speed.
6. Experiment and practice: Polarizing filters can produce different effects depending on the angle of the light source and the position of the camera. Take the time to experiment with different settings and angles to achieve the desired outcome.
In conclusion, using a polarizing filter with your camera can significantly enhance your photographs by reducing glare and improving color saturation. By following these steps and experimenting with different settings, you can capture stunning and vibrant images that truly stand out.
2、 Step-by-Step Guide: Attaching a Polarizing Filter to Your Camera
Step-by-Step Guide: Attaching a Polarizing Filter to Your Camera
A polarizing filter is a valuable tool for photographers as it helps reduce glare and reflections, enhance colors, and improve overall image quality. Here's a step-by-step guide on how to use a polarizing filter with your camera:
1. Choose the right filter size: Determine the filter size that fits your camera lens. This information can usually be found on the front of the lens or in the camera's manual.
2. Purchase a high-quality polarizing filter: Invest in a reputable brand to ensure optimal performance and durability.
3. Prepare your camera: Turn off your camera and remove any lens caps or filters currently attached.
4. Align the filter: Hold the polarizing filter up to your camera lens and align the threads. Carefully screw the filter onto the lens in a clockwise direction until it is securely attached.
5. Adjust the filter orientation: Once the filter is attached, rotate it to achieve the desired effect. Rotating the filter will adjust the amount of polarization applied to the scene. Experiment with different angles to find the best result.
6. Observe the effect: Look through the camera's viewfinder or LCD screen and observe the changes in the image. A polarizing filter can reduce reflections on water or glass surfaces, deepen the blue sky, and enhance the colors of foliage.
7. Fine-tune the settings: Depending on the lighting conditions and desired effect, you may need to adjust your camera's exposure settings, such as aperture or shutter speed, to compensate for the filter's light reduction.
8. Capture your shot: Once you are satisfied with the filter's effect and camera settings, press the shutter button to capture your image.
Remember, practice makes perfect. Experiment with different scenes and lighting conditions to fully understand the capabilities of your polarizing filter. Additionally, be cautious when using a polarizing filter with wide-angle lenses, as it may cause uneven polarization across the frame.
3、 Adjusting Polarizing Filter Orientation for Desired Effect in Photos
Adjusting Polarizing Filter Orientation for Desired Effect in Photos
Using a polarizing filter with your camera can greatly enhance the quality of your photographs, especially when shooting outdoors. This filter helps to reduce glare and reflections, deepen colors, and improve overall image clarity. However, to achieve the desired effect, it is crucial to understand how to properly use and adjust the polarizing filter orientation.
Firstly, attach the polarizing filter to your camera lens. It is important to note that polarizing filters come in different sizes, so ensure you have the correct size for your lens. Once attached, rotate the filter to adjust its orientation. The effect of the filter varies depending on the angle at which it is rotated.
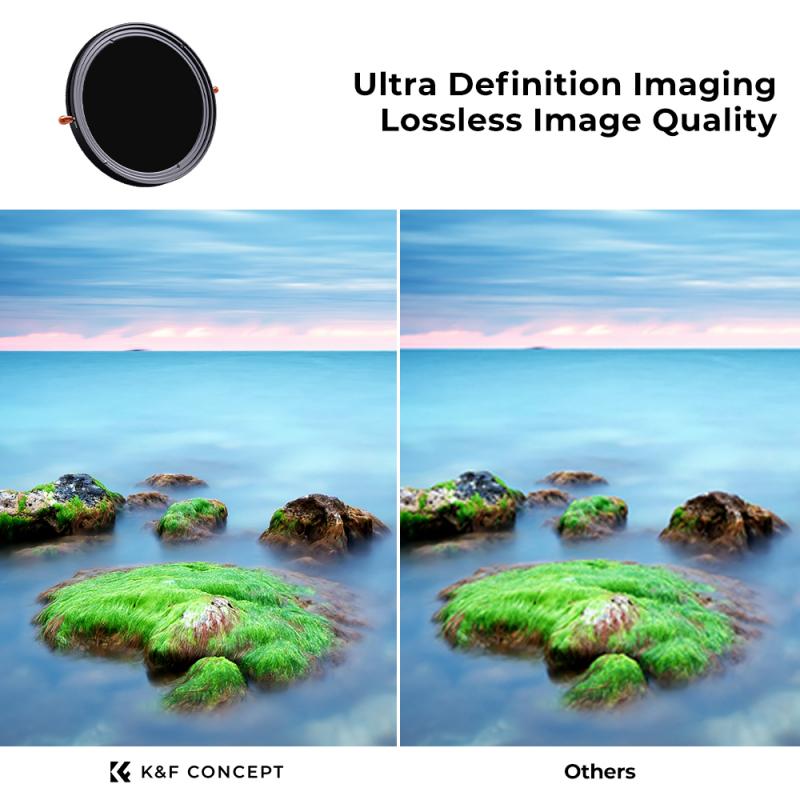
To reduce glare and reflections, rotate the filter until it is perpendicular to the light source. This is particularly useful when photographing water surfaces, glass windows, or shiny objects. By eliminating unwanted reflections, you can capture clearer and more vibrant images.
To deepen colors and enhance contrast, rotate the filter at a 45-degree angle from the light source. This helps to saturate colors and make them appear more vibrant. This technique is especially effective when photographing landscapes, foliage, or skies.
It is important to note that the effectiveness of the polarizing filter can vary depending on the angle of the light source and the position of the subject. Therefore, it is recommended to experiment with different filter orientations to achieve the desired effect.
In recent years, advancements in camera technology have led to the development of circular polarizing filters. These filters are designed to work seamlessly with autofocus and metering systems, making them more user-friendly and convenient.
In conclusion, using a polarizing filter can significantly improve the quality of your photographs. By adjusting the filter's orientation, you can reduce glare, deepen colors, and enhance overall image clarity. Experimenting with different angles and positions will help you achieve the desired effect and capture stunning, professional-looking photos.
4、 Enhancing Color Saturation and Contrast with a Polarizing Filter
A polarizing filter is a valuable tool for photographers looking to enhance color saturation and contrast in their images. To use a polarizing filter with a camera, follow these steps:
1. Attach the filter: Screw the polarizing filter onto the front of your camera lens. Make sure it is securely attached and aligned properly.
2. Adjust the angle: Rotate the filter to achieve the desired effect. The filter works by blocking certain light waves, so rotating it will change the amount of polarization. Experiment with different angles to see the impact on your image.
3. Observe through the viewfinder: Look through the camera's viewfinder or use the live view function to see the effect of the polarizing filter in real-time. You will notice changes in color saturation and contrast as you adjust the angle.
4. Fine-tune the effect: Once you have found the desired angle, take test shots and review them on your camera's LCD screen. Make any necessary adjustments to achieve the desired level of color saturation and contrast.
Using a polarizing filter can significantly enhance the colors in your images, especially when shooting landscapes, water scenes, or skies. It can reduce glare and reflections, making colors appear more vibrant and saturated. Additionally, the filter can darken the sky, making clouds stand out more prominently.
It is important to note that the effectiveness of a polarizing filter can vary depending on the lighting conditions and the angle of the sun. The filter works best when the sun is at a 90-degree angle to the subject. Shooting with the sun behind or in front of you may yield less noticeable results.
In conclusion, using a polarizing filter with your camera can greatly enhance color saturation and contrast in your images. Experiment with different angles and lighting conditions to achieve the desired effect. Keep in mind that the filter's effectiveness may vary, so it's important to review your images and make adjustments accordingly.
