How To Use A Polarizing Filter For Portraits ?
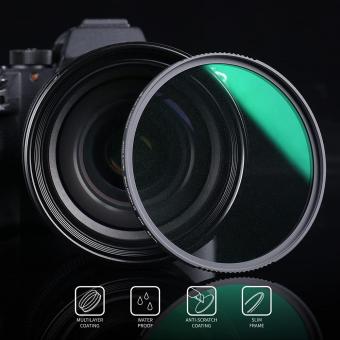
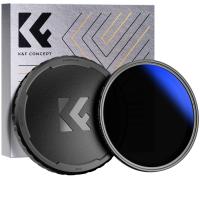
To use a polarizing filter for portraits, attach the filter to your camera lens by screwing it on. Rotate the filter until you achieve the desired effect. The polarizing filter helps reduce glare and reflections, making colors appear more saturated and vibrant. It also helps to enhance contrast and improve overall image quality. Experiment with different angles and positions of the filter to achieve the desired effect on your portraits.
1、 Understanding the purpose of a polarizing filter in photography
Understanding the purpose of a polarizing filter in photography is essential for capturing stunning portraits. A polarizing filter is a versatile tool that can enhance the quality of your images by reducing glare, increasing color saturation, and improving overall image clarity.
To use a polarizing filter for portraits, follow these steps:
1. Attach the filter: Screw the polarizing filter onto the front of your camera lens. Ensure it is securely attached and aligned correctly.
2. Adjust the angle: Rotate the filter to achieve the desired effect. The filter works by blocking certain light waves, so rotating it allows you to control the amount of polarization.
3. Reduce glare: When shooting portraits outdoors, a polarizing filter can help reduce glare from reflective surfaces such as water or glass. Rotate the filter until the glare is minimized, resulting in a clearer image.
4. Enhance colors: By reducing scattered light, a polarizing filter can intensify colors, making them appear more vibrant and saturated. This is particularly useful when photographing landscapes or portraits with colorful elements.
5. Increase contrast: The filter can also enhance contrast by darkening the sky and making clouds more prominent. This can add depth and drama to your portraits.
6. Experiment and practice: Every lighting situation is different, so it's important to experiment with the filter and practice using it in various conditions. This will help you understand its impact and how to achieve the desired effect.
From a contemporary perspective, it's worth noting that some photographers prefer to achieve similar effects through post-processing techniques. While this is a valid approach, using a polarizing filter during the shooting process can save time and effort in post-production, resulting in more natural and authentic portraits.
In conclusion, understanding how to use a polarizing filter for portraits can significantly enhance the quality of your images. By reducing glare, increasing color saturation, and improving overall image clarity, this versatile tool can help you capture stunning and impactful portraits.
2、 Choosing the right polarizing filter for portrait photography
Choosing the right polarizing filter for portrait photography can greatly enhance the quality of your images. A polarizing filter is a valuable tool that helps reduce glare and reflections, deepen colors, and improve overall image clarity. Here's a guide on how to use a polarizing filter effectively for portraits.
1. Understand the purpose: A polarizing filter is primarily used to reduce reflections from non-metallic surfaces such as water, glass, or foliage. It can also enhance the saturation of colors, making them appear more vibrant.
2. Select the correct filter size: Ensure that the filter you choose matches the diameter of your lens. Most filters come in various sizes, so make sure to check the lens diameter before purchasing.
3. Attach the filter: Screw the filter onto the front of your lens, ensuring it is securely attached. Make sure the filter is clean and free from any smudges or fingerprints that could affect image quality.
4. Adjust the polarization: Rotate the filter to achieve the desired effect. To reduce reflections, rotate the filter until the glare is minimized. Be mindful that rotating the filter too much can result in an unnatural-looking image, so use it judiciously.
5. Experiment with angles: Polarizing filters work best when the light source is at a 90-degree angle to the subject. Experiment with different angles to find the most flattering and effective polarization for your portraits.
6. Be aware of potential drawbacks: While polarizing filters can enhance colors and reduce reflections, they can also reduce the amount of light entering the lens. This may require you to adjust your exposure settings accordingly.
In recent years, there has been some debate about the use of polarizing filters for portrait photography. Some photographers argue that the filter can create an artificial look and reduce the natural skin tones of the subject. However, when used subtly and with care, a polarizing filter can still be a valuable tool for enhancing the overall quality of portrait images. As with any photography technique, it's important to experiment and find the right balance that suits your style and vision.

3、 Properly attaching and adjusting the polarizing filter on your lens
Properly attaching and adjusting a polarizing filter on your lens is essential for achieving the desired effect in portrait photography. Here's a step-by-step guide on how to use a polarizing filter for portraits:
1. Choose the right filter size: Ensure that you have a polarizing filter that fits your lens. Filter sizes are usually indicated on the front of the lens or in the lens specifications.
2. Attach the filter: Screw the polarizing filter onto the front of your lens. Make sure it is securely attached to avoid any accidental drops or damage.
3. Understand the effect: Polarizing filters help reduce glare and reflections, enhance colors, and improve overall image quality. They work by blocking certain light waves, allowing you to control the amount of polarized light entering the lens.
4. Adjust the filter orientation: Once the filter is attached, look through the viewfinder or LCD screen and rotate the filter. You will notice the effect changing as you rotate it. Experiment with different angles to achieve the desired result.
5. Control reflections: When shooting portraits outdoors, a polarizing filter can be particularly useful in reducing reflections on water, glass, or shiny surfaces. Rotate the filter until the reflections are minimized or eliminated.
6. Enhance colors: Polarizing filters can make colors appear more vibrant and saturated. Rotate the filter to find the position that enhances the colors in your portrait.
7. Be mindful of the impact on exposure: Keep in mind that polarizing filters can reduce the amount of light entering the lens, which may require you to adjust your exposure settings accordingly. Check your camera's metering or use manual mode to compensate for any exposure changes.
It's important to note that the use of polarizing filters for portraits is subjective and depends on the desired outcome and the specific shooting conditions. Experiment with different filter orientations and settings to achieve the desired effect while keeping the overall image natural and balanced.
In recent years, there has been a growing trend towards more natural and authentic portraits. Some photographers prefer to minimize the use of polarizing filters to maintain a more realistic representation of the subject and the environment. However, polarizing filters can still be a valuable tool when used subtly and thoughtfully to enhance certain aspects of the portrait. Ultimately, it's up to the photographer's artistic vision and personal preference to decide how and when to use a polarizing filter for portraits.

4、 Utilizing the polarizing filter to reduce glare and reflections
Utilizing a polarizing filter for portraits can greatly enhance the quality of your photographs by reducing glare and reflections. This filter is particularly useful when shooting outdoors, especially in bright sunlight or when photographing subjects near water or glass surfaces. Here's how to effectively use a polarizing filter for portraits:
1. Attach the filter: Start by screwing the polarizing filter onto the front of your camera lens. Ensure it is securely attached and aligned properly.
2. Adjust the angle: Rotate the filter to achieve the desired effect. The polarizing filter works by blocking certain light waves, so rotating it will allow you to control the amount of polarization. Experiment with different angles to find the best result.
3. Reduce glare and reflections: When shooting portraits outdoors, the polarizing filter can help reduce unwanted glare and reflections on the subject's skin or glasses. By minimizing these distractions, you can capture clearer and more vibrant images.
4. Enhance colors and contrast: The polarizing filter also has the ability to enhance colors and increase contrast in your portraits. It can make the sky appear bluer, foliage more vibrant, and overall image quality more appealing.
5. Be mindful of limitations: While the polarizing filter is a powerful tool, it does have limitations. It works best when the light source is at a 90-degree angle to the subject. Additionally, it may slightly reduce the amount of light entering the lens, so be prepared to adjust your exposure settings accordingly.
In the latest point of view, it's worth mentioning that some photographers prefer to achieve similar effects in post-processing using software. However, using a polarizing filter during the actual shoot can save time and effort in editing, as it allows you to capture the desired effect directly in-camera.
