How To Use A Tripod For Photography ?
To use a tripod for photography, start by extending the legs of the tripod to your desired height. Make sure the tripod is stable and secure on the ground. Attach your camera to the tripod using the mounting plate or quick release mechanism. Adjust the position and angle of the camera to frame your shot. Use the tripod's controls to fine-tune the height, tilt, and rotation of the camera. Once you have set up the tripod and camera, use the tripod's locking mechanisms to secure the position. This will help eliminate camera shake and ensure sharp images, especially in low light or long exposure situations. Use a remote shutter release or the camera's self-timer to further minimize any movement when capturing the photo. Finally, review your composition and settings, and take the photo when ready.
1、 Setting up a tripod for stability and balance.
Setting up a tripod for stability and balance is essential for achieving sharp and steady photographs. Here's a step-by-step guide on how to use a tripod for photography:
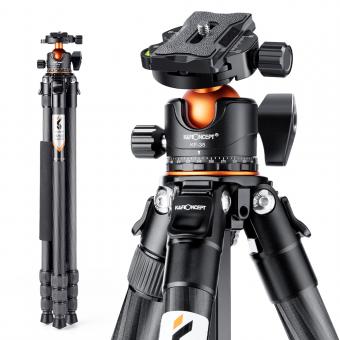
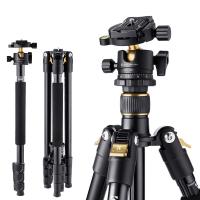
1. Choose a sturdy tripod: Invest in a tripod that is made of high-quality materials and has a weight capacity suitable for your camera and lens setup. Look for features like adjustable legs and a ball head for flexibility.
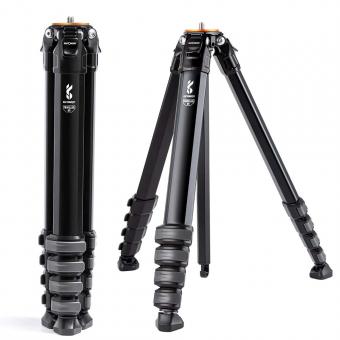
2. Extend the legs: Start by loosening the leg locks and extending the tripod legs to your desired height. Ensure that all three legs are extended evenly to maintain balance.
3. Adjust the center column: If your tripod has a center column, adjust it to fine-tune the height. However, it's generally recommended to keep the center column as low as possible to minimize vibrations.
4. Level the tripod: Most tripods have a built-in bubble level or a leveling base. Use this feature to ensure that the tripod is perfectly level. A level tripod helps in achieving straight horizons and prevents any unwanted tilting.
5. Attach the camera: Mount your camera securely onto the tripod head using the quick-release plate or the mounting screw. Make sure it is tightly fastened to avoid any accidental movement.
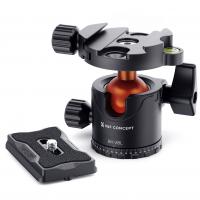
6. Adjust the tripod head: Depending on your shooting needs, adjust the tripod head to the desired angle and orientation. A ball head allows for smooth and precise adjustments, while a pan-tilt head offers more control for specific compositions.
7. Use a remote shutter release or self-timer: To further minimize camera shake, use a remote shutter release or the self-timer function on your camera. This prevents any movement caused by pressing the shutter button.
8. Fine-tune the composition: Once your camera is securely mounted, use the tripod's adjustable legs and head to fine-tune your composition. Take your time to frame the shot exactly as you envision it.
Using a tripod not only provides stability but also allows for longer exposures, sharper images, and creative control over composition. It is an essential tool for photographers of all levels, from professionals to hobbyists.
2、 Adjusting tripod height and leg angles for desired composition.
Adjusting tripod height and leg angles for desired composition is an essential skill for photographers looking to capture stable and well-composed shots. Here's a step-by-step guide on how to use a tripod effectively for photography:
1. Choose a sturdy tripod: Invest in a tripod that is sturdy enough to support your camera and lens. Look for one made of durable materials like aluminum or carbon fiber.
2. Set up the tripod: Find a level surface and extend the tripod legs. Make sure the tripod is stable by spreading the legs wide and locking them securely.
3. Adjust the height: Extend the center column of the tripod to your desired height. Avoid extending it fully if possible, as this can reduce stability. Instead, try to keep the center column as short as possible while still achieving the desired height.
4. Adjust leg angles: Most tripods have adjustable leg angles to accommodate different shooting situations. Spread the legs wider for a lower perspective or bring them closer together for a higher viewpoint. Adjusting the leg angles also helps in uneven terrain.
5. Secure the camera: Attach your camera to the tripod head using the quick-release plate or mounting screw. Ensure it is tightly secured to prevent any movement or vibrations.
6. Fine-tune the composition: Use the tripod's pan and tilt controls to adjust the camera's position and framing. This allows for precise composition and helps eliminate camera shake.
7. Lock everything in place: Once you have achieved the desired composition, tighten all the tripod locks to secure the camera and tripod in place. This ensures stability during the exposure.
Remember, using a tripod not only helps eliminate camera shake but also allows for longer exposures, sharper images, and creative composition. Experiment with different heights and leg angles to find the best composition for your shot. Additionally, consider using a remote shutter release or the camera's self-timer to further minimize any potential camera shake.
In recent years, advancements in tripod technology have introduced features like lightweight materials, compact designs, and innovative leg mechanisms. These developments have made tripods more portable and versatile, catering to the needs of photographers on the go. Additionally, some tripods now come with built-in levels or bubble indicators, making it easier to ensure a level composition. Always stay updated with the latest tripod models and features to enhance your photography experience.
3、 Attaching the camera securely to the tripod head.
Using a tripod for photography is essential for achieving sharp and stable images, especially in low light conditions or when using longer exposure times. To make the most of your tripod, it is important to know how to use it properly. One of the first steps is attaching the camera securely to the tripod head.
Start by ensuring that the tripod is set up on a stable surface. Extend the legs to your desired height and lock them in place. Next, locate the tripod head, which is the part that holds the camera. Most tripods have a quick-release plate system, which allows for easy attachment and detachment of the camera. To attach the camera, align the plate with the camera's tripod mount and screw it in securely. Make sure it is tight enough to prevent any movement, but be careful not to overtighten it.
Once the camera is attached, you can adjust the position and angle by loosening the tripod head's locking knobs. This allows you to compose your shot precisely. When you have the desired framing, tighten the knobs to secure the camera in place.
It is worth noting that different tripods may have variations in their attachment mechanisms. Some may have a lever or a twist-lock system instead of a plate. Therefore, it is important to familiarize yourself with your specific tripod's instructions.
In recent years, advancements in tripod technology have introduced features like built-in levels and quick-release systems that make attaching the camera even easier. These innovations have made tripods more user-friendly and efficient, allowing photographers to focus more on capturing the perfect shot.
In conclusion, attaching the camera securely to the tripod head is a fundamental step in using a tripod for photography. By following the proper procedure and taking advantage of the latest advancements, you can ensure stability and achieve sharper images in your photography endeavors.
4、 Using tripod controls for smooth panning and tilting.
Using a tripod for photography is essential for achieving sharp and stable images, especially in low light conditions or when using longer exposure times. Here's a guide on how to use a tripod effectively:
1. Setting up: Start by extending the tripod legs to your desired height. Ensure that the tripod is stable on the ground and adjust the leg angles if needed. Make sure the tripod head is securely attached to the legs.
2. Mounting the camera: Attach your camera to the tripod head using the quick release plate or screw mount. Ensure it is tightly secured to avoid any movement.
3. Adjusting the composition: Use the tripod's pan and tilt controls to frame your shot. The pan control allows horizontal movement, while the tilt control allows vertical movement. Make precise adjustments to achieve the desired composition.
4. Locking the controls: Once you have framed your shot, lock the pan and tilt controls to prevent any accidental movement. This will ensure that your composition remains unchanged.
5. Using a remote shutter release: To further minimize camera shake, use a remote shutter release or the camera's self-timer function to trigger the shot without touching the camera.
6. Smooth panning and tilting: When capturing moving subjects or creating panoramic shots, use the tripod controls for smooth panning and tilting. Slowly and steadily move the camera along the desired axis to maintain a smooth motion.
7. Stability tips: To enhance stability, hang a weight (such as your camera bag) from the tripod's center column. Additionally, avoid extending the tripod's center column fully, as it can reduce stability.
In recent years, advancements in tripod technology have introduced features like carbon fiber construction for lighter weight, built-in levels for precise leveling, and ball heads for quick adjustments. These improvements have made tripods more versatile and user-friendly.
Remember, using a tripod is not only about stability but also about allowing you to take your time to compose your shots and experiment with different settings. So, take advantage of this valuable tool to enhance your photography skills and capture stunning images.
