How To Use A Wireless Lavalier Microphone?
To use a wireless lavalier microphone, first, ensure that the microphone and the receiver are both turned on and have fresh batteries. Then, attach the lavalier microphone to the clothing of the person who will be speaking. Next, connect the receiver to the audio input of the device you will be using, such as a camera or a sound system.
Once everything is connected, turn on the device and adjust the volume levels as needed. It is important to test the microphone before recording or broadcasting to ensure that the audio quality is clear and that there is no interference or static.
When using a wireless lavalier microphone, it is also important to be aware of the range of the device and to stay within that range to avoid losing the signal. Additionally, it is recommended to use a windscreen or pop filter to reduce any unwanted noise or popping sounds.
1、 Equipment setup
Equipment setup is an essential aspect of using a wireless lavalier microphone. The first step is to ensure that the microphone is fully charged and that the receiver is connected to the audio recording device. The microphone should be placed on the speaker's clothing, preferably on the chest area, and secured with a clip or tape.
Once the microphone is in place, turn on the receiver and the audio recording device. Check the audio levels to ensure that the sound is clear and audible. It is also important to test the microphone before recording to ensure that it is working correctly.
When using a wireless lavalier microphone, it is important to be aware of any potential interference from other wireless devices. This can include cell phones, Wi-Fi routers, and other wireless microphones. To avoid interference, it is recommended to use a frequency that is not being used by other devices in the area.
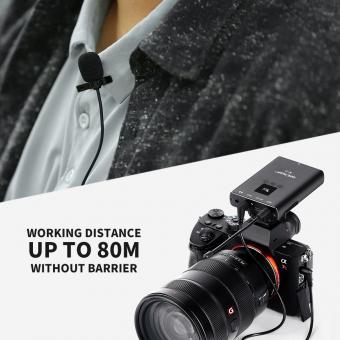
Another important consideration when using a wireless lavalier microphone is the distance between the microphone and the receiver. The microphone should be within range of the receiver to ensure that the sound is transmitted clearly. It is also important to avoid any obstacles that may interfere with the signal, such as walls or other objects.
In conclusion, using a wireless lavalier microphone requires proper equipment setup to ensure that the sound is clear and audible. It is important to test the microphone before recording, be aware of potential interference, and ensure that the microphone is within range of the receiver. With these considerations in mind, a wireless lavalier microphone can be a valuable tool for recording high-quality audio.
2、 Microphone placement
Microphone placement is a crucial aspect of using a wireless lavalier microphone. The placement of the microphone can greatly affect the quality of the audio captured. The first step is to attach the microphone to the clothing of the person speaking. The microphone should be placed in a position that is close to the mouth but not too close to avoid picking up unwanted sounds such as breathing or lip smacking.
It is important to ensure that the microphone is securely attached to the clothing to prevent it from moving around and causing rustling sounds. The microphone should also be positioned in a way that it is not obstructed by any clothing or accessories such as scarves or necklaces.
Another important consideration is the direction of the microphone. The microphone should be pointed towards the mouth of the speaker to capture clear and crisp audio. It is also important to avoid pointing the microphone towards any sources of noise such as air conditioning units or fans.
In recent years, there has been a growing trend towards using wireless lavalier microphones in live events and video productions. This is because they offer greater flexibility and mobility compared to wired microphones. With wireless lavalier microphones, the speaker can move around freely without being tethered to a microphone stand or cable.
In conclusion, proper microphone placement is essential when using a wireless lavalier microphone. The microphone should be securely attached to the clothing of the speaker and positioned in a way that it is not obstructed by any clothing or accessories. It should also be pointed towards the mouth of the speaker to capture clear and crisp audio. With the latest advancements in wireless technology, wireless lavalier microphones have become an increasingly popular choice for live events and video productions.
3、 Testing and adjusting audio levels
How to use a wireless lavalier microphone:
1. Turn on the microphone and receiver: Make sure both the microphone and receiver are turned on and set to the same frequency.
2. Attach the microphone: Clip the microphone onto the clothing of the person speaking, making sure it is close to their mouth.
3. Adjust the audio levels: Use the gain control on the receiver to adjust the audio levels. It's important to test the audio levels before recording or broadcasting to ensure the sound is clear and not distorted.
4. Monitor the audio: Use headphones to monitor the audio levels and make sure there is no interference or background noise.
5. Test the range: Walk around the room or area where the microphone will be used to test the range and make sure there is no drop in signal.
6. Check the battery life: Make sure the microphone and receiver have enough battery life to last the duration of the recording or broadcast.
7. Store the equipment properly: After use, store the microphone and receiver in a safe and dry place to prevent damage.
In the latest point of view, wireless lavalier microphones have become increasingly popular due to their convenience and ease of use. They are commonly used in video production, live events, and public speaking engagements. With advancements in technology, wireless lavalier microphones now offer improved sound quality and longer battery life. It's important to choose a high-quality microphone and receiver to ensure the best possible sound and range. Additionally, it's important to follow proper maintenance and storage procedures to prolong the lifespan of the equipment.
4、 Wireless transmission troubleshooting
How to use a wireless lavalier microphone:
1. Turn on the microphone and receiver: Make sure both the microphone and receiver are turned on and set to the same frequency.
2. Connect the microphone to the transmitter: Attach the lavalier microphone to the transmitter and clip it onto the speaker's clothing.
3. Connect the receiver to the sound system: Connect the receiver to the sound system using the appropriate cables.
4. Test the microphone: Test the microphone by speaking into it and adjusting the volume levels on the receiver and sound system as needed.
5. Monitor the battery life: Keep an eye on the battery life of both the microphone and receiver to ensure they don't run out of power during use.
Wireless transmission troubleshooting:
1. Check the frequency: Make sure the microphone and receiver are set to the same frequency and that there are no other devices interfering with the signal.
2. Check the distance: Make sure the microphone and receiver are within the recommended distance for optimal signal strength.
3. Check the battery life: Low battery life can cause signal interference and dropouts. Make sure the batteries are fully charged or replaced as needed.
4. Check for obstructions: Obstructions such as walls or other objects can interfere with the signal. Try to keep a clear line of sight between the microphone and receiver.
5. Update firmware: Some wireless microphone systems may require firmware updates to improve signal strength and reduce interference.
It's important to note that with the increasing use of wireless devices, there may be more interference and signal issues. It's always a good idea to test the microphone and receiver in the actual environment where they will be used to ensure optimal performance.











There are no comments for this blog.