How To Use Advanced Portable Car Camcorder ?
To use an advanced portable car camcorder, first, ensure that it is properly charged or connected to a power source. Mount the camcorder securely on your car's dashboard or windshield using the provided mounting bracket. Adjust the angle and position of the camcorder to capture the desired view.
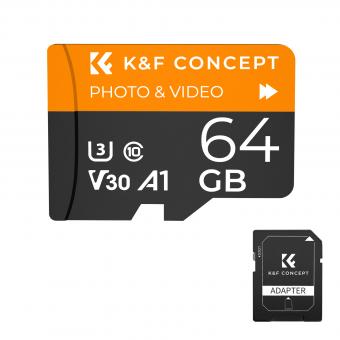
Next, insert a memory card into the camcorder to store the recorded footage. Check the camcorder's settings and adjust them according to your preferences, such as video resolution, frame rate, and loop recording.
Once everything is set up, power on the camcorder and it will start recording automatically. Some advanced car camcorders may have additional features like GPS tracking, motion detection, or parking mode. Familiarize yourself with these features and adjust the settings accordingly.
While driving, the camcorder will continuously record the road ahead. Make sure to periodically check the camcorder to ensure it is functioning properly and the memory card has enough space. After your drive, you can review the recorded footage on the camcorder's screen or transfer it to a computer for further analysis or storage.
Remember to follow local laws and regulations regarding the use of car camcorders, as they may vary in different jurisdictions.
1、 Mounting and positioning the car camcorder for optimal recording
To use an advanced portable car camcorder effectively, it is crucial to mount and position it correctly for optimal recording. Here are some steps to follow:
1. Choose the right location: Select a suitable spot inside your car to mount the camcorder. The windshield or dashboard are popular choices as they provide a clear view of the road ahead.
2. Secure the mount: Use the provided suction cup or adhesive mount to attach the camcorder securely to the chosen location. Ensure that it is firmly fixed to prevent any vibrations or movement during recording.
3. Adjust the angle: Position the camcorder at an angle that captures the desired field of view. It should be aligned with the road ahead and not obstruct the driver's view. Experiment with different angles to find the optimal position.
4. Consider the laws and regulations: Before mounting the camcorder, familiarize yourself with the local laws and regulations regarding the use of such devices in vehicles. Some jurisdictions may have restrictions on where and how they can be mounted.
5. Power the camcorder: Connect the camcorder to a power source, either through the car's cigarette lighter socket or a dedicated power outlet. Ensure that the power cable is neatly routed to avoid any distractions or obstructions.
6. Adjust settings: Depending on the specific features of your camcorder, you may need to adjust settings such as resolution, frame rate, and recording mode. Refer to the user manual for detailed instructions on how to optimize these settings.
7. Test and review: Before hitting the road, test the camcorder to ensure it is recording properly. Review the footage to verify that the angle and positioning are capturing the desired view.
From a latest point of view, some advanced portable car camcorders now come with built-in GPS capabilities, which can provide additional information such as speed and location data. This can be useful for insurance claims or providing evidence in case of accidents. Additionally, some camcorders offer Wi-Fi connectivity, allowing you to remotely access and download recorded footage using a smartphone or tablet.
Remember, always prioritize safety while using a car camcorder. Avoid adjusting or interacting with the device while driving, as it can be a distraction.
2、 Adjusting camera settings for high-quality video capture
To use an advanced portable car camcorder effectively, it is important to adjust the camera settings for high-quality video capture. Here are some steps to help you get the best results:
1. Resolution: Set the camera to the highest resolution available. This will ensure that your videos are captured in the best possible quality. Most advanced car camcorders offer options like 1080p or even 4K resolution.
2. Frame rate: Adjust the frame rate according to your needs. Higher frame rates, such as 60 frames per second (fps), can result in smoother videos, especially for fast-moving scenes. However, keep in mind that higher frame rates may require more storage space.
3. Exposure: Adjust the exposure settings to ensure that your videos are well-lit and properly exposed. Most car camcorders have automatic exposure settings, but you can also manually adjust the exposure if needed.
4. White balance: Set the white balance according to the lighting conditions. This will help ensure that colors are accurate and natural-looking in your videos. Most camcorders have automatic white balance settings, but you can also manually adjust it if required.
5. Image stabilization: Enable image stabilization to reduce camera shake and capture smoother videos, especially when driving on uneven roads. This feature is particularly important for car camcorders to ensure steady footage.
6. Audio settings: Check the audio settings and adjust the microphone sensitivity if necessary. Some camcorders offer options to reduce wind noise or enhance audio quality.
7. Mounting and positioning: Properly mount the camcorder in your car to get the best angle and minimize vibrations. Experiment with different positions to find the optimal placement for capturing your desired footage.
Remember to regularly check for firmware updates for your camcorder, as manufacturers often release updates to improve performance and add new features. Additionally, always follow local laws and regulations regarding the use of car camcorders to ensure your safety and compliance.
In conclusion, adjusting the camera settings for high-quality video capture is essential when using an advanced portable car camcorder. By following these steps and staying updated with the latest advancements in technology, you can capture stunning videos of your car journeys.
3、 Understanding and utilizing advanced features and functions
To effectively use an advanced portable car camcorder, it is crucial to understand and utilize its advanced features and functions. Here are some key points to consider:
1. Mounting and positioning: Ensure the camcorder is securely mounted on your car's windshield or dashboard, providing an optimal view of the road ahead. Experiment with different positions to find the best angle that captures the desired footage.
2. Resolution and frame rate: Adjust the camcorder's settings to record at the highest resolution and frame rate possible. This ensures clear and smooth video playback, allowing for better analysis of incidents or accidents.
3. Loop recording: Enable loop recording to overwrite old footage with new recordings once the storage is full. This feature ensures continuous recording without the need to manually delete old files.
4. G-sensor and motion detection: Activate the G-sensor and motion detection features to automatically start recording when the camcorder detects sudden movements or impacts. This is particularly useful in capturing evidence during accidents or break-ins.
5. GPS tracking: Some advanced car camcorders come with built-in GPS tracking. This feature allows you to record your vehicle's location, speed, and route, providing additional information in case of an incident.
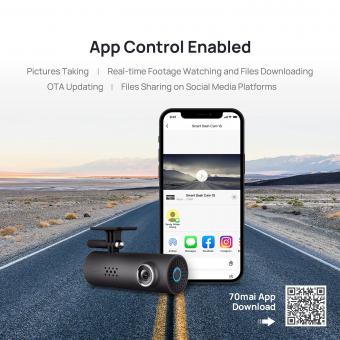
6. Wi-Fi connectivity: Utilize the camcorder's Wi-Fi connectivity to transfer footage wirelessly to your smartphone or computer. This makes it easier to review and share videos without the need for physical connections.
7. Night vision: If your camcorder has night vision capabilities, enable this feature to capture clear footage in low-light conditions. This is especially important for driving at night or in poorly lit areas.
It is important to regularly update the firmware of your camcorder to ensure it is equipped with the latest features and improvements. Additionally, familiarize yourself with the user manual and explore online resources for any additional tips or tricks specific to your model.
4、 Properly connecting and configuring the car camcorder with other devices
To properly use an advanced portable car camcorder, it is essential to understand how to connect and configure it with other devices. Here are some steps to help you get started:
1. Mounting the camcorder: Begin by securely attaching the car camcorder to your vehicle's windshield or dashboard using the provided mounting bracket. Ensure that it has a clear view of the road ahead.
2. Powering the camcorder: Connect the camcorder to your vehicle's power source, typically the cigarette lighter socket. Make sure the power cable is properly inserted and secure.
3. Adjusting camera settings: Most advanced car camcorders come with a built-in LCD screen or a smartphone app for configuration. Use these interfaces to adjust settings such as video resolution, frame rate, and loop recording duration. It is recommended to set the resolution to the highest available for better video quality.
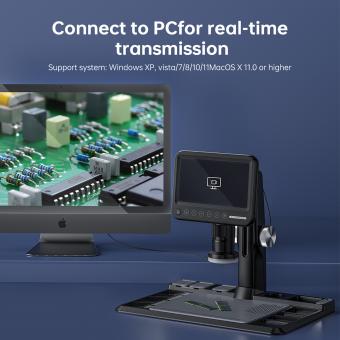
4. Connecting to other devices: To transfer and view recorded footage, connect the camcorder to your computer using the provided USB cable. Alternatively, some models offer Wi-Fi connectivity, allowing you to transfer files wirelessly to your smartphone or tablet.
5. Configuring additional features: Many advanced car camcorders come with extra features like GPS tracking, G-sensors, and parking mode. Consult the user manual to understand how to enable and configure these features according to your preferences.
6. Mounting considerations: Ensure that the camcorder is mounted in compliance with local laws and regulations. It should not obstruct your view or interfere with the vehicle's airbags.
7. Regular maintenance: Keep the camcorder lens clean and free from dust or smudges to ensure clear video recording. Regularly check the memory card's storage capacity and format it periodically to prevent data corruption.
Remember to familiarize yourself with local laws regarding the use of car camcorders, as regulations may vary. Additionally, always prioritize safe driving and avoid distractions while operating the camcorder.
