How To Use Big Stopper Nd Filter ?
To use a Big Stopper ND filter, follow these steps:
1. Attach the filter holder to your camera lens.
2. Slide the Big Stopper ND filter into the filter holder.
3. Set your camera to manual mode and adjust the exposure settings accordingly.
4. Compose your shot and focus on your subject.
5. Calculate the new exposure time by multiplying the original exposure time by the filter's stop value (usually around 10 stops).
6. Set the new exposure time on your camera.
7. Take the shot while ensuring the camera remains stable to avoid any blurriness.
8. Review the image and make any necessary adjustments to achieve the desired effect.
Remember that using a Big Stopper ND filter significantly reduces the amount of light entering the camera, allowing for longer exposure times. This can create stunning effects like motion blur in water or clouds, and can also be useful in situations where you want to capture long exposures in bright conditions.
1、 Understanding the Big Stopper ND Filter: Features and Benefits
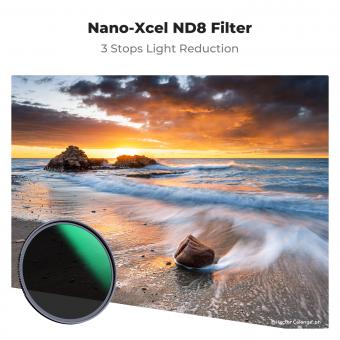
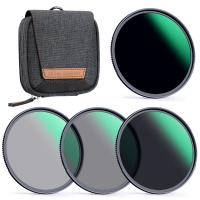
The Big Stopper ND filter is a powerful tool for long exposure photography. It is a neutral density filter that reduces the amount of light entering the camera, allowing for longer exposure times. This filter is particularly useful in situations where you want to capture motion blur, such as in waterfalls, rivers, or clouds.
To use the Big Stopper ND filter, follow these steps:
1. Set up your camera on a stable tripod to avoid any camera shake during the long exposure.
2. Compose your shot and focus on the subject. It is recommended to use manual focus to ensure accuracy.
3. Calculate the exposure time. With the Big Stopper ND filter, you will need to increase the exposure time significantly. A good starting point is to double the exposure time without the filter. For example, if your initial exposure time is 1/60th of a second, you would set it to 1/2 second with the Big Stopper ND filter.
4. Attach the filter to your lens. The Big Stopper ND filter is a square filter that requires a filter holder system. Slide the filter into the holder and adjust it to cover the entire lens.
5. Set your camera to Bulb mode or use a long exposure setting. This allows you to manually control the exposure time beyond the camera's normal range.
6. Use a remote shutter release or the camera's self-timer to avoid any camera shake when pressing the shutter button.
7. Press the shutter button and hold it for the desired exposure time. Keep in mind that longer exposure times may require additional adjustments to the camera settings, such as decreasing the ISO or closing down the aperture.
The Big Stopper ND filter offers several benefits, including the ability to create smooth, flowing water effects, capture cloud movement, and remove people or moving objects from a scene. It is important to note that using the Big Stopper ND filter requires practice and experimentation to achieve the desired results.
2、 Choosing the Right Big Stopper ND Filter for Your Needs
To use a Big Stopper ND filter effectively, follow these steps:
1. Mount the filter: Attach the filter holder to your camera lens securely. Ensure that it is properly aligned and tightened to prevent any light leaks.
2. Set up your shot: Compose your image and adjust the camera settings according to your desired exposure. Keep in mind that the Big Stopper is a 10-stop neutral density filter, so you will need to compensate for the reduced light by using longer shutter speeds or wider apertures.
3. Focus and lock: Before attaching the Big Stopper, focus your lens on the subject and then switch to manual focus mode. This prevents the autofocus from trying to readjust once the filter is in place. Lock the focus to ensure it remains constant throughout the exposure.
4. Calculate the exposure time: With the Big Stopper in place, calculate the new exposure time by multiplying the original shutter speed by 1,000. For example, if your initial exposure without the filter was 1/125th of a second, the new exposure time would be approximately 8 seconds (1/125 x 1,000 = 8).
5. Use a remote shutter release: To avoid camera shake during the long exposure, use a remote shutter release or the camera's self-timer function. This will help capture sharp and blur-free images.
6. Take the shot: Once everything is set up, press the shutter button and let the camera capture the image for the calculated exposure time. Be patient and avoid any movement or vibrations that could affect the final result.
Remember, practice makes perfect when using a Big Stopper ND filter. Experiment with different compositions, lighting conditions, and exposure times to achieve the desired creative effects. Stay updated with the latest techniques and tips from photography communities and experts to enhance your skills and broaden your creative possibilities.
3、 Properly Mounting and Attaching the Big Stopper ND Filter
Properly mounting and attaching the Big Stopper ND filter is essential to achieve the desired results in long exposure photography. Here is a step-by-step guide on how to use the Big Stopper ND filter effectively:
1. Prepare your camera: Set up your camera on a stable tripod to avoid any camera shake during the long exposure. Make sure your camera is in manual mode and set the desired aperture and ISO settings.
2. Attach the filter holder: The Big Stopper ND filter requires a filter holder system. Attach the filter holder to the front of your lens by screwing it on or using the appropriate adapter ring.
3. Insert the filter: Slide the Big Stopper ND filter into the designated slot in the filter holder. Ensure that the filter is securely in place to prevent any light leaks.
4. Compose your shot: Before taking the photo, compose your shot and focus on the subject. It is recommended to focus before attaching the filter as it can be challenging to focus accurately with the filter in place.
5. Calculate the exposure time: The Big Stopper ND filter is known for its extreme light reduction capabilities, typically reducing the light by around 10 stops. To calculate the correct exposure time, you can use a long exposure calculator app or the "Sunny 16" rule as a starting point and adjust accordingly.
6. Set the exposure time: Once you have determined the correct exposure time, set your camera's shutter speed accordingly. Use a remote shutter release or the camera's self-timer to avoid any camera shake when pressing the shutter button.
7. Take the shot: Press the shutter button and let the camera capture the long exposure image. Be patient during the exposure time, as it can range from a few seconds to several minutes depending on the lighting conditions and desired effect.
Remember, practice makes perfect when it comes to using the Big Stopper ND filter. Experiment with different exposure times and compositions to achieve stunning long exposure photographs.
4、 Adjusting Camera Settings for Big Stopper ND Filter Photography
To use a Big Stopper ND filter effectively, you need to adjust your camera settings accordingly. Here's a step-by-step guide on how to do it:
1. Set up your camera on a stable tripod to avoid any camera shake during long exposures.
2. Switch your camera to manual mode to have full control over the settings. This will prevent the camera from automatically adjusting the exposure based on the dark filter.
3. Set your ISO to the lowest value possible (usually ISO 100 or 200) to minimize noise in the image.
4. Choose a small aperture (high f-number) to achieve a longer exposure time. Start with f/11 or higher to allow less light to enter the camera.
5. Compose your shot and focus on the subject before attaching the Big Stopper ND filter. Once focused, switch your lens to manual focus to prevent the camera from refocusing when the filter is attached.
6. Attach the Big Stopper ND filter to your lens. Make sure it is securely attached to avoid any light leaks.
7. Calculate the exposure time by using the 10-stop reduction factor of the Big Stopper ND filter. For example, if the metered exposure without the filter is 1/125th of a second, with the filter it would be around 8 seconds (1/125 x 10 stops = 1/8).
8. Set the calculated exposure time on your camera's shutter speed dial.
9. Take the shot using a remote shutter release or the camera's self-timer to minimize any camera shake.
10. Review the image and make any necessary adjustments to the exposure time or composition.
It's important to note that the latest point of view on using a Big Stopper ND filter may vary depending on the specific camera and lens you are using. It's always a good idea to consult the user manual or online resources for your specific equipment to ensure you are getting the best results. Additionally, experimenting with different settings and compositions can lead to unique and creative images.












There are no comments for this blog.