How To Use Clip On Microphone ?
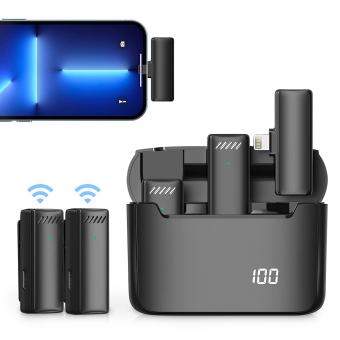
To use a clip-on microphone, first, locate the clip on the microphone and open it. Then, attach the microphone to the desired location, such as the collar of your shirt or the lapel of a jacket. Make sure the microphone is securely clipped on. Next, connect the microphone to the audio input of your device, such as a camera, smartphone, or computer. This can be done using a wired connection or a wireless transmitter, depending on the type of clip-on microphone you have. Once connected, adjust the microphone's position and angle to ensure optimal sound capture. Finally, test the microphone by speaking or making sound, and adjust the audio levels as needed.
1、 Positioning: Proper placement for optimal sound capture.
To use a clip-on microphone effectively, proper positioning is crucial for optimal sound capture. Here's a step-by-step guide on how to use a clip-on microphone and position it correctly:
1. Attach the microphone: Start by attaching the clip-on microphone securely to your clothing, preferably near your chest area. Make sure it is clipped firmly but not too tight to avoid any discomfort.
2. Position the microphone: Position the microphone close to your mouth, ideally about 6-8 inches away. This distance may vary depending on the specific microphone and your speaking volume. Experiment with different distances to find the sweet spot where your voice is clear and not distorted.
3. Avoid obstructions: Ensure that the microphone is not obstructed by any clothing, jewelry, or hair. These obstructions can muffle or distort the sound, affecting the overall audio quality.
4. Minimize background noise: Try to position yourself in a quiet environment to minimize background noise interference. If that's not possible, consider using a windscreen or foam cover on the microphone to reduce wind noise or plosive sounds.
5. Monitor the audio: Use headphones or earphones to monitor the audio while recording or speaking. This allows you to adjust the microphone's position or make any necessary changes to ensure optimal sound capture.
6. Test and adjust: Before recording or speaking in a critical setting, it's essential to test the microphone and make any necessary adjustments. Record a short sample and listen back to ensure the sound quality meets your expectations.
It's worth noting that advancements in clip-on microphone technology have led to improved sound quality and noise cancellation features. Some microphones now come with built-in equalizers or noise reduction capabilities, allowing for even better sound capture in various environments.
Remember, practice makes perfect. Experiment with different positions and settings to find what works best for you and your specific microphone.

2、 Attachment: Securely fastening the clip on microphone to clothing.
To use a clip-on microphone, the first step is to securely fasten it to your clothing. This ensures that the microphone stays in place and captures clear audio. Here's how you can attach a clip-on microphone to your clothing:
1. Locate a suitable spot: Look for a spot on your clothing where the microphone can be easily attached and won't obstruct your movements. The ideal location is usually near the collar or lapel.
2. Prepare the microphone: Ensure that the microphone is turned off before attaching it. This prevents any unwanted noise or interference during the attachment process.
3. Open the clip: Most clip-on microphones have a small clip that needs to be opened. Gently pull the clip apart to create an opening.
4. Position the microphone: Place the microphone in the desired location on your clothing. Make sure the microphone is facing towards your mouth for optimal sound capture.
5. Secure the clip: Once the microphone is in position, close the clip by pressing it together. Ensure that the clip is securely fastened to your clothing, but be careful not to damage the fabric.
6. Adjust the cable: If necessary, adjust the cable of the microphone so that it is not hanging loosely or causing any discomfort. You can use cable clips or tape to keep the cable neatly in place.
7. Test the microphone: Before using the microphone, it's important to test it to ensure it's working properly. Connect the microphone to your recording device or amplifier and speak into it. Adjust the volume levels as needed.
It's worth noting that advancements in clip-on microphone technology have led to the development of wireless options. These wireless microphones eliminate the need for cables and provide greater freedom of movement. When using a wireless clip-on microphone, follow the manufacturer's instructions for pairing and connecting the microphone to your recording device.
Overall, attaching a clip-on microphone to your clothing is a simple process that ensures clear and high-quality audio capture.

3、 Cable Management: Organizing and managing the microphone cable.
Clip-on microphones are a popular choice for individuals who require hands-free audio recording or amplification. These compact and versatile devices can be easily attached to clothing or other surfaces, allowing for convenient and discreet use. To effectively utilize a clip-on microphone, it is important to consider proper cable management to ensure a seamless and organized setup.
Cable management plays a crucial role in maintaining the functionality and longevity of your clip-on microphone. Here are some tips to help you organize and manage the microphone cable effectively:
1. Start by identifying the ideal placement for the microphone. Consider the purpose of your recording or amplification and choose a location that provides optimal sound quality and minimal interference.
2. Once you have determined the placement, carefully route the microphone cable along the desired path. Avoid crossing the cable with other wires or placing it near sources of electromagnetic interference, such as power cables or electronic devices.
3. Use cable clips or adhesive cable management solutions to secure the microphone cable in place. This will prevent it from tangling or getting caught on objects during use.
4. If the cable is too long, consider using cable ties or Velcro straps to bundle and shorten it. Excess cable length can be a tripping hazard and may lead to damage or disconnection of the microphone.
5. Regularly inspect the cable for any signs of wear or damage. If you notice any fraying or exposed wires, it is important to replace the cable to avoid potential audio issues or safety hazards.
In conclusion, proper cable management is essential for organizing and managing the microphone cable of a clip-on microphone. By following these tips, you can ensure a seamless and hassle-free audio recording or amplification experience.

4、 Adjusting Levels: Setting appropriate volume levels for clear audio.
To use a clip-on microphone effectively, it is important to adjust the levels properly to ensure clear audio. Here is a step-by-step guide on how to do it:
1. Attach the clip-on microphone securely to your clothing or any other suitable location close to your mouth. Make sure it is positioned correctly for optimal sound capture.
2. Connect the microphone to the audio input of your recording device or amplifier. This can be done using a wired connection or a wireless transmitter, depending on the type of microphone you have.
3. Turn on your recording device or amplifier and set the input level to a neutral position. This will prevent any distortion or clipping caused by excessively high levels.
4. Begin speaking or performing into the microphone at your normal volume. Monitor the audio levels on your recording device or amplifier to ensure they are not too low or too high.
5. Adjust the microphone gain or sensitivity if necessary. If the audio levels are too low, increase the gain to boost the signal. If the levels are too high and causing distortion, decrease the gain.
6. Continue adjusting the gain until you achieve a balanced and clear sound. It is important to find the right balance where your voice is audible without any distortion or background noise.
7. Test the microphone by recording a short sample and listening back to it. Make any additional adjustments if needed.
In addition to these steps, it is worth mentioning that some clip-on microphones come with built-in volume controls or equalizers. These features can be used to further fine-tune the audio levels and enhance the sound quality.
It is also important to consider the environment in which you are using the clip-on microphone. Background noise, wind, and other external factors can affect the audio quality. Positioning the microphone correctly and using any included windshields or noise-cancelling features can help mitigate these issues.
Overall, adjusting the levels properly is crucial for obtaining clear and professional audio when using a clip-on microphone.













There are no comments for this blog.