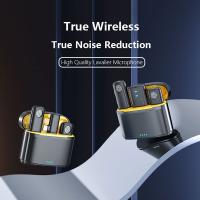
How To Use Collar Mic ?
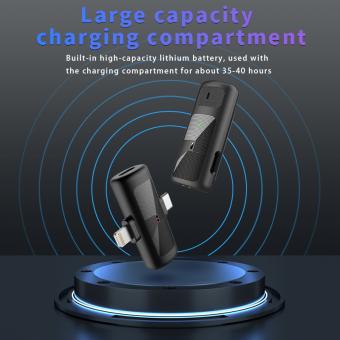
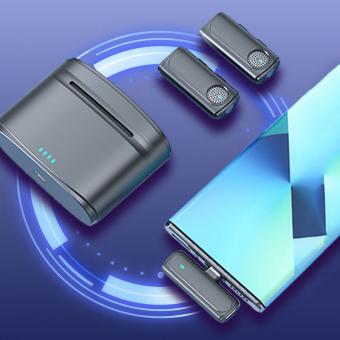
To use a collar mic, first, attach the mic to your clothing near your collarbone using the clip provided. Then, connect the mic to your recording device or amplifier using the appropriate cable. Make sure the mic is positioned close to your mouth but not touching it, and adjust the volume levels as needed. It's also important to minimize any background noise or interference that may affect the quality of the recording. Finally, test the mic by recording a sample and listening back to ensure that the sound quality is clear and consistent.
1、 Positioning of the collar mic
Positioning of the collar mic is crucial to ensure clear and crisp audio quality. Here are the steps on how to use a collar mic:
1. Attach the mic to your clothing: Clip the mic onto your collar or lapel, ensuring that it is securely attached.
2. Position the mic correctly: The mic should be positioned about 6-8 inches away from your mouth. This distance ensures that the mic picks up your voice clearly without any distortion.
3. Avoid rustling sounds: Make sure that the mic is not rubbing against your clothing or any other objects. This can cause rustling sounds that can interfere with the audio quality.
4. Check the direction of the mic: Ensure that the mic is pointing towards your mouth. This will help to capture your voice more accurately.
5. Test the audio quality: Before recording or going live, test the audio quality to ensure that it is clear and crisp. Adjust the mic position if necessary.
It is important to note that the latest point of view on collar mic positioning is to avoid placing the mic too close to the mouth. This can cause popping sounds and distortions in the audio. Instead, position the mic slightly away from the mouth to capture a more natural sound. Additionally, it is recommended to use a windscreen or pop filter to reduce wind noise and popping sounds.
2、 Connecting the collar mic to a recording device
Connecting a collar mic to a recording device is a simple process that can greatly enhance the audio quality of your recordings. Here's how to use a collar mic:
1. First, ensure that your recording device has a 3.5mm jack input. This is the standard size for most collar mics.
2. Next, plug the collar mic into the jack input on your recording device. Make sure it is securely connected.
3. Position the collar mic on your clothing, ensuring that it is close to your mouth. This will help to pick up your voice clearly.
4. Turn on your recording device and test the audio levels. Adjust the volume as necessary to ensure that your voice is clear and audible.
5. Start recording! Speak clearly and directly into the collar mic for the best results.
It's worth noting that some collar mics may require additional setup or configuration, depending on the specific model and recording device being used. Always refer to the manufacturer's instructions for best results.
In recent years, collar mics have become increasingly popular for use in a variety of settings, from podcasting and vlogging to public speaking and live events. With their compact size and high-quality audio capture, they offer a convenient and effective solution for anyone looking to improve their audio recordings.
3、 Adjusting the volume and sensitivity of the mic
How to use collar mic? One of the most important aspects of using a collar mic is adjusting the volume and sensitivity of the mic. This is crucial to ensure that the audio quality is clear and audible. The first step is to connect the collar mic to your device, whether it's a smartphone, camera, or other recording device. Once connected, you can adjust the volume and sensitivity settings on your device.
To adjust the volume, you can use the volume controls on your device or in the recording app you are using. It's important to test the volume levels before recording to ensure that the audio is not too loud or too soft. You can also adjust the sensitivity of the mic to pick up sound from a specific direction or distance. This can be done by adjusting the mic's position or using a windscreen to reduce background noise.
It's also important to consider the environment you are recording in. If you are in a noisy environment, you may need to adjust the sensitivity of the mic to reduce background noise. If you are recording in a quiet environment, you may need to increase the sensitivity to pick up softer sounds.
In the latest point of view, some collar mics come with built-in volume and sensitivity controls, making it easier to adjust the settings without relying on your device's controls. Additionally, some collar mics come with noise-cancelling technology, which can help reduce background noise and improve audio quality. Overall, adjusting the volume and sensitivity of your collar mic is essential to ensure clear and audible audio recordings.
4、 Avoiding clothing rustling and wind noise
How to use collar mic to avoid clothing rustling and wind noise is a common question among content creators, journalists, and vloggers. A collar mic, also known as a lavalier mic, is a small microphone that can be clipped onto clothing, making it a popular choice for those who need to record audio while on the move.
To avoid clothing rustling, it is important to position the collar mic correctly. The mic should be clipped onto the clothing in a position where it is not rubbing against any fabric. It is also important to ensure that the clothing is not too loose or too tight, as this can cause rustling noise.
Wind noise can be a challenge when using a collar mic outdoors. To avoid this, it is recommended to use a windscreen or a furry cover over the mic. This will help to reduce the impact of wind noise on the audio recording.
Another important consideration when using a collar mic is the distance between the mic and the speaker's mouth. It is recommended to position the mic about 6-8 inches away from the mouth to ensure clear audio recording.
In recent years, advancements in technology have led to the development of collar mics with noise-cancelling features. These mics use advanced algorithms to filter out background noise, resulting in clearer audio recordings.
In conclusion, using a collar mic to avoid clothing rustling and wind noise requires proper positioning, the use of windscreen or furry cover, and maintaining an appropriate distance between the mic and the speaker's mouth. With the latest advancements in technology, noise-cancelling collar mics are becoming increasingly popular among content creators and journalists.
