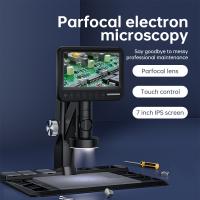
How To Use Confocal Microscope ?
To use a confocal microscope, first, prepare your sample by fixing and staining it appropriately. Next, mount the sample on a microscope slide or coverslip. Adjust the focus and position of the sample using the microscope's stage controls.
Turn on the confocal microscope and select the appropriate laser and filters for your sample. Adjust the laser power and gain settings to optimize the image quality. Use the joystick or computer controls to scan the laser beam across the sample.
Capture images by selecting the desired imaging mode (e.g., brightfield, fluorescence) and adjusting the exposure time. Use the software to control the image acquisition parameters, such as resolution, zoom, and depth of field.
After capturing the images, you can analyze and process them using image analysis software. This may involve adjusting brightness and contrast, applying filters, and measuring various parameters.
Remember to follow proper safety protocols when using a confocal microscope, such as wearing appropriate personal protective equipment and handling lasers with caution.
1、 Principle of confocal microscopy
The principle of confocal microscopy is based on the use of a pinhole aperture to eliminate out-of-focus light and improve image resolution. This technique allows for the acquisition of high-resolution, three-dimensional images of biological samples.
To use a confocal microscope, follow these steps:
1. Prepare your sample: Fix and stain your sample according to the specific requirements of your experiment. Ensure that the sample is mounted on a suitable substrate and is compatible with the microscope's objectives.
2. Set up the microscope: Turn on the confocal microscope and allow it to warm up. Adjust the laser power and gain settings to optimize image quality. Choose the appropriate objective lens based on your desired magnification and resolution.
3. Focus on the sample: Use the microscope's focus adjustment knobs to bring the sample into focus. Start with a low magnification objective to locate the region of interest, then switch to a higher magnification objective for detailed imaging.
4. Acquire images: Use the confocal microscope's software to select the desired imaging parameters, such as laser wavelength, pinhole size, and scanning speed. Start the image acquisition process and allow the microscope to scan the sample in a raster pattern.
5. Analyze the images: Once the images are acquired, use image analysis software to process and analyze the data. This may involve adjusting brightness and contrast, performing 3D reconstructions, or quantifying fluorescence intensity.
The latest advancements in confocal microscopy include the development of super-resolution techniques such as stimulated emission depletion (STED) microscopy and structured illumination microscopy (SIM). These techniques further enhance the resolution and imaging capabilities of confocal microscopy, allowing for the visualization of subcellular structures and molecular interactions with unprecedented detail. Additionally, the integration of confocal microscopy with other imaging modalities, such as fluorescence lifetime imaging microscopy (FLIM) and fluorescence correlation spectroscopy (FCS), enables the study of dynamic processes and molecular interactions in living cells.
2、 Sample preparation for confocal microscopy
Sample preparation for confocal microscopy is a crucial step in obtaining high-quality images and accurate data. Here is a step-by-step guide on how to prepare samples for confocal microscopy:
1. Fixation: Start by fixing the sample to preserve its structure and prevent degradation. Common fixatives include formaldehyde, paraformaldehyde, and glutaraldehyde. The choice of fixative depends on the type of sample and the desired outcome.
2. Permeabilization: Some samples, such as cells, may require permeabilization to allow the entry of fluorescent probes or antibodies. This step is typically achieved by treating the sample with a detergent like Triton X-100.
3. Blocking: To minimize non-specific binding of antibodies or probes, it is essential to block the sample. This is done by incubating the sample with a blocking agent such as bovine serum albumin (BSA) or non-fat dry milk.
4. Primary antibody incubation: If using antibodies, incubate the sample with the primary antibody specific to the target of interest. This step allows for specific labeling of the desired structure or molecule.
5. Secondary antibody incubation: After washing away unbound primary antibodies, incubate the sample with a secondary antibody conjugated to a fluorophore. This step amplifies the signal and allows for visualization under the confocal microscope.
6. Mounting: Finally, mount the sample onto a glass slide using an appropriate mounting medium. This helps to preserve the sample and prevent photobleaching during imaging.
It is important to note that sample preparation protocols may vary depending on the specific requirements of the experiment and the type of sample being studied. Additionally, advancements in sample preparation techniques, such as the use of advanced clearing methods or tissue expansion, are continually being developed to improve imaging quality and resolution in confocal microscopy.
3、 Adjusting laser and detector settings in confocal microscopy
To use a confocal microscope, it is essential to understand how to adjust the laser and detector settings. These adjustments are crucial for obtaining high-quality images and maximizing the potential of the confocal microscope.
Firstly, it is important to set the laser power appropriately. The laser power should be adjusted to a level that provides sufficient signal intensity without causing photobleaching or phototoxicity. It is recommended to start with a low laser power and gradually increase it until the desired signal is achieved. However, it is crucial to be cautious and avoid using excessive laser power, as it can damage the sample.
Next, the detector settings need to be optimized. The detector collects the emitted fluorescence signal from the sample. Adjusting the detector gain or amplification is necessary to ensure that the signal is strong enough to be detected but not saturated. It is advisable to adjust the gain to a level where the signal is well above the background noise but not reaching the maximum limit of the detector.
Additionally, the pinhole size should be considered. The pinhole is a critical component of confocal microscopy as it eliminates out-of-focus light, resulting in improved image resolution. Adjusting the pinhole size can control the optical sectioning capability of the microscope. A smaller pinhole size provides better axial resolution but reduces the amount of detected signal, while a larger pinhole size allows more signal but compromises the resolution. Therefore, finding the optimal balance between resolution and signal intensity is crucial.
Lastly, it is important to keep up with the latest advancements in confocal microscopy. New technologies and techniques are constantly being developed to enhance the capabilities of confocal microscopes. Staying updated with the latest research and attending conferences or workshops can provide valuable insights into the most effective ways to adjust laser and detector settings for specific applications.
In conclusion, adjusting laser and detector settings is essential for obtaining high-quality images with a confocal microscope. It is important to optimize the laser power, detector gain, and pinhole size to achieve the desired signal intensity, resolution, and image quality. Staying informed about the latest advancements in confocal microscopy can further enhance the effectiveness of these adjustments.
4、 Image acquisition and optimization in confocal microscopy
To use a confocal microscope for image acquisition and optimization, follow these steps:
1. Sample preparation: Prepare your sample by fixing, staining, or labeling it with fluorescent markers. Ensure that the sample is mounted on a suitable substrate and is compatible with the confocal microscope.
2. Microscope setup: Turn on the confocal microscope and allow it to warm up. Adjust the laser power and gain settings according to the sample and fluorophores being used. Set the appropriate excitation and emission wavelengths for your fluorophores.
3. Focus adjustment: Use the eyepiece or camera to locate the region of interest. Adjust the focus using the coarse and fine focus knobs until the image appears sharp and clear.
4. Scanning parameters: Set the scanning parameters such as scan speed, line averaging, and pixel dwell time. These parameters will affect the image quality and acquisition time. Optimize these settings based on the specific requirements of your experiment.
5. Image acquisition: Start the image acquisition by selecting the desired imaging mode (e.g., single plane, z-stack, time-lapse). Use the software interface to control the microscope and acquire images. Ensure that the exposure time is set appropriately to avoid overexposure or underexposure.
6. Image optimization: After acquiring the images, use image processing software to optimize the acquired data. This may involve adjusting brightness, contrast, and color balance, as well as applying filters or deconvolution algorithms to enhance image quality.
7. Analysis and interpretation: Analyze the acquired images using appropriate software tools. Quantify fluorescence intensity, measure distances, or perform colocalization analysis, depending on the objectives of your experiment.
It is important to stay updated with the latest advancements in confocal microscopy. For example, recent developments include the use of super-resolution techniques like stimulated emission depletion (STED) microscopy and structured illumination microscopy (SIM), which allow for higher resolution imaging beyond the diffraction limit. Additionally, advancements in software algorithms have improved image processing and analysis capabilities, enabling more accurate and detailed quantification of cellular structures and processes.
