How To Use Cpl Filter Lens ?
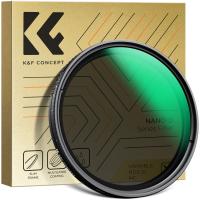
To use a CPL (Circular Polarizing) filter lens, follow these steps:
1. Attach the CPL filter lens to the front of your camera lens. Make sure it is securely screwed on.
2. Rotate the CPL filter to adjust the polarization effect. Look through the camera's viewfinder or LCD screen and rotate the filter until you achieve the desired effect.
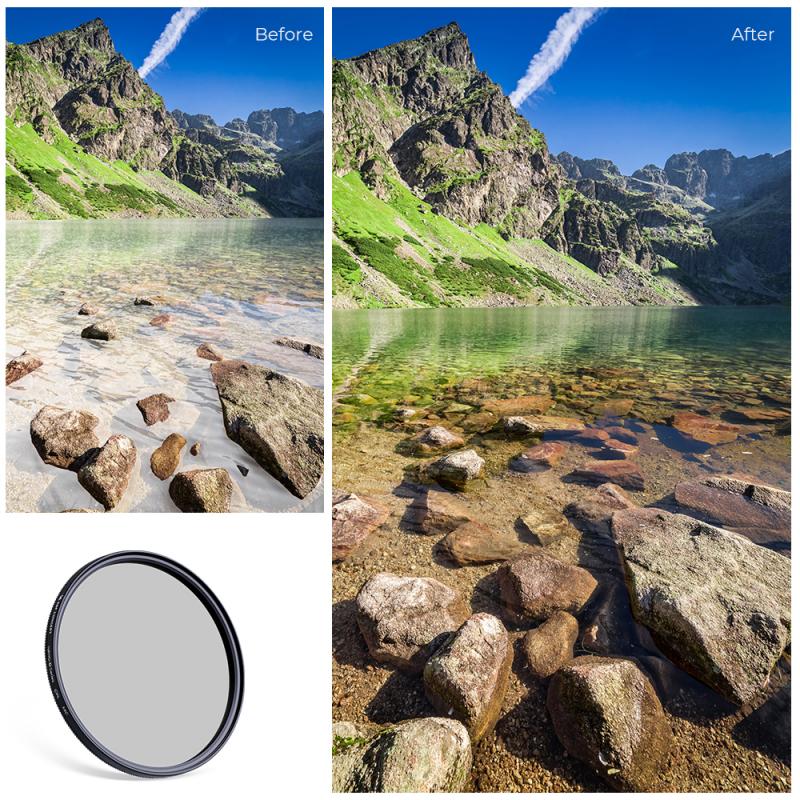
3. The CPL filter helps reduce reflections and glare from non-metallic surfaces such as water or glass. To minimize reflections, rotate the filter until the glare is reduced or eliminated.
4. The CPL filter also enhances colors and increases contrast. Rotate the filter to intensify the colors and make the sky appear bluer.
5. Keep in mind that the effectiveness of the CPL filter varies depending on the angle of the light source. Experiment with different angles to achieve the desired results.
6. When you're done using the CPL filter, simply unscrew it from the camera lens and store it in a protective case to prevent any damage.
Remember to check the compatibility of the CPL filter with your camera lens diameter before purchasing.
1、 Understanding the Purpose of a CPL Filter Lens
Understanding the Purpose of a CPL Filter Lens
A CPL (Circular Polarizing) filter lens is a valuable tool for photographers looking to enhance their images by reducing glare and reflections, boosting color saturation, and improving overall image quality. Here's how to use a CPL filter lens effectively:
1. Mounting the CPL Filter Lens: Start by attaching the CPL filter lens to the front of your camera lens. Ensure that the filter is securely fastened and aligned correctly.
2. Adjusting the Polarization: Rotate the CPL filter to adjust the polarization effect. This can be done by looking through the viewfinder or LCD screen and turning the filter until you achieve the desired effect. The filter will darken the sky, reduce reflections on water or glass surfaces, and enhance colors.
3. Controlling Reflections: CPL filters are particularly useful for reducing unwanted reflections. When shooting landscapes, rotate the filter to minimize reflections on water or foliage, allowing you to capture clearer and more vibrant images.
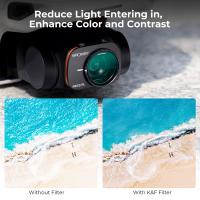
4. Enhancing Color Saturation: By reducing scattered light, a CPL filter can enhance color saturation, making your images appear more vibrant and rich. This is especially beneficial when photographing landscapes, nature, or architecture.
5. Balancing Exposure: Keep in mind that CPL filters can reduce the amount of light entering the camera, typically by around 1-2 stops. Adjust your camera settings accordingly to maintain proper exposure.
6. Experiment and Practice: To fully understand the capabilities of a CPL filter lens, experiment with different angles, lighting conditions, and subjects. Practice using the filter in various scenarios to develop your skills and achieve the desired effects.
In recent years, CPL filters have become more advanced, with some offering additional features like anti-reflective coatings and slim designs to prevent vignetting. These advancements have made CPL filters more effective and user-friendly, allowing photographers to achieve better results with ease.
Remember, while CPL filters can significantly enhance your images, it's important to use them judiciously. Overusing the filter can lead to unnatural-looking images, so it's crucial to strike a balance and use the filter only when necessary.
2、 Mounting a CPL Filter Lens on Your Camera
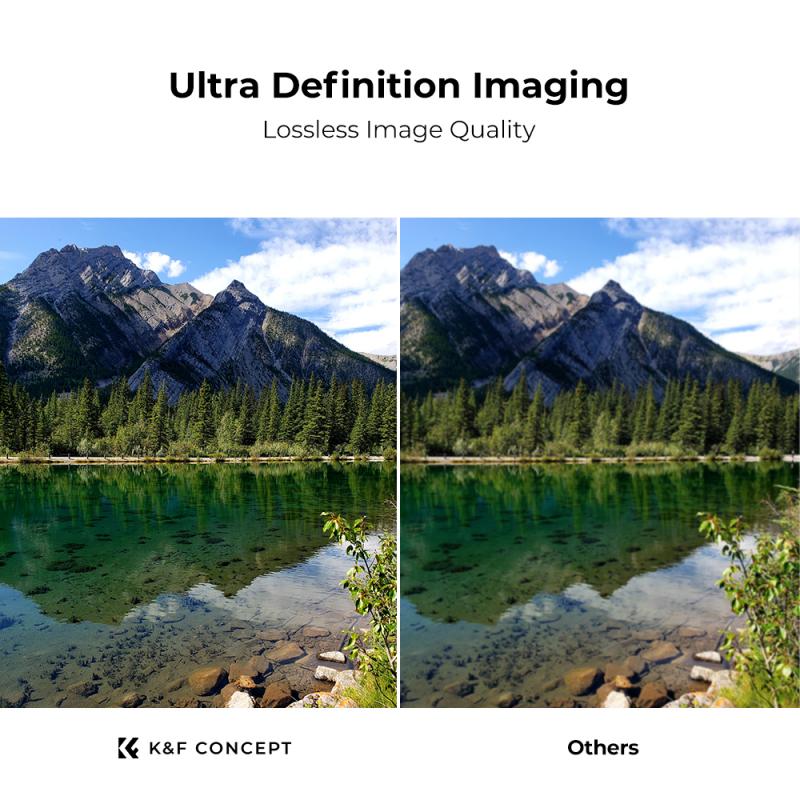
Mounting a CPL (Circular Polarizing) filter lens on your camera can greatly enhance your photography by reducing glare and reflections, improving color saturation, and increasing contrast. Here's how to use a CPL filter lens effectively:
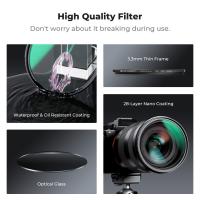
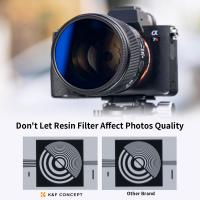
1. Choose the right CPL filter: CPL filters come in different sizes, so ensure you select the one that fits your camera lens diameter. Additionally, consider the quality of the filter to avoid any loss in image sharpness.
2. Attach the filter: Remove any lens cap or UV filter from your camera lens. Screw the CPL filter onto the lens by aligning the threads. Make sure it is securely attached to prevent any accidental detachment.
3. Adjust the filter orientation: CPL filters have a rotating ring on the front. Look through the camera's viewfinder or LCD screen and rotate the filter to achieve the desired effect. This rotation allows you to control the amount of polarization and the direction of the polarizing effect.
4. Observe the changes: As you rotate the CPL filter, you will notice the reduction of reflections on shiny surfaces like water or glass. The filter also enhances the colors, making them more vibrant and saturated. It can also darken the sky, making clouds stand out more.
5. Experiment and practice: CPL filters can be used in various situations, such as landscape photography, architecture, or even portraits. Experiment with different angles and orientations to achieve the desired effect. Practice using the filter in different lighting conditions to understand its impact on your images.
Remember, while CPL filters are incredibly useful, they can also reduce the amount of light entering your camera. This may require you to adjust your exposure settings accordingly, especially in low-light situations.
In conclusion, mounting a CPL filter lens on your camera can significantly improve your photography by reducing glare, enhancing colors, and increasing contrast. With practice and experimentation, you can master the art of using a CPL filter to capture stunning images.
3、 Adjusting the Polarization Effect of a CPL Filter Lens
To use a CPL (Circular Polarizing) filter lens effectively, follow these steps:
1. Attach the CPL filter lens: Screw the CPL filter lens onto the front of your camera lens. Make sure it is securely attached.
2. Rotate the filter: Once the CPL filter lens is attached, you can rotate it to adjust the polarization effect. Look through the camera's viewfinder or use the live view mode to see the changes in real-time.
3. Observe the effect: As you rotate the CPL filter lens, you will notice changes in the polarization effect. The filter helps reduce glare and reflections from non-metallic surfaces such as water, glass, and foliage. It also enhances color saturation and contrast.
4. Adjust the angle: To achieve the desired effect, adjust the angle of the CPL filter lens. Rotating it at a 90-degree angle to the light source will maximize the polarization effect. Experiment with different angles to find the best results for your specific scene.
5. Be mindful of the sky: When using a CPL filter lens, be aware that it can have a significant impact on the sky. Rotating the filter can darken the sky, making it appear more dramatic. However, this effect may not be desirable in all situations, so adjust accordingly.
6. Combine with other filters: CPL filter lenses can be used in combination with other filters, such as neutral density (ND) filters or graduated ND filters, to achieve various creative effects. Experiment with different filter combinations to enhance your photography.
Remember, the effectiveness of a CPL filter lens can vary depending on factors such as the angle of the light source, the position of the sun, and the type of surface you are photographing. Therefore, it is essential to experiment and practice using the CPL filter lens to achieve the desired results.
4、 Controlling Reflections and Glare with a CPL Filter Lens
To use a CPL (Circular Polarizing) filter lens effectively, follow these steps:
1. Attach the CPL filter lens to your camera: Screw the filter onto the front of your lens, ensuring it is securely attached.
2. Adjust the orientation of the filter: Rotate the outer ring of the CPL filter to adjust the polarization effect. Look through the viewfinder or LCD screen and rotate the filter until you achieve the desired effect.
3. Controlling reflections: CPL filters are particularly useful for reducing reflections from non-metallic surfaces such as water, glass, or foliage. By rotating the filter, you can minimize or eliminate these reflections, resulting in clearer and more vibrant images.
4. Reducing glare: CPL filters are also effective in reducing glare from shiny surfaces like water or wet roads. By rotating the filter, you can reduce the intensity of the glare, allowing you to capture more details in your photos.
5. Enhancing colors and contrast: CPL filters can deepen the colors in your images and increase overall contrast. This is especially noticeable in landscapes, where the filter can make the sky appear bluer and clouds more defined.
6. Experiment with different angles: Depending on the angle of the light source, the effectiveness of the CPL filter may vary. Try rotating the filter at different angles to find the optimal position for reducing reflections and glare.
7. Be mindful of the impact on exposure: CPL filters can reduce the amount of light entering the camera, so you may need to adjust your exposure settings accordingly. Keep an eye on your camera's light meter or use manual exposure mode to compensate for any light loss.
Remember, practice makes perfect. Experiment with different settings and angles to fully understand the capabilities of your CPL filter lens.
