How To Use Microscope ?
To use a microscope, first, place the specimen you want to observe on the stage of the microscope. Adjust the focus by turning the coarse focus knob to bring the specimen into view. Then, use the fine focus knob to sharpen the image. Adjust the magnification by rotating the objective lenses. Start with the lowest magnification and gradually increase it as needed. Use the condenser to control the amount of light passing through the specimen. Adjust the diaphragm to regulate the brightness and contrast of the image. Finally, observe the specimen through the eyepiece and make any necessary adjustments to improve the clarity and focus of the image.
1、 Microscope Parts and Functions
Microscope Parts and Functions
The microscope is an essential tool used in various scientific fields, including biology, medicine, and research. Understanding the different parts and functions of a microscope is crucial for its proper usage and obtaining accurate results. Here is a comprehensive guide on how to use a microscope and its various components.
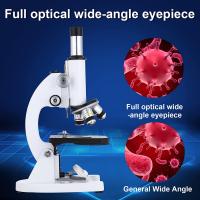
1. Eyepiece: The eyepiece, also known as the ocular lens, is the part where you look through to observe the specimen. It typically provides a magnification of 10x.
2. Objective lenses: Microscopes usually have multiple objective lenses with different magnification powers, such as 4x, 10x, 40x, and 100x. To change the magnification, rotate the nosepiece to select the desired objective lens.
3. Stage: The stage is where you place the specimen for observation. It often has clips or a mechanical stage to hold the slide in place.
4. Condenser: The condenser is located beneath the stage and focuses the light onto the specimen. Adjusting the condenser's height and aperture can enhance the clarity and contrast of the image.
5. Illuminator: The illuminator is the light source of the microscope, usually located beneath the stage. It can be a built-in light bulb or an external light source.
To use a microscope effectively, follow these steps:
1. Place the microscope on a stable surface and plug in the illuminator if necessary.
2. Adjust the light intensity using the light control knob.
3. Place the specimen on the stage and secure it with the clips or mechanical stage.
4. Start with the lowest magnification objective lens (usually 4x) and focus on the specimen using the coarse adjustment knob.
5. Fine-tune the focus using the fine adjustment knob for a clearer image.
6. If needed, switch to higher magnification objective lenses by rotating the nosepiece.
7. Adjust the condenser and diaphragm to optimize the lighting conditions.
8. Observe the specimen through the eyepiece and make any necessary adjustments to improve the image quality.
It is important to handle the microscope with care, avoiding any sudden movements or rough handling that could damage the delicate components. Additionally, keep the lenses clean and free from dust or smudges to ensure accurate observations.
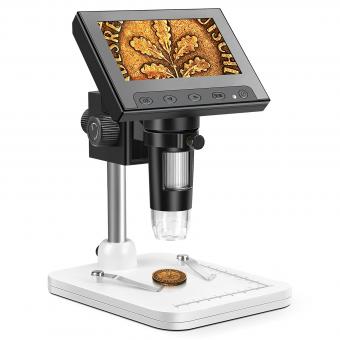
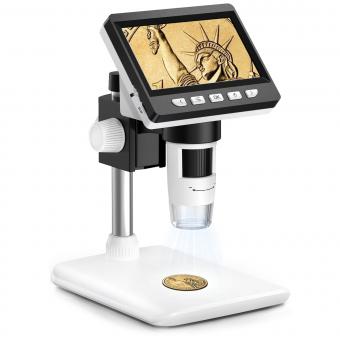
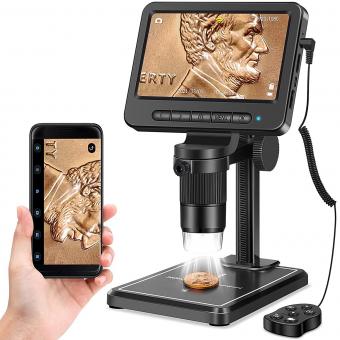
In recent years, advancements in microscope technology have led to the development of digital microscopes. These microscopes incorporate digital cameras and software, allowing for real-time imaging, image capture, and analysis. Digital microscopes offer the advantage of easy sharing and storage of images, as well as the ability to measure and analyze specimens more accurately.
In conclusion, understanding the parts and functions of a microscope is essential for its proper usage. By following the steps outlined above and considering the latest advancements in microscope technology, users can effectively observe and analyze specimens for various scientific purposes.
2、 Microscope Setup and Calibration
Microscope Setup and Calibration: How to Use a Microscope
Using a microscope is an essential skill for scientists, researchers, and students in various fields such as biology, medicine, and materials science. To ensure accurate observations and measurements, it is crucial to properly set up and calibrate the microscope. Here is a step-by-step guide on how to use a microscope effectively.
1. Set up the microscope: Start by placing the microscope on a stable surface, ensuring it is level. Connect the power source and turn on the microscope. Adjust the light intensity to a comfortable level for viewing.
2. Adjust the eyepieces: Adjust the interpupillary distance by moving the eyepieces closer or further apart until you see a single, circular field of view. Additionally, adjust the diopter settings on each eyepiece to compensate for any differences in your eyesight.
3. Choose the objective lens: Microscopes typically have multiple objective lenses with different magnification levels. Start with the lowest magnification lens (e.g., 4x or 10x) and gradually increase the magnification as needed.
4. Focus the specimen: Place the specimen on the stage and secure it with the stage clips. Use the coarse adjustment knob to bring the specimen into rough focus, then use the fine adjustment knob for precise focusing. Move the stage up or down to bring different areas of the specimen into focus.
5. Observe and record: Once the specimen is in focus, observe it through the eyepieces. Adjust the light intensity and use the condenser to enhance the contrast if necessary. Take notes or capture images of the observed structures using a camera or digital imaging software.
6. Calibration: To ensure accurate measurements, it is important to calibrate the microscope. Use a stage micrometer, which is a slide with a known scale, to determine the relationship between the scale on the slide and the actual size of the specimen. This calibration factor can then be used to measure the size of objects observed under the microscope.
It is worth noting that with advancements in technology, digital microscopes and software are becoming increasingly popular. These tools offer additional features such as image analysis, measurement tools, and the ability to share and collaborate remotely.
In conclusion, setting up and calibrating a microscope properly is essential for accurate observations and measurements. By following these steps, users can effectively use a microscope to explore the microscopic world and contribute to scientific knowledge.

3、 Sample Preparation for Microscopy
Sample preparation for microscopy is a crucial step in obtaining accurate and reliable results. To use a microscope effectively, it is essential to follow proper sample preparation techniques. Here is a step-by-step guide on how to prepare samples for microscopy:
1. Collect the sample: Depending on the type of microscopy you are performing, collect the appropriate sample. This could be a tissue section, cell culture, or a solid material.
2. Fixation: Fixation is done to preserve the sample's structure and prevent degradation. Use a suitable fixative, such as formaldehyde or glutaraldehyde, and follow the recommended fixation time.
3. Dehydration: Dehydration removes water from the sample and replaces it with a suitable solvent, such as ethanol or acetone. Gradually increase the concentration of the solvent to prevent sample damage.
4. Embedding: Embedding is necessary for solid samples. Use a suitable embedding medium, such as paraffin or resin, to provide support and maintain the sample's structure during sectioning.
5. Sectioning: For solid samples, sectioning is required to obtain thin slices for microscopy. Use a microtome or cryostat to cut thin sections of the embedded sample.
6. Staining: Staining enhances the contrast and visibility of the sample. Choose appropriate stains based on the sample type and the information you want to obtain. Common stains include hematoxylin and eosin (H&E) for general histology and fluorescent dyes for specific cellular components.
7. Mounting: Place the stained sample onto a glass slide and cover it with a coverslip. Use a mounting medium, such as mounting media or glycerol, to prevent air bubbles and preserve the sample.
8. Cleaning: Clean the microscope lenses and stage before placing the slide. Use lens cleaning solution and a lint-free cloth to remove any dust or debris that may affect the image quality.
9. Microscope settings: Adjust the microscope settings, such as magnification, focus, and lighting, to obtain the desired image. Follow the manufacturer's instructions for your specific microscope model.
10. Observation and analysis: Once the sample is prepared and the microscope is set up, observe the sample under different magnifications and analyze the obtained images. Take notes or capture images for further analysis or documentation.
It is important to note that sample preparation techniques may vary depending on the specific microscopy technique and the sample type. Always refer to the latest research and protocols for the most up-to-date sample preparation methods.
4、 Adjusting Magnification and Focus
Adjusting Magnification and Focus
To use a microscope effectively, it is crucial to understand how to adjust the magnification and focus. Here is a step-by-step guide on how to do so:
1. Start by placing the slide on the stage of the microscope. Ensure that the specimen is centered and secured in place.
2. Begin with the lowest magnification objective lens. Rotate the nosepiece to select the desired lens. The magnification power is usually indicated on the lens.
3. Look through the eyepiece and use the coarse adjustment knob to bring the specimen into view. This knob moves the stage up and down, allowing you to focus roughly on the specimen.
4. Once the specimen is visible, use the fine adjustment knob to sharpen the focus. This knob moves the stage in smaller increments, enabling precise focusing.
5. If you need to increase the magnification, rotate the nosepiece to select a higher power objective lens. Remember to use the coarse adjustment knob to bring the specimen into view again and then fine-tune the focus.
6. When switching to a higher magnification, it is important to note that the field of view becomes smaller, and the depth of field decreases. This means that only a thin slice of the specimen will be in focus at a time.
7. To maintain clarity, it may be necessary to adjust the focus slightly using the fine adjustment knob as you move the slide around to examine different areas.
It is worth mentioning that with the advancements in technology, some microscopes now come with digital features that allow for easier adjustment of magnification and focus. These digital microscopes often have a control panel or software interface that allows users to adjust the settings with greater precision.
In conclusion, adjusting magnification and focus is a fundamental skill when using a microscope. By following the steps outlined above, you can ensure that your observations are clear and accurate.
