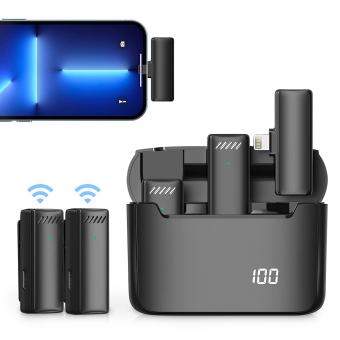
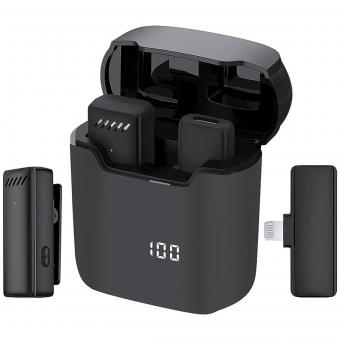
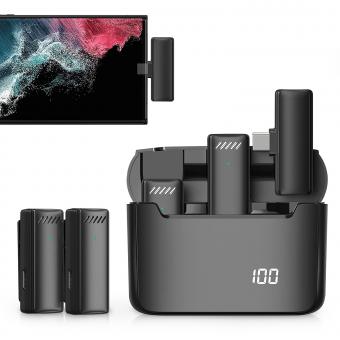
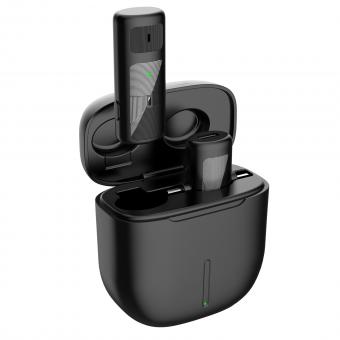
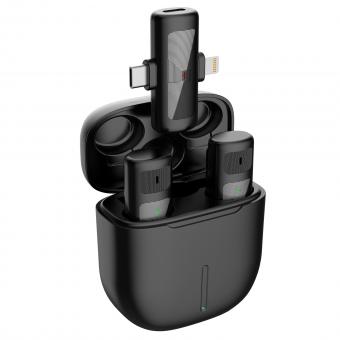
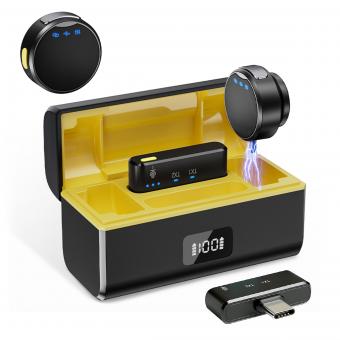
How To Use Mini Wireless Microphone ?
To use a mini wireless microphone, first, ensure that the microphone is charged or has fresh batteries. Then, turn on the microphone and the receiver. Make sure that the receiver is connected to the audio input of the device you want to use, such as a camera, speaker system, or computer. Adjust the volume levels on both the microphone and the receiver to your desired settings. Finally, test the microphone by speaking into it and checking if the audio is being transmitted and received properly.
1、 Connecting the mini wireless microphone to your device
Connecting the mini wireless microphone to your device is a simple process that allows you to enjoy the convenience and freedom of wireless audio recording. Here's a step-by-step guide on how to use a mini wireless microphone:
1. Check compatibility: Ensure that your device supports wireless connectivity, such as Bluetooth or Wi-Fi. Most modern smartphones, tablets, and laptops have this capability.
2. Charge the microphone: Before using the mini wireless microphone, make sure it is fully charged. Connect it to a power source using the provided USB cable and allow it to charge for the recommended time.
3. Turn on the microphone: Once charged, switch on the mini wireless microphone by pressing the power button. Some models may have an LED indicator that lights up when it is turned on.
4. Enable pairing mode: Put the microphone into pairing mode by pressing and holding the Bluetooth button or following the manufacturer's instructions. This allows your device to detect and connect to the microphone.
5. Connect to your device: On your device, go to the Bluetooth or Wi-Fi settings and search for available devices. Select the mini wireless microphone from the list of detected devices and follow any on-screen prompts to complete the pairing process.
6. Adjust settings: Once connected, you may need to adjust the audio settings on your device. This includes selecting the microphone as the input source and adjusting the volume levels as desired.
7. Start recording: With the mini wireless microphone successfully connected, you can now start recording audio. Open your preferred recording app or video recording software and ensure that the microphone is selected as the audio input source.
It's important to note that the specific steps may vary depending on the brand and model of the mini wireless microphone you are using. Always refer to the manufacturer's instructions for detailed guidance.
In recent years, mini wireless microphones have become increasingly popular due to their convenience and versatility. They offer a range of benefits, such as improved mobility, reduced cable clutter, and the ability to capture audio from a distance. Additionally, advancements in technology have led to improved sound quality and longer battery life in these devices.
As technology continues to evolve, mini wireless microphones are becoming more user-friendly and compatible with a wider range of devices. Some models now offer additional features like noise cancellation, adjustable sensitivity, and real-time audio monitoring. These advancements make them suitable for a variety of applications, including vlogging, podcasting, interviews, presentations, and more.
In conclusion, connecting a mini wireless microphone to your device is a straightforward process that allows you to enjoy the freedom of wireless audio recording. By following the steps outlined above and staying up to date with the latest advancements in wireless microphone technology, you can enhance your audio recording experience and capture high-quality sound with ease.
2、 Adjusting the microphone settings for optimal performance
To use a mini wireless microphone effectively, it is important to adjust the microphone settings for optimal performance. Here are some steps to help you get the best out of your mini wireless microphone:
1. Positioning: Start by positioning the microphone correctly. Place it close to the sound source to ensure clear and accurate audio capture. Experiment with different positions to find the best spot for optimal sound quality.
2. Volume control: Adjust the volume settings on the microphone to ensure the audio is neither too soft nor too loud. This will help prevent distortion and ensure a balanced sound output.
3. Frequency selection: Mini wireless microphones often come with multiple frequency options. Select a frequency that is not being used by other nearby devices to avoid interference. This will help maintain a stable and uninterrupted audio transmission.
4. Gain control: Adjust the gain control on the microphone to optimize the sensitivity of the audio input. This will help capture the desired sound levels without any distortion or background noise.
5. Test and monitor: Before using the mini wireless microphone in a live setting, it is crucial to test and monitor the audio quality. Use headphones or speakers to listen to the audio output and make any necessary adjustments to the settings.
6. Battery life: Ensure that the microphone has sufficient battery life before each use. A low battery can affect the performance and audio quality of the microphone. Replace or recharge the batteries as needed.
7. Range limitations: Keep in mind that mini wireless microphones have a limited range. Stay within the recommended range to maintain a strong and stable connection between the microphone and the receiver.
It is important to consult the user manual provided by the manufacturer for specific instructions on adjusting the settings of your mini wireless microphone. Additionally, staying updated with the latest advancements in wireless microphone technology can help you make the most of your device.
3、 Positioning the microphone for clear and consistent audio capture
To use a mini wireless microphone effectively, it is crucial to position it correctly for clear and consistent audio capture. Here are some steps to follow:
1. Choose the right location: Find a suitable spot where the microphone can capture the desired audio without any obstructions or interference. Consider the distance between the microphone and the sound source to ensure optimal sound quality.
2. Attach the microphone securely: Depending on the type of mini wireless microphone you have, it may come with a clip or a lavalier-style design. Attach the microphone securely to the clothing of the person speaking, ensuring it is close to their mouth for clear audio pickup.
3. Test the audio levels: Before starting the recording or live performance, check the audio levels to ensure they are not too low or too high. Adjust the microphone sensitivity accordingly to avoid distortion or background noise.
4. Monitor the audio: Use headphones or a monitoring system to listen to the audio in real-time. This allows you to make any necessary adjustments to the microphone position or audio levels during the recording or performance.
5. Minimize interference: Keep the mini wireless microphone away from other electronic devices that may cause interference, such as smartphones or Wi-Fi routers. This helps maintain a strong and stable wireless connection.
6. Consider the latest advancements: With the continuous advancements in technology, mini wireless microphones now often come with features like noise cancellation and improved signal transmission. Take advantage of these features to enhance the audio quality and reduce any unwanted background noise.
Remember, practice and experimentation are key to achieving the best results with a mini wireless microphone. Adjust the positioning and settings as needed to find the optimal setup for your specific requirements.
4、 Troubleshooting common issues with mini wireless microphones
How to Use Mini Wireless Microphone:
1. Charge the microphone: Before using the mini wireless microphone, make sure it is fully charged. Connect the microphone to a power source using the provided USB cable and allow it to charge for the recommended time.
2. Pair the microphone: Turn on the microphone and the receiver. Most mini wireless microphones have a pairing button or a specific process to establish a connection between the microphone and the receiver. Follow the instructions provided with your specific model to pair them successfully.
3. Adjust the settings: Once the microphone and receiver are paired, adjust the volume levels on both devices. You may also need to select the appropriate channel or frequency to ensure a clear and interference-free signal.
4. Test the microphone: Before using the mini wireless microphone for a presentation or performance, it is essential to test its functionality. Speak into the microphone and check if the sound is clear and audible through the receiver. Adjust the microphone's position or volume levels if necessary.
5. Use the microphone: Once the mini wireless microphone is set up and tested, you can start using it for your intended purpose. Attach the microphone securely to your clothing or use a microphone stand if needed. Move around within the recommended range to maintain a strong and stable connection.
Troubleshooting Common Issues with Mini Wireless Microphones:
1. Interference: If you experience interference or static during use, try changing the channel or frequency on both the microphone and receiver. Additionally, ensure that there are no other electronic devices nearby that may be causing interference.
2. Range limitations: Mini wireless microphones have a limited range within which they can operate effectively. If you move too far away from the receiver, the signal may weaken or cut out entirely. Stay within the recommended range to maintain a reliable connection.
3. Battery life: If the microphone's battery life seems shorter than expected, check for any power-saving features that may be enabled. Adjusting the microphone's settings or reducing the volume levels can help conserve battery life.
4. Audio quality: If the sound quality is poor or distorted, check the microphone's position and ensure it is not obstructed by clothing or other objects. Adjust the microphone's volume levels and distance from your mouth to achieve optimal audio quality.
5. Connectivity issues: If the microphone and receiver fail to pair or lose connection frequently, try resetting both devices and repeating the pairing process. Ensure that the microphone and receiver are within close proximity during the pairing process.
It is important to consult the user manual or manufacturer's instructions specific to your mini wireless microphone model for detailed guidance on usage and troubleshooting.


