How To Use Nd Filter For Portrait ?
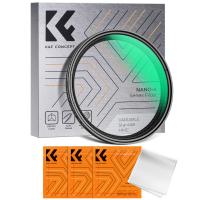
An ND filter can be used for portrait photography to achieve a shallow depth of field in bright lighting conditions. By reducing the amount of light entering the lens, the ND filter allows for wider apertures to be used without overexposing the image. This results in a blurred background and a sharp subject, which is a desirable effect in portrait photography.
To use an ND filter for portrait photography, attach the filter to the lens and adjust the camera settings accordingly. Start by setting the ISO to the lowest possible value and the aperture to the widest possible setting. Then, adjust the shutter speed to achieve the correct exposure. The ND filter will allow for a slower shutter speed to be used without overexposing the image.
It is important to note that the strength of the ND filter will affect the amount of light reduction and the resulting effect on the image. A stronger ND filter will reduce more light and allow for wider apertures to be used, resulting in a shallower depth of field. Experiment with different strengths of ND filters to achieve the desired effect.
1、 ND filter basics for portrait photography
How to use ND filter for portrait:
ND filters are a great tool for portrait photography, especially when shooting in bright sunlight. Here are some basic steps to use ND filters for portrait photography:
1. Choose the right ND filter: ND filters come in different strengths, ranging from ND2 to ND1000. For portrait photography, ND2 or ND4 filters are usually sufficient.
2. Set up your camera: Set your camera to manual mode and adjust the aperture and shutter speed to achieve the desired depth of field and exposure.
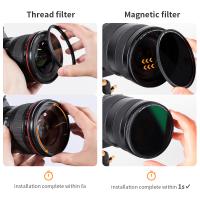
3. Attach the ND filter: Screw the ND filter onto the front of your lens. Make sure it is securely attached and aligned properly.
4. Adjust the exposure: With the ND filter attached, the amount of light entering the lens will be reduced. Adjust the shutter speed or aperture to compensate for the reduced light.
5. Take the shot: Once you have adjusted the exposure, take the shot as you normally would.
The latest point of view on using ND filters for portrait photography is that they can also be used creatively to achieve unique and artistic effects. For example, using a strong ND filter (such as ND1000) can create a long exposure effect, blurring any movement in the background and creating a dreamy, ethereal look. ND filters can also be used to create shallow depth of field in bright sunlight, allowing for a more cinematic look to your portraits. Experiment with different strengths of ND filters and see how they can enhance your portrait photography.
2、 Choosing the right ND filter strength for portraits
Choosing the right ND filter strength for portraits is crucial to achieving the desired effect. ND filters are used to reduce the amount of light entering the camera, allowing for longer exposure times and wider apertures. This can be particularly useful in portrait photography, where a shallow depth of field is often desired to create a blurred background and draw attention to the subject.
When selecting an ND filter for portrait photography, it is important to consider the strength of the filter. ND filters come in different strengths, ranging from ND2 to ND1000. The strength of the filter is determined by the amount of light it blocks, with higher numbers indicating a stronger filter.
For portrait photography, a good starting point is an ND filter with a strength of around ND4 or ND8. This will allow for a wider aperture and longer exposure times, while still maintaining a good level of detail in the image. However, the strength of the filter will ultimately depend on the lighting conditions and the desired effect.
It is also important to consider the type of ND filter being used. Some filters can introduce color casts or reduce image sharpness, so it is important to choose a high-quality filter from a reputable brand.
In terms of using an ND filter for portrait photography, it is important to experiment with different settings and strengths to achieve the desired effect. This may involve adjusting the exposure time, aperture, and ISO settings to compensate for the reduced light entering the camera.
Overall, using an ND filter for portrait photography can be a great way to achieve a shallow depth of field and create a more artistic and visually appealing image. By choosing the right strength and experimenting with different settings, photographers can achieve stunning results that truly capture the essence of their subject.
3、 Using ND filters to control depth of field in portraits
How to use ND filter for portrait photography is a common question among photographers. ND filters are used to control the amount of light entering the camera, allowing for longer exposure times without overexposing the image. This can be particularly useful in portrait photography, where a shallow depth of field is often desired.
To use an ND filter for portrait photography, first, select the appropriate filter strength based on the lighting conditions and desired effect. Next, attach the filter to the lens and adjust the camera settings accordingly. A longer shutter speed may be necessary to compensate for the reduced light entering the camera.
When shooting portraits with an ND filter, it is important to consider the effect on the background. A longer exposure time may result in a blurred background, which can be desirable for some portraits but not for others. Additionally, the use of an ND filter may require the use of a tripod to ensure sharpness in the image.
In recent years, there has been a growing trend towards using natural light and minimal equipment in portrait photography. While ND filters can be a useful tool in certain situations, it is important to consider the overall aesthetic and style of the portrait and whether the use of an ND filter aligns with that vision.
4、 ND filters for balancing exposure in bright light portraits
How to use ND filter for portrait:
ND filters are a great tool for balancing exposure in bright light portraits. Here are some steps to use ND filters for portrait photography:
1. Choose the right ND filter: ND filters come in different strengths, ranging from 1-stop to 10-stops. For portrait photography, a 2-stop or 3-stop ND filter is usually sufficient.
2. Set your camera to manual mode: This will allow you to control the exposure settings and adjust them accordingly.
3. Set your aperture and ISO: Choose a wide aperture (low f-stop number) to create a shallow depth of field and blur the background. Set your ISO to the lowest possible setting to reduce noise.
4. Adjust your shutter speed: With the ND filter attached, your camera will need to use a slower shutter speed to achieve the correct exposure. Start with a shutter speed that is twice the length of the exposure time without the ND filter.
5. Focus on your subject: Use manual focus to ensure your subject is sharp and in focus.
6. Take the shot: Press the shutter button and take the shot. Check the exposure and adjust the shutter speed if necessary.
The latest point of view on using ND filters for portrait photography is that they can be a great tool for creating unique and creative images. By using a slower shutter speed, you can create motion blur or capture movement in your portraits. Additionally, ND filters can help you achieve a shallow depth of field in bright light, which can be difficult to achieve without overexposing the image. Overall, ND filters are a versatile tool that can help you achieve your creative vision in portrait photography.










There are no comments for this blog.