How To Use Nisi Filters ?
To use Nisi filters, first, attach the filter holder to your camera lens using the appropriate adapter ring. Then, insert the desired Nisi filter into the filter holder. Make sure the filter is securely in place. Adjust the position of the filter within the holder to achieve the desired effect. Finally, compose your shot and take the photo. Experiment with different Nisi filters and their positions to achieve various creative effects in your photography.
1、 Understanding Nisi Filters: Types and Functions
Nisi filters are a popular choice among photographers and videographers for enhancing their images and videos. These filters are designed to fit onto the front of a camera lens and can be used to control light, reduce reflections, and enhance colors. Understanding how to use Nisi filters effectively can greatly improve the quality of your photographs and videos.
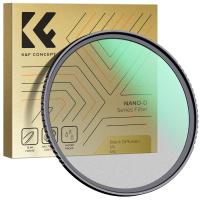
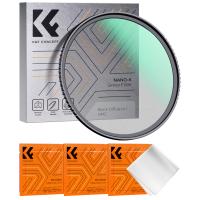
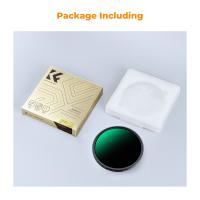
To use Nisi filters, you first need to choose the right type of filter for your specific needs. Nisi offers a wide range of filters, including neutral density (ND) filters, graduated neutral density (GND) filters, polarizing filters, and color filters. Each filter serves a different purpose and can be used in various situations.
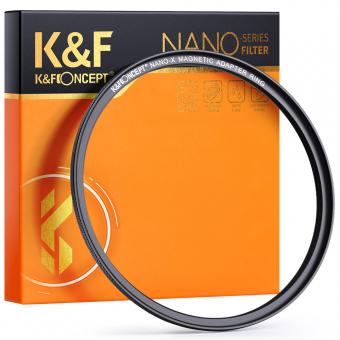
Once you have selected the appropriate filter, attach it to your lens using the filter holder system provided by Nisi. This system allows you to easily slide the filter into place and adjust its position as needed. Make sure the filter is securely attached to prevent any light leaks or movement during shooting.
When using ND filters, you can control the amount of light entering the camera by adjusting the filter's density. This is particularly useful in situations where you want to achieve long exposure effects, such as capturing smooth water or creating motion blur in moving subjects.
GND filters are useful for balancing the exposure between the sky and the foreground in landscape photography. By positioning the darkened portion of the filter over the brighter area of the scene, you can achieve a more balanced exposure.
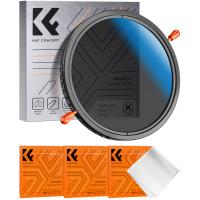
Polarizing filters are great for reducing reflections and enhancing colors. They can be rotated to adjust the amount of polarization, allowing you to control the level of reflection reduction and color saturation.
Lastly, color filters can be used to add creative effects to your images. These filters come in various colors and can be used to enhance specific tones or create a specific mood in your photographs.
In conclusion, understanding how to use Nisi filters effectively can greatly enhance your photography and videography. By selecting the right filter for your needs and using it correctly, you can control light, reduce reflections, and enhance colors to create stunning images and videos.

2、 Step-by-Step Guide to Attaching Nisi Filters to Your Lens
Step-by-Step Guide to Attaching Nisi Filters to Your Lens
Nisi filters are a popular choice among photographers for their high-quality construction and ability to enhance images. Whether you're a beginner or an experienced photographer, here is a step-by-step guide on how to use Nisi filters to elevate your photography game.
1. Choose the Right Filter: Nisi offers a wide range of filters, including neutral density (ND), graduated neutral density (GND), polarizers, and more. Determine the effect you want to achieve and select the appropriate filter for your needs.
2. Prepare Your Lens: Before attaching the filter, make sure your lens is clean and free from any dust or smudges. This will ensure optimal image quality.
3. Attach the Filter Holder: Nisi filters are designed to be used with a filter holder system. Attach the filter holder to your lens by screwing it onto the filter thread. Ensure it is securely fastened to prevent any movement or light leaks.
4. Insert the Filter: Slide the chosen filter into the designated slot on the filter holder. Nisi filters are made from high-quality glass, so handle them with care to avoid any scratches or damage.
5. Adjust the Filter: Once the filter is inserted, you can adjust its position within the holder to achieve the desired effect. For GND filters, position the transition line where you want it to balance the exposure.
6. Check for Light Leaks: After attaching the filter, inspect the setup for any potential light leaks. Adjust the filter holder or use a lens hood if necessary to eliminate any unwanted light entering the lens.
7. Capture Stunning Images: With the Nisi filter attached, you're ready to capture breathtaking images. Experiment with different filters and settings to achieve the desired results.
It's worth noting that Nisi filters are constantly evolving, with new products and innovations being introduced regularly. Stay updated with the latest information and tutorials from Nisi to make the most of your filters and explore new creative possibilities.
3、 Exploring Different Nisi Filter Effects for Creative Photography
To use Nisi filters effectively, it is important to understand their purpose and how they can enhance your photography. Nisi filters are high-quality optical filters that can be attached to your camera lens to achieve various creative effects. Here's a step-by-step guide on how to use Nisi filters:
1. Choose the right filter: Nisi offers a wide range of filters, including neutral density (ND), graduated neutral density (GND), polarizers, and color filters. Determine the effect you want to achieve and select the appropriate filter.
2. Attach the filter holder: Nisi filters are designed to be used with a filter holder system. Attach the filter holder to your lens by screwing it onto the filter thread.
3. Insert the filter: Slide the chosen filter into the designated slot on the filter holder. Make sure it is securely in place.
4. Adjust the position: Use the filter holder's adjustable knobs to position the filter correctly. For GND filters, align the transition line with the horizon or any other desired point of reference.
5. Set the exposure: When using ND filters, you will need to compensate for the reduced light entering the lens. Adjust your camera settings accordingly, such as increasing the exposure time or widening the aperture.
6. Experiment and be creative: Nisi filters offer a range of effects, from long exposure photography to enhancing colors and reducing reflections. Explore different combinations of filters and settings to achieve unique and captivating images.
The latest point of view on Nisi filters is that they continue to be highly regarded by photographers for their exceptional quality and performance. Nisi has been consistently innovating and introducing new filters to meet the evolving needs of photographers. Their filters are known for their excellent color accuracy, minimal color cast, and durability. Additionally, Nisi has also introduced filter systems specifically designed for mirrorless cameras, catering to the growing popularity of these cameras in the photography community. Overall, Nisi filters are a reliable and versatile tool for photographers looking to add creativity and impact to their images.
4、 Tips for Properly Adjusting Nisi Filters to Achieve Desired Results
Tips for Properly Adjusting Nisi Filters to Achieve Desired Results
Nisi filters are a popular choice among photographers and videographers for enhancing their images and videos. These filters can help you achieve a variety of effects, such as reducing glare, enhancing colors, and creating long exposure effects. However, to get the best results, it's important to know how to use Nisi filters effectively. Here are some tips to help you properly adjust Nisi filters and achieve your desired results:
1. Understand the different types of Nisi filters: Nisi offers a wide range of filters, including neutral density (ND) filters, graduated ND filters, polarizers, and more. Each filter serves a specific purpose, so it's important to understand their functions and how they can enhance your images.
2. Choose the right filter strength: Nisi filters come in different strengths, such as ND2, ND4, ND8, etc. The strength determines the amount of light that is allowed to pass through the filter. For example, a higher strength ND filter will block more light, allowing for longer exposures. Choose the filter strength based on the effect you want to achieve and the lighting conditions.
3. Properly mount the filter: Ensure that the filter is securely mounted on your lens to avoid any light leaks or unwanted reflections. Use the filter holder system provided by Nisi for a secure and precise fit.
4. Adjust the filter position: Graduated ND filters are often used to balance the exposure between the sky and the foreground. To achieve the desired effect, position the filter in the filter holder so that the transition line aligns with the horizon or any other desired point of separation.
5. Experiment with different combinations: Nisi filters can be used in combination to achieve unique effects. For example, you can use a polarizer along with an ND filter to reduce glare and create long exposure effects simultaneously. Don't be afraid to experiment and try different combinations to achieve your desired results.
6. Post-processing: While Nisi filters can enhance your images in-camera, some post-processing may still be required to fine-tune the results. Use editing software to adjust the exposure, contrast, and colors as needed.
In conclusion, properly adjusting Nisi filters requires an understanding of their functions and how they can enhance your images. By following these tips and experimenting with different combinations, you can achieve stunning results and take your photography or videography to the next level.


