How To Use Time Lapse On Action Camera ?
To use time lapse on an action camera, you typically need to follow these steps:
1. Access the camera's settings menu: Turn on the camera and navigate to the settings menu. The exact method may vary depending on the camera model.
2. Select time lapse mode: Look for an option that allows you to choose the time lapse mode. It may be labeled as "Time Lapse," "Interval Shooting," or something similar.
3. Set the interval: Once in time lapse mode, you can usually set the interval between shots. This determines how frequently the camera will capture images. For example, you can set it to take a photo every 1, 5, or 10 seconds.
4. Adjust other settings: Some cameras offer additional settings like exposure, white balance, or resolution. You can customize these settings based on your preferences or the shooting conditions.
5. Start recording: After configuring the desired settings, start the time lapse recording. The camera will automatically capture images at the specified interval until you stop it.
6. Playback or edit: Once you finish recording, you can either play back the time lapse video directly on the camera or transfer the images to a computer for editing and creating a final time lapse video.
Remember to consult your camera's user manual for specific instructions as the steps may vary depending on the brand and model.
1、 Setting up time lapse mode on your action camera
Setting up time lapse mode on your action camera is a great way to capture stunning footage of long-duration events or slow-moving subjects. Whether you want to document a beautiful sunset, a construction project, or a bustling cityscape, time lapse mode allows you to condense hours or even days into a few seconds of captivating video.
To begin, make sure your action camera has a time lapse mode. Most modern action cameras have this feature, but the exact steps may vary depending on the brand and model. Consult your camera's user manual for specific instructions.
Once you've confirmed that your camera has time lapse mode, follow these general steps:
1. Mount your action camera securely in the desired location. Use a tripod or other stable surface to ensure steady footage.
2. Access the camera's settings menu and navigate to the time lapse mode option. This may be located under the video or photo settings.
3. Adjust the interval between shots. This determines how often the camera will take a photo. For example, if you set the interval to 5 seconds, the camera will capture a photo every 5 seconds.
4. Set the duration of the time lapse. This determines how long the camera will continue taking photos. You can choose a specific time frame or set the camera to continue until the memory card is full.
5. Start the time lapse recording and let the camera do its work. Make sure to keep the camera powered and the memory card has enough space to store the photos.
6. Once the time lapse is complete, transfer the photos to your computer and use video editing software to compile them into a time lapse video. Many action cameras also have built-in editing features that allow you to create the time lapse directly on the camera.
Remember to experiment with different intervals and durations to achieve the desired effect. Time lapse videos can be a powerful storytelling tool, capturing the passage of time in a visually captivating way. So go out, set up your action camera's time lapse mode, and unleash your creativity!
2、 Adjusting time interval for capturing time lapse footage
To use time lapse on an action camera, you need to adjust the time interval for capturing time lapse footage. Here's how you can do it:
1. Access the settings menu: Turn on your action camera and navigate to the settings menu. The location of the settings menu may vary depending on the brand and model of your camera.
2. Find the time lapse option: Look for the time lapse feature in the settings menu. It is usually located under the shooting or capture mode options.
3. Set the time interval: Once you have found the time lapse option, you can adjust the time interval for capturing the footage. The time interval determines how often the camera will take a photo or record a video during the time lapse. You can choose intervals ranging from a few seconds to several minutes, depending on your preference.
4. Frame your shot: Before you start the time lapse, make sure to frame your shot properly. Consider the subject, composition, and any movement that you want to capture in the time lapse.
5. Start the time lapse: Once you have adjusted the time interval and framed your shot, you can start the time lapse. Press the record button or activate the time lapse mode, and let the camera capture the footage for the desired duration.
The latest point of view on using time lapse on action cameras is that it has become increasingly popular among adventure enthusiasts, vloggers, and filmmakers. Time lapse footage can add a unique and visually appealing element to videos, showcasing the passage of time in a condensed and captivating manner. With advancements in technology, action cameras now offer more customizable options for time lapse, allowing users to experiment with different time intervals and capture stunning visuals. Additionally, some action cameras even have built-in editing features that allow you to create time lapse videos directly on the camera itself. Overall, using time lapse on action cameras is a great way to capture and share dynamic and engaging footage.
3、 Selecting the appropriate duration for your time lapse video
To use time lapse on an action camera, follow these steps:
1. Set up your action camera on a stable surface or mount it securely to a tripod or other support.
2. Access the camera's settings menu and navigate to the time lapse mode. This may vary depending on the brand and model of your camera, so consult the user manual if needed.
3. Adjust the interval between shots. This determines how frequently the camera will capture images. For example, if you set the interval to 5 seconds, the camera will take a photo every 5 seconds.
4. Determine the duration of your time lapse video. This depends on the subject and the effect you want to achieve. For example, a longer duration may be suitable for capturing a sunset, while a shorter duration may be ideal for capturing fast-moving action.
5. Start recording. Once you have set up the camera and adjusted the settings, press the record button to begin capturing the time lapse sequence.
6. Let the camera run for the desired duration. Make sure to keep the camera steady and avoid any movement or disturbance that could affect the final video quality.
7. Stop recording when you have captured enough footage for your time lapse video.
When selecting the appropriate duration for your time lapse video, consider the subject and the story you want to tell. If you are capturing a slow-moving scene, such as clouds moving across the sky, a longer duration may be suitable to showcase the gradual changes. On the other hand, if you are capturing a fast-paced action, such as a sports event, a shorter duration with a higher interval between shots may be more appropriate to capture the quick movements.
It's also important to consider the final output format and platform where you plan to share your time lapse video. For social media platforms like Instagram or TikTok, shorter durations are often preferred to keep the audience engaged. However, for longer-form videos on platforms like YouTube, you may have more flexibility in choosing a duration that suits your storytelling.
Ultimately, the duration of your time lapse video is a creative decision that depends on your vision and the story you want to convey. Experiment with different durations and intervals to find the perfect balance for your time lapse videos.
4、 Mounting your action camera for stable time lapse shots
Mounting your action camera for stable time lapse shots is a crucial step in capturing stunning footage. Time lapse photography allows you to condense hours or even days into a few seconds, creating a visually captivating effect. Here's how to use time lapse on an action camera:
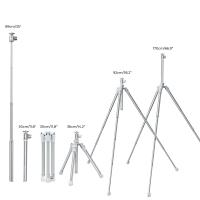
1. Choose the right mount: Select a stable and secure mount that suits your shooting location. Popular options include tripods, suction cups, and chest mounts. Ensure that the mount is compatible with your action camera model.
2. Positioning: Find a vantage point that offers an interesting perspective and a clear view of the subject. Consider the composition and framing of your shot. Experiment with different angles and heights to capture the best footage.
3. Stabilize the camera: To avoid shaky footage, use a stabilizing accessory like a gimbal or a tripod with a built-in stabilizer. This will help eliminate vibrations and ensure smooth, professional-looking time lapse sequences.
4. Set up the camera: Adjust the camera settings according to your desired time lapse interval and duration. Most action cameras have a dedicated time lapse mode that allows you to set the interval between shots (e.g., every 5 seconds) and the total duration of the time lapse (e.g., 1 hour).
5. Frame your shot: Use the camera's LCD screen or a smartphone app to frame your shot accurately. Ensure that the subject remains in focus throughout the time lapse sequence.
6. Start shooting: Once everything is set up, press the record button and let the camera capture the time lapse sequence. Avoid touching or moving the camera during the process to maintain stability.
Remember to check the latest user manual or online resources for specific instructions tailored to your action camera model. Additionally, keep in mind that technology is constantly evolving, so staying updated with the latest features and firmware updates can enhance your time lapse experience.
