How To Weather Seal A Lens ?
Weather sealing a lens involves protecting it from moisture, dust, and other environmental elements that can damage the lens and affect its performance. The process typically involves using specialized weather sealing materials such as gaskets, o-rings, and silicone sealants to create a barrier between the lens and the outside environment. Some lenses come with built-in weather sealing, while others require aftermarket modifications to achieve weather resistance. To weather seal a lens, you should first clean it thoroughly and remove any existing debris or dust. Then, you can apply the weather sealing materials to the lens body and any openings or seams where moisture or dust could enter. It's important to follow the manufacturer's instructions carefully and ensure that the seal is tight and secure. Additionally, you should avoid exposing the lens to extreme temperatures or humidity levels, as these can compromise the weather sealing and damage the lens over time.
1、 Types of weather sealing materials
How to weather seal a lens:
Weather sealing a lens is an important step to protect it from moisture, dust, and other environmental factors. Here are some steps to weather seal a lens:
1. Clean the lens: Before sealing the lens, make sure it is clean and free of any dust or debris.
2. Apply weather sealing tape: Use weather sealing tape to cover any gaps or openings in the lens. This tape is designed to be waterproof and will help keep moisture and dust out of the lens.
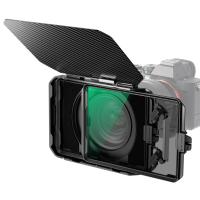
3. Use a lens hood: A lens hood can help protect the lens from rain and other environmental factors. It can also help reduce glare and improve image quality.
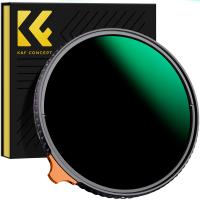
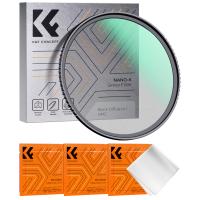
4. Use a protective filter: A protective filter can help protect the lens from scratches and other damage. It can also help keep moisture and dust out of the lens.
Types of weather sealing materials:
There are several types of weather sealing materials that can be used to protect a lens. Some of the most common materials include:
1. Weather sealing tape: This tape is designed to be waterproof and can be used to cover any gaps or openings in the lens.
2. Silicone sealant: Silicone sealant can be used to seal the lens against moisture and dust. It is also flexible and can withstand temperature changes.
3. Rubber gaskets: Rubber gaskets can be used to create a tight seal around the lens. They are often used in conjunction with weather sealing tape.
4. O-rings: O-rings can be used to create a waterproof seal around the lens. They are often used in underwater photography.
5. Nano-coatings: Nano-coatings are a newer type of weather sealing material that can be applied to the lens. They are designed to repel water and other environmental factors.
In conclusion, weather sealing a lens is an important step to protect it from moisture, dust, and other environmental factors. There are several types of weather sealing materials that can be used, and the latest point of view is that nano-coatings are becoming more popular due to their effectiveness in repelling water and other environmental factors.
2、 Steps for applying weather sealing to a lens
Steps for applying weather sealing to a lens:
1. Clean the lens: Before applying any weather sealing material, it is important to clean the lens thoroughly. Use a microfiber cloth to remove any dust or debris from the lens surface.
2. Apply weather sealing material: There are various types of weather sealing materials available in the market, such as silicone grease, rubber sealant, and weather sealing tape. Choose the one that suits your lens and apply it carefully around the lens mount and other openings.
3. Let it dry: After applying the weather sealing material, let it dry completely before using the lens. This may take a few hours or overnight, depending on the type of material used.
4. Test the seal: Once the weather sealing material has dried, test the seal by exposing the lens to water or moisture. If there are any leaks, reapply the weather sealing material and let it dry again.
5. Maintain the seal: Weather sealing is not a one-time process. It is important to regularly check and maintain the seal to ensure that it remains effective. Clean the lens regularly and reapply the weather sealing material as needed.
It is important to note that not all lenses are weather-sealed, and even those that are may not be completely waterproof. Weather sealing can help protect your lens from dust, moisture, and other environmental factors, but it is not a guarantee against damage. It is always best to exercise caution when using your camera in challenging weather conditions and to take steps to protect your equipment.
3、 Common mistakes to avoid during weather sealing
How to weather seal a lens:
Weather sealing a lens is an important step to protect your camera gear from moisture, dust, and other environmental factors. Here are the steps to weather seal a lens:
1. Clean the lens: Before sealing the lens, make sure it is clean and free of any dust or debris.
2. Apply weather sealing tape: Use weather sealing tape to cover any gaps or openings on the lens. Make sure to cover the lens mount, focus ring, and any other areas where moisture or dust could enter.
3. Use a lens hood: A lens hood can help protect the lens from rain and other environmental factors.
4. Use a rain cover: If you plan on shooting in heavy rain or snow, consider using a rain cover to protect your camera and lens.
Common mistakes to avoid during weather sealing:
1. Using the wrong type of tape: Make sure to use weather sealing tape specifically designed for camera gear. Using the wrong type of tape can damage your lens or camera.
2. Not cleaning the lens: Failing to clean the lens before sealing it can trap dust and debris inside, causing damage to the lens.
3. Overlapping tape: Overlapping tape can create gaps and allow moisture or dust to enter.
4. Not using a lens hood: A lens hood can help protect the lens from rain and other environmental factors. Failing to use a lens hood can increase the risk of damage to the lens.
5. Not using a rain cover: If you plan on shooting in heavy rain or snow, not using a rain cover can increase the risk of damage to your camera and lens.
It is important to note that weather sealing is not a foolproof method of protecting your camera gear. It is still important to take precautions and avoid exposing your gear to extreme weather conditions whenever possible.
4、 Maintenance tips for weather-sealed lenses
Maintenance tips for weather-sealed lenses:
Weather-sealed lenses are designed to withstand harsh weather conditions, but they still require proper maintenance to ensure their longevity and performance. Here are some tips to keep your weather-sealed lenses in top condition:
1. Keep them clean: Dirt, dust, and moisture can accumulate on the lens surface, affecting image quality. Use a soft-bristled brush or a microfiber cloth to gently clean the lens. Avoid using harsh chemicals or abrasive materials that can scratch the lens coating.
2. Store them properly: When not in use, store your weather-sealed lenses in a dry, cool place. Avoid exposing them to extreme temperatures or humidity, which can damage the lens elements.
3. Check the seals: Inspect the rubber seals around the lens mount and other openings for signs of wear or damage. If the seals are cracked or missing, replace them immediately to maintain the lens's weather resistance.
4. Use a lens hood: A lens hood can help protect the lens from rain, snow, and other elements. It also helps reduce lens flare and improves contrast.
5. Be cautious in extreme conditions: While weather-sealed lenses are designed to withstand harsh weather conditions, it's still important to exercise caution. Avoid exposing the lens to extreme temperatures, high humidity, or heavy rain for extended periods.
In conclusion, proper maintenance is key to keeping your weather-sealed lenses in top condition. By following these tips, you can ensure that your lenses perform at their best and last for years to come.














There are no comments for this blog.