Microscope Photography How To ?
Microscope photography involves capturing images of microscopic subjects using a microscope and a camera. To get started, you will need a microscope with a camera attachment or a smartphone adapter. Here are some basic steps to follow:
1. Set up your microscope: Ensure that your microscope is properly set up and focused on the subject you want to photograph. Adjust the lighting and magnification as needed.
2. Attach the camera: If your microscope has a camera attachment, connect your camera to it. If not, use a smartphone adapter to attach your smartphone to the eyepiece of the microscope.
3. Adjust camera settings: Set your camera or smartphone to the appropriate settings for macro or close-up photography. Adjust the focus, exposure, and white balance as needed.
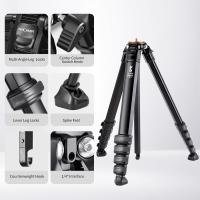
4. Stabilize the setup: Use a tripod or other stable support to minimize camera shake and ensure sharp images.
5. Capture the image: Look through the eyepiece or use the camera's live view to compose your shot. Take multiple shots at different magnifications and angles to capture different details.
6. Post-processing: Transfer the images to your computer and use image editing software to enhance and adjust the photos if desired.
Remember to follow proper microscope handling and safety guidelines while conducting microscope photography. Experiment with different techniques and settings to achieve the desired results.
1、 Equipment and Setup for Microscope Photography
Microscope photography is a fascinating field that allows us to capture the intricate details of microscopic subjects. To get started with microscope photography, you will need the right equipment and setup. Here is a guide on how to set up your equipment for microscope photography.
1. Microscope: Choose a high-quality microscope that suits your needs. Look for features like adjustable magnification, a sturdy build, and compatibility with a camera attachment.
2. Camera: Use a digital camera with manual settings for better control over the image. A DSLR or mirrorless camera is ideal, as they offer interchangeable lenses and larger sensors for improved image quality.
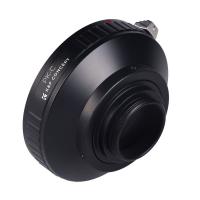
3. Camera Mount: Attach your camera to the microscope using a camera mount or an adapter specific to your microscope model. This ensures stability and precise alignment between the camera and the microscope.
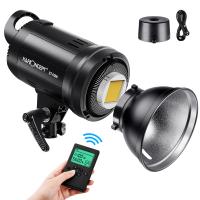
4. Lighting: Proper lighting is crucial for microscope photography. Use a bright and even light source, such as a microscope ring light or an external LED light, to illuminate the subject. Avoid using the microscope's built-in light source, as it may not provide sufficient illumination.
5. Focus and Depth of Field: Achieving sharp focus and a suitable depth of field can be challenging in microscope photography. Use the microscope's fine focus adjustment to achieve precise focus, and adjust the aperture on your camera to control the depth of field.
6. Stabilization: To minimize camera shake and ensure sharp images, use a tripod or a stable surface to support your camera. Additionally, consider using a remote shutter release or the camera's self-timer function to further reduce vibrations.
7. Experiment and Practice: Microscope photography requires patience and experimentation. Try different magnifications, lighting angles, and subject positioning to capture unique and captivating images. Practice regularly to improve your skills and understanding of the microscope's capabilities.
It's worth noting that technology is constantly evolving, and new equipment and techniques may emerge in the field of microscope photography. Stay updated with the latest advancements and incorporate them into your setup as appropriate.
2、 Techniques for Capturing High-Quality Microscope Images
Microscope photography is a fascinating field that allows us to capture intricate details of the microscopic world. To achieve high-quality microscope images, it is essential to follow certain techniques and considerations.
Firstly, it is crucial to have a good understanding of the microscope and its settings. Familiarize yourself with the different components of the microscope, such as the objective lens, condenser, and eyepiece. Adjust the focus and lighting to ensure optimal image quality.
Next, choose the right microscope for your needs. There are various types of microscopes available, including compound, stereo, and digital microscopes. Each has its own advantages and limitations, so select one that suits your specific requirements.
Lighting plays a crucial role in microscope photography. Proper illumination is essential to highlight the subject and enhance image clarity. Experiment with different lighting techniques, such as brightfield, darkfield, and phase contrast, to achieve the desired effect.
To capture high-quality images, it is important to stabilize the microscope and minimize vibrations. Use a sturdy tripod or mount to prevent any movement that could blur the image. Additionally, consider using a remote shutter release or a timer to avoid camera shake.
When it comes to camera settings, use a low ISO to reduce noise and select a small aperture for a greater depth of field. Adjust the shutter speed accordingly to achieve the desired exposure. Additionally, shooting in RAW format allows for greater flexibility in post-processing.
Lastly, pay attention to composition and framing. Experiment with different angles and perspectives to create visually appealing images. Consider using a macro lens or extension tubes to capture even more detail.
In conclusion, capturing high-quality microscope images requires a combination of technical knowledge, proper equipment, and artistic vision. By following these techniques and experimenting with different approaches, you can unlock the fascinating world of microscope photography.

3、 Lighting and Illumination in Microscope Photography
Microscope photography is a fascinating field that allows us to capture the intricate details of microscopic subjects. One crucial aspect of achieving high-quality microscope photographs is understanding lighting and illumination techniques.
When it comes to lighting in microscope photography, there are several key factors to consider. Firstly, it is important to ensure that the subject is evenly illuminated. Uneven lighting can result in shadows or overexposure, which can obscure details or create unwanted artifacts in the image. To achieve even lighting, one can use diffused light sources such as a ring light or a diffuser placed over the microscope's light source.
Another important consideration is the angle of illumination. By adjusting the angle of the light source, one can highlight specific features or textures of the subject. Experimenting with different angles can help bring out the desired details and create visually appealing images.
Additionally, the intensity of the light should be carefully controlled. Too much light can cause overexposure and wash out the details, while too little light can result in underexposed images. Adjusting the microscope's aperture and shutter speed can help achieve the optimal balance of light.
In recent years, advancements in LED technology have greatly improved lighting options for microscope photography. LED lights offer a more consistent and controllable light source compared to traditional halogen bulbs. They also provide a wider range of color temperatures, allowing photographers to accurately capture the colors of the subject.
In conclusion, mastering lighting and illumination techniques is essential for successful microscope photography. By ensuring even illumination, adjusting the angle of light, and controlling the intensity, photographers can capture stunning images that reveal the hidden beauty of the microscopic world. The latest advancements in LED lighting technology have further enhanced the possibilities in this field, providing photographers with more control and flexibility in their work.

4、 Image Processing and Editing for Microscope Photography
Microscope photography is a fascinating field that allows us to capture the intricate details of microscopic objects. To achieve high-quality microscope images, it is essential to understand the techniques of image processing and editing. Here is a guide on how to enhance your microscope photography skills.
Firstly, it is crucial to capture the best possible image straight from the microscope. Ensure that the microscope is properly calibrated and focused, and adjust the lighting conditions to minimize glare and maximize contrast. Use the appropriate magnification and choose the right objective lens for the desired level of detail.
Once the image is captured, it is time to process and edit it. Start by importing the image into a software program specifically designed for image processing, such as Adobe Photoshop or ImageJ. Adjust the brightness, contrast, and color levels to enhance the visibility of the specimen's features. Be careful not to over-process the image, as it can lead to loss of detail and introduce artifacts.
Consider applying image filters to reduce noise and improve sharpness. Techniques like deconvolution can help to enhance the clarity of the image. Additionally, you can use image stitching software to create a larger, more detailed composite image from multiple smaller images.
The latest point of view in microscope photography is the use of artificial intelligence (AI) algorithms for image processing. AI can automatically enhance images by applying advanced algorithms that optimize contrast, remove noise, and improve resolution. This technology is particularly useful when dealing with large datasets or when time is limited.
In conclusion, mastering the techniques of image processing and editing is essential for obtaining high-quality microscope photographs. By following the steps outlined above and staying up-to-date with the latest advancements in AI technology, you can take your microscope photography to the next level.


