Monopod Selfie Stick How To Use ?
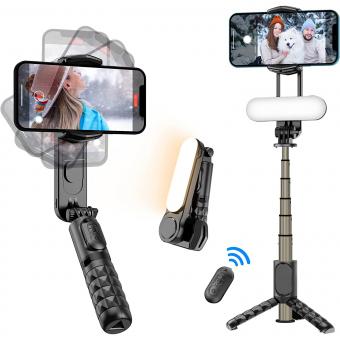
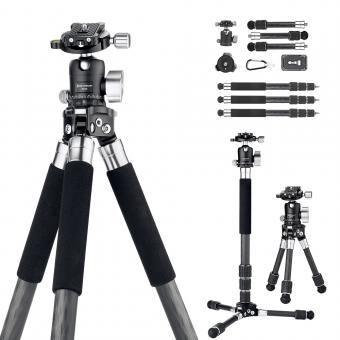
To use a monopod selfie stick, first, extend the stick to your desired length by pulling it outwards. Then, attach your smartphone or camera to the mount at the top of the stick. Make sure it is securely fastened. Next, set the timer or use a remote control if your selfie stick has one. Hold the stick firmly with one hand and extend your arm to capture the desired angle. Press the shutter button or use the remote control to take the photo. Adjust the angle and position as needed to capture different shots. Finally, retract the stick back to its original length and store it safely when you are done.
1、 Assembly and Setup of Monopod Selfie Stick
Assembly and Setup of Monopod Selfie Stick
Using a monopod selfie stick is a great way to capture amazing photos and videos from unique angles. To make the most of your monopod selfie stick, follow these steps for assembly and setup:
1. Unbox the selfie stick: Start by removing the monopod selfie stick from its packaging. Ensure that all the components are present, including the stick itself, the phone holder, and any additional attachments.
2. Extend the stick: Extend the stick to its full length by pulling it gently. Most selfie sticks have multiple sections that can be adjusted to achieve the desired length. Make sure to lock each section securely in place.
3. Attach the phone holder: Locate the phone holder attachment and screw it onto the top of the stick. Adjust the holder's angle to ensure that your phone will be positioned correctly for capturing photos or videos.
4. Connect your phone: Open the phone holder and place your smartphone inside. Adjust the holder's grip to securely hold your phone in place. Ensure that your phone is centered and balanced to prevent it from falling off.
5. Pair with Bluetooth (if applicable): Some monopod selfie sticks come with built-in Bluetooth functionality. If your selfie stick has this feature, turn on the Bluetooth on your phone and pair it with the selfie stick. This will allow you to remotely control the camera shutter using the selfie stick's buttons.
6. Adjust the angle: Once your phone is securely attached, adjust the angle of the stick to frame your shot. Experiment with different angles and heights to find the best composition for your photos or videos.
7. Capture your shot: With everything set up, you are now ready to start capturing amazing selfies or group photos. Use the selfie stick's buttons or remote control (if included) to trigger the camera shutter.
Remember to always be mindful of your surroundings and considerate of others when using a monopod selfie stick. Some places may have restrictions on their use, so be sure to check local regulations before using your selfie stick in public spaces.
In conclusion, assembling and setting up a monopod selfie stick is a straightforward process. By following these steps, you can start capturing incredible photos and videos from unique perspectives.
2、 Adjusting the Length and Angle of the Selfie Stick
Adjusting the Length and Angle of the Selfie Stick
Using a monopod selfie stick can greatly enhance your photography experience, allowing you to capture unique angles and include more people in your shots. To make the most of your selfie stick, it's important to know how to adjust its length and angle effectively.
Firstly, start by extending the selfie stick to your desired length. Most selfie sticks have telescopic handles that can be extended and locked into place. Make sure to tighten the locking mechanism securely to prevent any accidental collapses while in use. Adjusting the length of the selfie stick will allow you to capture a wider perspective or get closer to your subject.
Next, position your smartphone or camera securely in the phone holder or mount at the end of the selfie stick. Ensure that it is tightly secured to prevent any accidental drops. Many selfie sticks also have a rotating head, allowing you to adjust the angle of your device. Experiment with different angles to find the most flattering and interesting composition for your photos.
It's important to note that some selfie sticks come with Bluetooth remote controls or built-in buttons on the handle. These features allow you to control your device's camera remotely, eliminating the need for a timer or reaching for the shutter button. This can be particularly useful when capturing group shots or when you want to include yourself in the frame.
Lastly, always be mindful of your surroundings when using a selfie stick. Be considerate of others and avoid obstructing pathways or causing any inconvenience. Additionally, some places may have restrictions on the use of selfie sticks, so it's important to respect any rules or guidelines in place.
In conclusion, adjusting the length and angle of your monopod selfie stick is essential for capturing the perfect shot. By following these guidelines and considering the latest advancements in selfie stick technology, you can elevate your photography skills and create memorable images.
3、 Attaching and Securing Your Smartphone to the Selfie Stick
Attaching and Securing Your Smartphone to the Selfie Stick
Using a monopod selfie stick can greatly enhance your photography experience, allowing you to capture amazing selfies and group shots from unique angles. To make the most of your selfie stick, it is important to know how to properly attach and secure your smartphone. Here's a step-by-step guide on how to do it:
1. Extend the stick: Start by extending the monopod to your desired length. Most selfie sticks have telescopic handles that can be adjusted to various lengths.
2. Adjust the phone holder: Locate the phone holder on the top of the stick. It usually has an adjustable clamp that can accommodate different smartphone sizes. Adjust the holder to fit your phone securely.
3. Insert your smartphone: Gently place your smartphone into the holder, making sure it is centered and aligned with the stick. Ensure that the phone is securely held by the clamp, so it doesn't accidentally slip out.
4. Tighten the clamp: Once your phone is in place, tighten the clamp to secure it. Be careful not to overtighten, as it may damage your phone or the selfie stick.
5. Connect the cable (if applicable): If your selfie stick has a built-in cable for remote shutter control, connect it to your phone's headphone jack or charging port. This will allow you to capture photos by pressing the button on the handle.
6. Adjust the angle: Once your phone is securely attached, you can adjust the angle of the stick to frame your shot. Most selfie sticks have a 180-degree rotation feature, allowing you to capture photos from different perspectives.
Remember to exercise caution while using a selfie stick, especially in crowded areas, to avoid accidentally hitting someone or damaging property. Additionally, always follow local regulations and guidelines regarding the use of selfie sticks in public spaces.
In conclusion, attaching and securing your smartphone to a monopod selfie stick is a simple process that can greatly enhance your photography experience. By following these steps, you'll be ready to capture amazing selfies and group shots from unique angles.
4、 Operating the Shutter Button on the Selfie Stick
Operating the Shutter Button on the Selfie Stick
The monopod selfie stick has become a popular accessory for capturing the perfect selfie or group photo. With its extendable arm and built-in shutter button, it allows users to take photos from a distance, providing a wider angle and eliminating the need for a timer or someone else to take the picture.
To use the monopod selfie stick, start by extending the arm to your desired length. Most selfie sticks have a telescopic design that allows for easy adjustment. Once the stick is extended, attach your smartphone or camera to the mount at the end of the stick. Make sure it is securely fastened to prevent any accidents.
Now, it's time to operate the shutter button. The location of the shutter button may vary depending on the model of the selfie stick, but it is typically located on the handle or grip of the stick. Some selfie sticks have a wired connection that plugs into your phone's headphone jack, while others use Bluetooth technology to connect wirelessly.
If your selfie stick has a wired connection, simply plug it into your phone's headphone jack. Open your camera app and press the shutter button on the selfie stick to take a photo. If your selfie stick uses Bluetooth, make sure your phone's Bluetooth is turned on and pair it with the selfie stick. Once connected, open your camera app and press the shutter button on the stick to capture your photo.
It's important to note that some newer smartphones no longer have a headphone jack, which may require the use of an adapter to connect the selfie stick. Additionally, always be aware of your surroundings and use the selfie stick responsibly to avoid any accidents or injuries.
In conclusion, operating the shutter button on a monopod selfie stick is a simple and convenient way to capture the perfect selfie or group photo. With its extendable arm and wireless or wired connection, it provides users with a wider angle and greater flexibility in capturing their desired shots.
