Neewer Wireless Flash Trigger How To Use ?
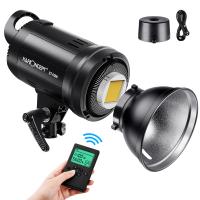
To use the Neewer wireless flash trigger, first, ensure that the trigger and flash units are compatible with each other. Then, insert the trigger into the camera's hot shoe mount. Next, attach the flash unit to the trigger's receiver using the provided cable or by mounting it directly onto the receiver. Make sure both the trigger and flash unit are powered on and set to the same channel. Adjust the flash settings as desired on the camera. When ready to take a photo, press the camera's shutter button, and the trigger will wirelessly communicate with the flash unit to fire the flash at the desired moment.
1、 Understanding the Neewer Wireless Flash Trigger System
Understanding the Neewer Wireless Flash Trigger System
The Neewer wireless flash trigger is a versatile and user-friendly tool that allows photographers to remotely trigger their off-camera flashes. This system is designed to provide a reliable and efficient way to control multiple flashes simultaneously, making it an essential accessory for both professional and amateur photographers.
To use the Neewer wireless flash trigger, follow these steps:
1. Set up your flashes: Attach the wireless receiver to your off-camera flash units. Make sure the receiver is securely connected to the flash's hot shoe.
2. Attach the transmitter: Mount the wireless transmitter onto your camera's hot shoe. Ensure that it is securely attached and aligned properly.
3. Power on: Turn on both the transmitter and receiver units. They should automatically sync with each other.
4. Set the channel: The Neewer wireless flash trigger system allows you to choose from multiple channels to avoid interference from other devices. Set the same channel on both the transmitter and receiver units.
5. Test the connection: Press the test button on the transmitter to check if the flashes are triggered. If the flashes fire, it means the connection is successful.
6. Adjust flash settings: Depending on your specific needs, you can adjust the flash power, zoom, and other settings directly on the flash units.
7. Start shooting: Once the Neewer wireless flash trigger system is set up and functioning correctly, you can start capturing images with off-camera flash.
It's important to note that the Neewer wireless flash trigger system may have specific features and functions that vary depending on the model. Therefore, it is recommended to refer to the user manual provided by Neewer for detailed instructions and troubleshooting tips.
In conclusion, the Neewer wireless flash trigger system is a valuable tool for photographers looking to enhance their lighting setups. With its easy setup process and reliable performance, it allows for creative freedom and flexibility in off-camera flash photography.
2、 Setting up the Neewer Wireless Flash Trigger
Setting up the Neewer Wireless Flash Trigger is a relatively straightforward process that allows photographers to remotely trigger their off-camera flashes. Here is a step-by-step guide on how to use the Neewer Wireless Flash Trigger:
1. Start by inserting the transmitter into your camera's hot shoe mount. Ensure that it is securely attached.
2. Connect the receiver to your off-camera flash using the sync cable provided. Make sure the cable is firmly plugged into both the receiver and the flash.
3. Turn on both the transmitter and the receiver. You will usually find an on/off switch on each device. Check the battery levels to ensure they have enough power.
4. Set the same channel on both the transmitter and the receiver. Most Neewer Wireless Flash Triggers offer multiple channels to avoid interference with other devices. Select the same channel on both devices to establish a connection.
5. Adjust the flash settings on your camera. Depending on your camera model, you may need to enable the flash sync function or set it to "wireless flash" mode. Consult your camera's manual for specific instructions.
6. Test the setup by pressing the shutter button on your camera. If everything is properly connected, the off-camera flash should fire.
It is important to note that the Neewer Wireless Flash Trigger may have specific features or settings that vary depending on the model. Therefore, it is always recommended to refer to the user manual provided with your specific device for detailed instructions.
Additionally, it is worth mentioning that technology is constantly evolving, and new models of the Neewer Wireless Flash Trigger may offer additional features or improvements. Therefore, it is advisable to stay updated with the latest user guides and online resources to make the most of your device.
3、 Syncing the Neewer Wireless Flash Trigger with your Camera
Syncing the Neewer Wireless Flash Trigger with your Camera
The Neewer Wireless Flash Trigger is a versatile tool that allows photographers to remotely trigger their off-camera flash units. It provides a convenient and efficient way to control the lighting in your photography, giving you more creative freedom and flexibility. Here's a step-by-step guide on how to use the Neewer Wireless Flash Trigger:
1. Set up your flash units: Attach the Neewer Wireless Flash Trigger to your camera's hot shoe mount. Then, connect your off-camera flash units to the receiver units using the provided cables. Make sure all the units are securely attached.
2. Power on the units: Turn on the power switch on both the transmitter and receiver units. Ensure that they are on the same channel. The Neewer Wireless Flash Trigger offers multiple channels to avoid interference from other devices.
3. Set your camera and flash settings: Adjust your camera settings according to your desired exposure. Set your flash units to the desired power output and mode (e.g., manual or TTL).
4. Test the trigger: Half-press the shutter button on your camera to focus, and then fully press it to take a test shot. The Neewer Wireless Flash Trigger should trigger the off-camera flash units simultaneously.
5. Fine-tune your settings: If necessary, adjust the power output or position of your flash units to achieve the desired lighting effect. You can also experiment with different angles and modifiers to enhance your creativity.
It's important to note that the Neewer Wireless Flash Trigger may have specific instructions and features depending on the model you have. Therefore, it's always recommended to refer to the user manual provided by Neewer for detailed instructions and troubleshooting tips.
In conclusion, the Neewer Wireless Flash Trigger is a valuable tool for photographers looking to expand their lighting capabilities. By following these steps and experimenting with different settings, you can achieve professional-looking results and take your photography to the next level.
4、 Adjusting Flash Power and Settings with the Neewer Wireless Flash Trigger
The Neewer wireless flash trigger is a versatile tool that allows photographers to remotely control and trigger their off-camera flashes. It provides a convenient and efficient way to adjust flash power and settings without having to physically touch the flash unit.
To use the Neewer wireless flash trigger, follow these steps:
1. Set up your flash units: Mount your flash units on light stands or any other desired location. Ensure that they are securely attached and positioned correctly.
2. Attach the Neewer wireless flash trigger: Connect the transmitter to your camera's hot shoe and the receiver to the flash unit's hot shoe. Make sure they are securely attached.
3. Power on the flash units and the trigger: Turn on both the flash units and the trigger. They should sync automatically, but if they don't, refer to the user manual for troubleshooting steps.
4. Adjust flash power: Depending on your flash unit, you can adjust the power manually on the flash itself or through the camera menu. Some flash units also allow you to adjust the power remotely using the Neewer wireless flash trigger. Experiment with different power levels to achieve the desired lighting effect.
5. Modify flash settings: The Neewer wireless flash trigger may also allow you to adjust other flash settings such as zoom, mode (TTL or manual), and sync speed. Refer to the user manual for specific instructions on how to access and modify these settings.
6. Test and fine-tune: Take test shots and review the results. If necessary, make further adjustments to the flash power and settings until you achieve the desired lighting effect.
The Neewer wireless flash trigger provides photographers with the flexibility and convenience of remotely controlling their off-camera flashes. It allows for precise control over flash power and settings, enabling photographers to unleash their creativity and capture stunning images.









![J12 Mini-projector Outdoor-filmprojector met 100 inch-projectorscherm, 1080P, compatibel met tv-stick, videogames, HDMI, USB, TF, VGA, AUX, AV [Amerikaanse regelgeving] J12 Mini-projector Outdoor-filmprojector met 100 inch-projectorscherm, 1080P, compatibel met tv-stick, videogames, HDMI, USB, TF, VGA, AUX, AV [Amerikaanse regelgeving]](https://img.kentfaith.de/cache/catalog/products/de/GW01.0172/GW01.0172-1-200x200.jpg)
