Olympus Recorder How To Use ?
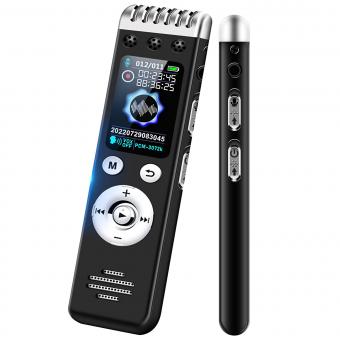
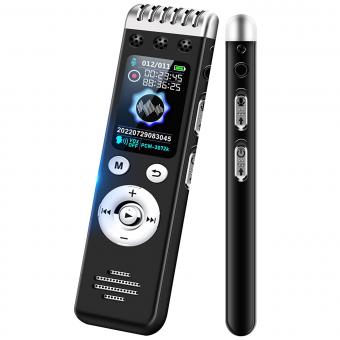
To use an Olympus recorder, first, ensure that the device is charged or has fresh batteries. Then, familiarize yourself with the buttons and controls on the recorder. Typically, there will be buttons for power, recording, playback, and menu navigation.
To start recording, press the record button. You can adjust the recording settings, such as quality and sensitivity, through the menu options. To stop recording, press the stop button.
To playback your recordings, locate the playback button and press it. You can navigate through your recordings using the forward and rewind buttons. Adjust the volume using the volume control buttons.
To transfer your recordings to a computer or other device, connect the recorder using a USB cable. The recorder should be recognized as a removable storage device. You can then copy or move the recordings to your desired location.
Remember to consult the user manual specific to your Olympus recorder model for detailed instructions and additional features.
1、 Basic functions and controls of an Olympus recorder
The Olympus recorder is a versatile and user-friendly device that allows you to capture high-quality audio recordings for various purposes. To make the most of your Olympus recorder, it is essential to understand its basic functions and controls.
Firstly, familiarize yourself with the power button, which is usually located on the side or top of the device. Press and hold this button to turn the recorder on or off. Once powered on, you can navigate through the menu using the arrow buttons or a touch screen, depending on the model.
To start recording, locate the dedicated record button, often denoted by a red dot or symbol. Press this button once to begin recording and again to stop. Some models may have additional recording options, such as voice activation or stereo recording, which can be accessed through the menu.
To playback your recordings, locate the playback button, usually represented by a triangle or arrow symbol. Press this button to start or pause playback. You can adjust the volume using the dedicated volume buttons or through the menu settings.
Additionally, most Olympus recorders offer features like file management, USB connectivity for transferring files to a computer, and the ability to add bookmarks or index points during playback.
It is worth noting that the latest Olympus recorder models may come with advanced features such as noise cancellation, Bluetooth connectivity, and smartphone integration. These features can enhance the recording experience and provide more convenience in managing your audio files.
To fully understand the functions and controls of your specific Olympus recorder model, refer to the user manual provided with the device. The manual will provide detailed instructions and tips on how to use the recorder effectively and take advantage of its latest features.

2、 Recording and playback settings on an Olympus recorder
Olympus recorders are versatile and user-friendly devices that offer a range of recording and playback settings to enhance your audio experience. Whether you are using an Olympus recorder for professional purposes or personal use, understanding how to use its features effectively can greatly improve your recording and playback experience.
To begin, familiarize yourself with the basic functions of the Olympus recorder. This includes turning the device on and off, adjusting the volume, and navigating through the menu options. Most Olympus recorders have a simple interface with clearly labeled buttons, making it easy to navigate and access the various settings.
When it comes to recording, Olympus recorders offer different modes to suit your needs. These modes include dictation, conference, and music, each optimized for specific types of audio recordings. Selecting the appropriate mode ensures that your recordings are clear and of high quality.
Additionally, Olympus recorders often come with advanced features such as noise cancellation and voice activation. These features help eliminate background noise and ensure that only the desired audio is captured. Familiarize yourself with these features and adjust the settings according to your preferences.
During playback, Olympus recorders allow you to adjust the playback speed, repeat sections, and bookmark important parts of the recording. These features are particularly useful for transcribing interviews or lectures, as they enable you to listen at a comfortable pace and easily locate specific sections.
In recent years, Olympus has also introduced smartphone compatibility, allowing you to connect your recorder to your smartphone via Bluetooth or Wi-Fi. This enables you to transfer recordings seamlessly, access additional features through smartphone apps, and even control the recorder remotely.
In conclusion, understanding the recording and playback settings on an Olympus recorder is essential for maximizing its capabilities. By familiarizing yourself with the basic functions, selecting the appropriate recording mode, and utilizing advanced features, you can ensure high-quality recordings and a seamless playback experience.
3、 Transferring and managing files on an Olympus recorder
Transferring and managing files on an Olympus recorder has become increasingly convenient and user-friendly with the latest advancements in technology. Olympus recorders are equipped with various features and functions that make the process seamless and efficient.
To begin, ensure that you have the necessary software installed on your computer. Olympus provides a software called Olympus Sonority, which allows you to transfer, manage, and edit your recorded files. Once installed, connect your Olympus recorder to your computer using a USB cable.
Once connected, your computer should recognize the device and prompt you to open the Olympus Sonority software. Open the software and navigate to the file transfer section. Here, you will be able to view all the recorded files on your Olympus recorder.
To transfer files, simply select the desired files and click on the "Transfer" button. You can choose to transfer the files to your computer's hard drive or directly to a specific folder. Additionally, you can create new folders within the software to organize your recordings.
Furthermore, Olympus Sonority allows you to edit your recordings. You can trim, split, or merge files, adjust the volume, and even add effects to enhance the audio quality. This feature is particularly useful for professionals who require precise editing capabilities.
Moreover, Olympus recorders often come with built-in Wi-Fi or Bluetooth connectivity, enabling wireless file transfer. This eliminates the need for a physical connection and provides greater flexibility in managing your recordings.
In conclusion, transferring and managing files on an Olympus recorder has become a straightforward process with the help of software like Olympus Sonority. The software allows for easy file transfer, organization, and editing, making it a valuable tool for both personal and professional use.
4、 Advanced features and settings of an Olympus recorder
Advanced features and settings of an Olympus recorder
The Olympus recorder is a versatile device that offers a range of advanced features and settings to enhance your recording experience. Whether you are using it for professional purposes or personal use, understanding these features can greatly improve your recording quality and efficiency.
One of the key features of an Olympus recorder is its high-quality microphone system. It is designed to capture clear and crisp audio, even in noisy environments. To optimize the microphone settings, you can adjust the sensitivity level based on the surrounding conditions. This ensures that you capture the desired sound without any distortion or background noise.
Another advanced feature is the voice activation mode. This allows the recorder to automatically start and stop recording when it detects sound. This is particularly useful for hands-free recording or when you want to capture specific moments without having to manually operate the device.
Additionally, the Olympus recorder offers various recording modes, such as stereo, mono, and high-quality PCM. These modes allow you to choose the best format for your specific recording needs. For example, stereo mode is ideal for capturing music or interviews, while mono mode is suitable for dictation or voice memos.
Furthermore, the Olympus recorder comes with a built-in USB connection, making it easy to transfer your recordings to a computer or other devices. This enables quick and convenient sharing or editing of your audio files.
In terms of settings, the Olympus recorder provides options for adjusting playback speed, adding bookmarks, and organizing files into folders. These settings allow you to customize your recording experience and easily navigate through your recordings.
In conclusion, the Olympus recorder offers a range of advanced features and settings that enhance its functionality and usability. By familiarizing yourself with these features, you can make the most out of your recorder and achieve high-quality recordings for your intended purpose.
