How To Attach Mobile Phone To Tripod Adapter ?
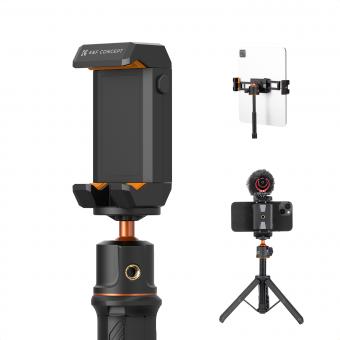
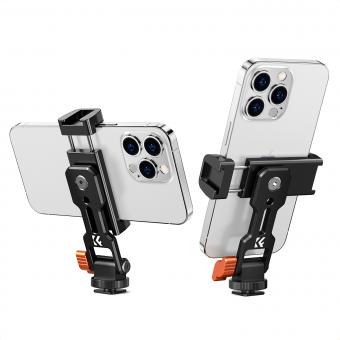
To attach a mobile phone to a tripod adapter, you will need a tripod adapter specifically designed for mobile phones. These adapters typically have adjustable clamps or brackets that can securely hold your phone in place.
To attach your phone, first, ensure that the tripod adapter is compatible with your phone model. Then, open the adapter's clamp or bracket and place your phone inside, making sure it is centered and secure. Adjust the clamp or bracket to fit your phone snugly, but not too tight to avoid damaging it.
Once your phone is securely in place, attach the tripod adapter to the tripod by screwing it onto the tripod's mounting plate or head. Make sure it is tightened properly to prevent any wobbling or movement.
Before using the tripod, double-check that your phone is securely attached and balanced. This will help ensure stability and prevent any accidental falls or damage.
1、 Choosing the Right Tripod Adapter for Your Mobile Phone
Choosing the right tripod adapter for your mobile phone is essential for capturing stable and professional-looking photos and videos. With the increasing popularity of mobile photography and videography, there are numerous options available in the market. Here's a step-by-step guide on how to attach your mobile phone to a tripod adapter:
1. Determine the type of tripod adapter you need: There are various types of tripod adapters available, including universal adapters, specific brand adapters, and adjustable adapters. Consider the compatibility of the adapter with your mobile phone model.
2. Ensure your tripod adapter has a secure grip: Look for an adapter that has a strong grip to hold your mobile phone firmly in place. This will prevent any accidental slips or falls during shooting.
3. Attach the tripod adapter to your tripod: Most tripod adapters have a standard screw mount that can be easily attached to the tripod. Ensure that the adapter is securely fastened to the tripod to avoid any wobbling or instability.
4. Adjust the adapter to fit your mobile phone: Depending on the type of adapter you have, you may need to adjust the width or height to fit your mobile phone. Follow the instructions provided with the adapter to make the necessary adjustments.
5. Attach your mobile phone to the adapter: Once the adapter is adjusted, gently place your mobile phone into the adapter's grip. Ensure that it is centered and secure.
6. Double-check the stability: Before starting your photography or videography session, give your mobile phone a gentle shake to ensure it is securely attached to the adapter. If there is any movement or instability, readjust the adapter or tighten the grip.
Remember to always follow the manufacturer's instructions when attaching your mobile phone to a tripod adapter. Additionally, consider investing in a quality tripod adapter that is durable and reliable to ensure the best results for your mobile photography and videography endeavors.
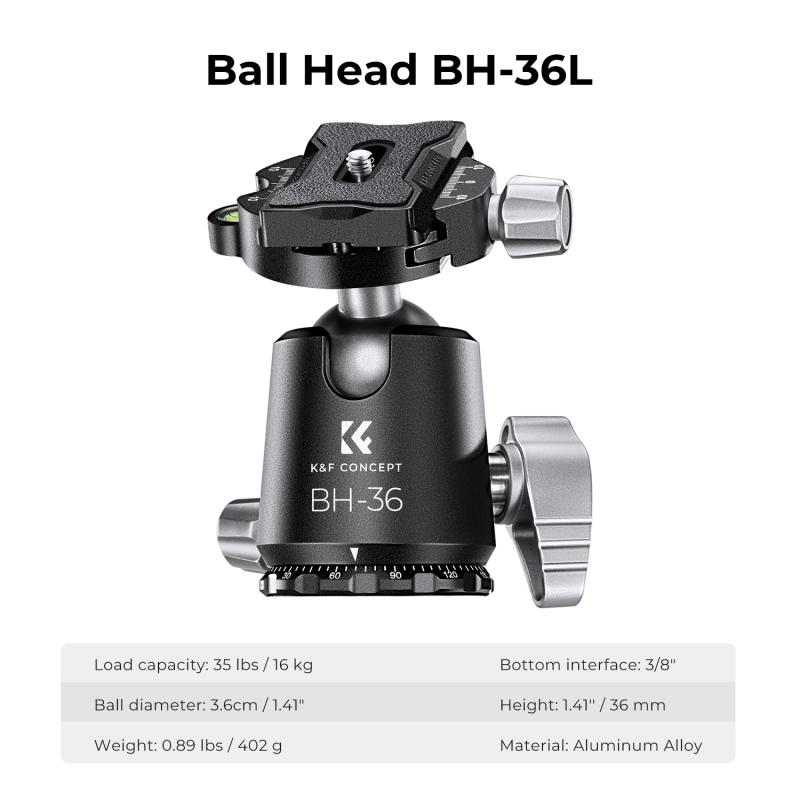
2、 Attaching a Mobile Phone to a Tripod Adapter: Step-by-Step Guide
Attaching a Mobile Phone to a Tripod Adapter: Step-by-Step Guide
In today's digital age, mobile phones have become powerful tools for capturing high-quality photos and videos. To enhance the stability and versatility of your mobile photography, attaching your phone to a tripod adapter is essential. Here is a step-by-step guide on how to attach your mobile phone to a tripod adapter:
1. Choose a tripod adapter: There are various tripod adapters available in the market, so select one that is compatible with your mobile phone model and tripod. Look for adapters that offer a secure grip and adjustable features for optimal positioning.
2. Adjust the adapter: Most tripod adapters have adjustable arms to accommodate different phone sizes. Start by loosening the adapter's arms and extending them to fit your phone snugly. Once adjusted, tighten the arms to secure your phone in place.
3. Attach the adapter to the tripod: Locate the mounting screw on the tripod adapter and align it with the tripod's mounting plate. Insert the screw into the tripod's threaded hole and tighten it securely.
4. Position your phone: Place your phone into the adapter, ensuring that it is centered and aligned with the tripod's axis. Adjust the adapter's arms if necessary to achieve the desired positioning.
5. Secure your phone: Once your phone is in position, tighten the adapter's arms to hold your phone securely. Be careful not to overtighten, as it may damage your phone.
6. Test stability: Gently shake the tripod to check if your phone is securely attached. If there is any wobbling or instability, readjust the adapter's arms or tighten them further.
7. Fine-tune the positioning: Most tripod adapters allow for 360-degree rotation and tilt adjustments. Use these features to fine-tune the positioning of your phone for the perfect shot.
Remember to always follow the manufacturer's instructions for your specific tripod adapter and mobile phone model. Additionally, consider using a remote shutter or self-timer function to minimize camera shake when capturing photos or videos.
As technology advances, tripod adapters are continuously evolving to accommodate the latest mobile phone models. It is advisable to stay updated with the latest adapter options and features to ensure compatibility and optimal performance.
In conclusion, attaching a mobile phone to a tripod adapter is a simple process that can greatly enhance your mobile photography experience. By following these steps and considering the latest advancements in tripod adapter technology, you can capture stunning photos and videos with stability and precision.
3、 Adjusting the Mobile Phone Position on the Tripod Adapter
To attach a mobile phone to a tripod adapter, follow these steps:
1. Start by ensuring that your tripod adapter is compatible with your mobile phone. Most tripod adapters are designed to fit a wide range of phone sizes, but it's always a good idea to double-check.
2. Open the tripod adapter and extend the arms to their maximum width. This will create enough space to accommodate your phone.
3. Place your mobile phone horizontally or vertically, depending on your preference, into the adapter. Make sure the phone is centered and secure.
4. Adjust the arms of the adapter to hold your phone firmly in place. The adapter should grip the phone snugly, but be careful not to overtighten and potentially damage your device.
5. Once your phone is securely attached to the tripod adapter, you can then attach the adapter to your tripod. Most adapters have a standard screw thread that fits onto the tripod's mounting plate.
6. Align the adapter's screw thread with the tripod's mounting plate and twist it clockwise until it is securely attached.
Now that your phone is attached to the tripod adapter, you can adjust its position to achieve the desired angle and composition. This can be done by loosening the tripod's tilt and pan locks and moving the phone accordingly. Once you have adjusted the position, tighten the locks to secure the phone in place.
It's worth noting that some tripod adapters also offer additional features such as a remote shutter release or a rotating mount. These can enhance your mobile photography experience by allowing you to capture photos or videos more conveniently.
In conclusion, attaching a mobile phone to a tripod adapter is a simple process that allows you to stabilize your device for better photography or videography. With the ability to adjust the position of your phone, you can capture stunning shots from various angles and perspectives.
4、 Ensuring Stability and Balance when Attaching a Mobile Phone
Ensuring Stability and Balance when Attaching a Mobile Phone to a Tripod Adapter
Attaching a mobile phone to a tripod adapter is a great way to capture stable and professional-looking photos and videos. However, it is important to ensure stability and balance to prevent any accidental falls or shaky footage. Here are some steps to follow to achieve this:
1. Choose a sturdy tripod adapter: Invest in a high-quality tripod adapter that is specifically designed for mobile phones. Look for one that has a secure grip and adjustable features to accommodate different phone sizes.
2. Position the phone correctly: Place the phone in the adapter in a horizontal position, ensuring that it is centered and balanced. This will help distribute the weight evenly and prevent any tilting or wobbling.
3. Tighten the adapter securely: Once the phone is in position, tighten the adapter securely to the tripod. Make sure it is firmly attached to prevent any accidental slips or movements.
4. Use a counterweight: If you are using a larger or heavier phone, it may be necessary to add a counterweight to the tripod. This will help balance the weight distribution and prevent the tripod from tipping over.
5. Adjust the tripod legs: Ensure that the tripod legs are fully extended and locked in place. This will provide additional stability and prevent any wobbling or shaking.
6. Avoid touching the phone: Once the phone is attached and positioned correctly, avoid touching it as much as possible. Even the slightest movement can cause instability and affect the quality of your footage.
7. Consider using a remote shutter: To further minimize any movement, consider using a remote shutter or a timer function on your phone's camera app. This will allow you to take photos or start recording without physically touching the phone.
In conclusion, attaching a mobile phone to a tripod adapter can greatly enhance the stability and quality of your photos and videos. By following these steps and ensuring stability and balance, you can capture professional-looking footage with ease.
















There are no comments for this blog.