How To Build Camera Rig ?
To build a camera rig, you will need a few essential components. First, you will need a camera baseplate or cage that securely holds your camera. This provides stability and allows for easy attachment of other accessories. Next, you will need a set of rails or rods that attach to the baseplate and provide a mounting point for additional accessories. These rails can be used to attach a follow focus system, matte box, or other accessories.
Additionally, you may want to consider adding a shoulder mount or handheld grip to make it easier to stabilize the camera while shooting. This can help reduce camera shake and improve the overall quality of your footage. Depending on your needs, you may also want to add a monitor or viewfinder to better see what you are shooting.
Finally, don't forget about the importance of a good tripod or stabilizer system. This will help keep your camera steady and allow for smooth movements during filming. Overall, building a camera rig involves selecting the right components that suit your specific needs and budget, and then assembling them together to create a stable and versatile setup.
1、 Camera Rig Components and Accessories
To build a camera rig, you will need several components and accessories that can enhance stability, control, and versatility while shooting. Here are some essential components to consider:
1. Camera Cage: A camera cage provides a sturdy frame to mount your camera securely. It also offers multiple mounting points for accessories like monitors, lights, and microphones.
2. Follow Focus System: A follow focus system allows for precise focusing while shooting. It consists of a gear-driven mechanism that attaches to the lens, enabling smooth and accurate focus adjustments.
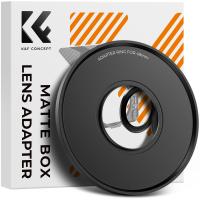
3. Matte Box: A matte box helps control light and reduce lens flare. It attaches to the front of the camera and allows for the use of filters and flags to block unwanted light.
4. Shoulder Mount: A shoulder mount provides stability and comfort while shooting handheld. It distributes the weight of the camera rig across your shoulder, reducing strain on your arms.
5. Handheld Stabilizer: A handheld stabilizer, such as a gimbal or a steadicam, helps achieve smooth and steady shots while moving. It counteracts camera shake and allows for fluid movements.
6. External Monitor: An external monitor provides a larger and more accurate display of your footage. It helps with framing, focus, and exposure control.
7. External Microphone: An external microphone improves audio quality by capturing clearer and more directional sound. It is essential for professional-grade audio recording.
8. Power Supply: Depending on your camera and shooting requirements, you may need additional power supply options like batteries, battery grips, or external power sources.
9. Mounting Accessories: Various mounting accessories like articulating arms, clamps, and quick release plates are necessary to attach and adjust the camera rig components securely.
It's important to note that the latest point of view in camera rig components and accessories may vary based on technological advancements and individual shooting preferences. Therefore, it's recommended to research and stay updated with the latest equipment options and trends in the industry.
2、 Types of Camera Rigs and Their Uses
Types of Camera Rigs and Their Uses
Camera rigs are essential tools for filmmakers and videographers to achieve stable shots and capture unique perspectives. There are various types of camera rigs available, each designed for specific purposes. Here, we will explore some common camera rigs and their uses.
1. Shoulder Rig: A shoulder rig is a versatile option that rests on the filmmaker's shoulder, providing stability and control. It is ideal for handheld shots, allowing for smooth movements and reducing camera shake. Shoulder rigs often come with additional accessories like handles, follow focus systems, and matte boxes.
2. Steadicam Rig: Steadicam rigs are used to achieve smooth and stable tracking shots. They consist of a harness worn by the operator, which is connected to an arm that holds the camera. This rig uses counterweights and a gimbal system to minimize camera shake and create fluid movements.
3. Crane/Jib Rig: Crane or jib rigs are used to capture high-angle or sweeping shots. They consist of a long arm that can be extended and moved vertically or horizontally. This rig allows for dynamic camera movements and is commonly used in music videos, films, and sports events.
4. Slider Rig: Slider rigs are used to achieve smooth horizontal camera movements. They consist of a track on which the camera can slide back and forth. Slider rigs are great for adding cinematic motion to shots and are commonly used in product videos, interviews, and narrative filmmaking.
5. Drone Rig: With the rise of drone technology, aerial shots have become more accessible. Drone rigs are used to mount cameras onto drones, allowing for stunning aerial cinematography. They are widely used in documentaries, travel videos, and action sequences.
It is important to note that camera rig technology is constantly evolving. With advancements in stabilization systems and motorized gimbals, filmmakers now have access to more compact and efficient rigs. Additionally, the rise of virtual reality and 360-degree video has led to the development of specialized rigs for capturing immersive content.
In conclusion, camera rigs are essential tools for filmmakers and videographers to achieve stable shots and capture unique perspectives. The type of rig used depends on the desired shot and the filmmaker's creative vision. From shoulder rigs to drone rigs, each rig serves a specific purpose and contributes to the overall quality of the final product.
3、 Building a DIY Camera Rig
Building a DIY camera rig can be a fun and rewarding project for any photography or videography enthusiast. Not only does it allow you to customize your rig to suit your specific needs, but it also saves you money compared to purchasing a pre-made rig. Here's a step-by-step guide on how to build a camera rig:
1. Determine your requirements: Before starting the build, think about the specific features you want in your camera rig. Consider factors such as stability, versatility, and ease of use.
2. Gather the necessary materials: You will need a baseplate, rods, handles, and various mounting accessories. These can be purchased from camera equipment stores or online retailers. Additionally, you may need tools like a drill, screwdriver, and Allen wrenches.
3. Assemble the baseplate: Attach the baseplate to the bottom of your camera using the appropriate screws. Make sure it is securely fastened to provide a stable foundation for your rig.
4. Attach the rods: Slide the rods into the rod clamps on the baseplate. These rods will serve as the main support structure for your rig. Adjust their length according to your desired configuration.
5. Add handles and accessories: Attach handles to the rods at comfortable positions for gripping. You can also add accessories like a follow focus system, matte box, or external monitor depending on your needs.
6. Test and adjust: Once everything is assembled, test the rig to ensure it is stable and functions as intended. Make any necessary adjustments to improve its performance.
It's important to note that the latest point of view in building camera rigs is the increasing popularity of modular systems. These systems allow for easy customization and expansion of the rig as your needs evolve. Additionally, advancements in 3D printing technology have made it possible to create custom parts and accessories for camera rigs, further enhancing their versatility.

4、 Camera Rig Stability and Balance Techniques
Camera rig stability and balance techniques are essential for achieving smooth and professional-looking footage. Whether you are shooting handheld or using a shoulder rig, it is crucial to ensure that your camera rig is stable and well-balanced. Here are some tips on how to build a camera rig that provides stability and balance:
1. Use a sturdy base: Start by selecting a reliable camera base, such as a tripod or a camera cage. This will provide a solid foundation for your rig and help prevent unwanted camera movement.
2. Counterbalance the weight: Depending on the size and weight of your camera, you may need to add counterweights to balance the rig. This can be achieved by attaching weights to the back of the rig or using a counterbalance system specifically designed for camera rigs.
3. Distribute weight evenly: Ensure that the weight of your camera and any additional accessories is evenly distributed across the rig. This will help maintain balance and prevent strain on your arms or shoulders.
4. Use a shoulder mount: If you prefer shooting handheld, consider using a shoulder mount. This will help distribute the weight of the camera rig more evenly and provide stability by resting the rig on your shoulder.
5. Add stabilization accessories: Incorporate stabilization accessories such as a camera stabilizer or a gimbal to further enhance stability. These tools can help minimize camera shake and provide smoother footage, especially when shooting while moving.
6. Fine-tune the balance: Once you have assembled your camera rig, take the time to fine-tune the balance. Adjust the position of the camera and any additional accessories until you achieve optimal stability and balance.
In recent years, advancements in camera technology have led to the development of more lightweight and compact camera rigs. These rigs offer improved stability and balance while being easier to handle and transport. Additionally, electronic stabilization systems, such as in-body image stabilization and electronic gimbals, have become more prevalent, providing filmmakers with even greater stability options.
Remember, building a camera rig is a personal process, and what works for one person may not work for another. Experiment with different configurations and accessories to find the setup that best suits your shooting style and needs.
