How To Clean Your Mechanical Keyboard ?
To clean your mechanical keyboard, start by unplugging it from your computer. Use a keycap puller or gently remove the keycaps one by one. Clean the keycaps by soaking them in warm soapy water, then scrubbing them with a soft brush. Rinse and dry them thoroughly before reattaching.
Next, use compressed air or a small brush to remove any debris or dust from the keyboard switches. Be careful not to apply too much pressure or damage the switches. If there are stubborn stains or grime, you can use a cotton swab dipped in isopropyl alcohol to gently clean the switches.
For the keyboard plate and case, use a soft cloth or sponge dampened with a mild cleaning solution to wipe away any dirt or smudges. Avoid using excessive moisture to prevent damage to the electronics.
Once everything is clean and dry, reattach the keycaps and plug the keyboard back into your computer. Test each key to ensure they are working properly.
Remember to consult your keyboard's manual or manufacturer's website for specific cleaning instructions, as different models may require slightly different methods.
1、 Removing Keycaps
How to clean your mechanical keyboard:
1. Removing Keycaps: The first step in cleaning your mechanical keyboard is to remove the keycaps. This allows you to access the switches and clean them thoroughly. Start by gently prying off the keycaps using a keycap puller or a small flathead screwdriver. Be careful not to apply too much force to avoid damaging the switches or keycaps.
2. Cleaning the Keycaps: Once the keycaps are removed, you can clean them separately. Fill a bowl with warm water and add a mild detergent. Place the keycaps in the soapy water and let them soak for a few minutes. Use a soft brush or toothbrush to gently scrub away any dirt or grime. Rinse the keycaps with clean water and let them dry completely before reattaching them to the keyboard.
3. Cleaning the Switches: To clean the switches, you can use compressed air to blow away any dust or debris that may have accumulated. Alternatively, you can use a small brush or cotton swabs dipped in isopropyl alcohol to clean the switches. Gently brush or wipe the switches to remove any dirt or residue. Be sure to let the switches dry completely before reassembling the keyboard.
4. Reassembling the Keyboard: Once the keycaps and switches are clean and dry, you can reassemble the keyboard. Carefully place the keycaps back onto the switches, ensuring they are aligned properly. Press down firmly on each keycap to secure it in place.
It's important to note that the process of cleaning a mechanical keyboard may vary depending on the specific model and manufacturer. Always refer to the user manual or manufacturer's guidelines for the best cleaning practices. Additionally, be cautious when using liquids near your keyboard to avoid any damage to the electrical components.
2、 Cleaning Keycaps
How to clean your mechanical keyboard:
Cleaning a mechanical keyboard is essential to maintain its performance and longevity. Here's a step-by-step guide on how to clean your mechanical keyboard:
1. Unplug your keyboard: Before starting the cleaning process, make sure to unplug your keyboard from the computer to avoid any accidental keystrokes.
2. Remove keycaps: Gently remove the keycaps from the keyboard. You can use a keycap puller or carefully lift them with your fingers. Keycaps can accumulate dirt, oils, and debris over time, so cleaning them separately is crucial.
3. Clean keycaps: Fill a bowl with warm water and add a mild detergent. Place the keycaps in the soapy water and let them soak for a few minutes. Use a soft brush or toothbrush to scrub away any dirt or stains. Rinse the keycaps thoroughly with clean water and let them dry completely before reattaching them to the keyboard.
4. Clean the keyboard surface: Use a can of compressed air to blow away any loose debris or dust from the keyboard surface. For more stubborn dirt, you can use a soft, lint-free cloth slightly dampened with isopropyl alcohol. Gently wipe the surface, taking care not to get any liquid inside the switches.
5. Clean the switches: If your keyboard has removable switches, you can clean them individually. However, it's important to note that disassembling switches can void the warranty and requires technical knowledge. If you're unsure, it's best to consult the manufacturer's guidelines or seek professional help.
6. Reassemble the keyboard: Once everything is dry, reattach the keycaps to the keyboard. Make sure they are properly aligned and press them down firmly to ensure they are securely in place.
Remember to clean your mechanical keyboard regularly to prevent the buildup of dirt and debris, which can affect its performance. Additionally, consider investing in a keyboard cover or dust cover to protect it from spills and dust when not in use.

3、 Cleaning Switches
How to clean your mechanical keyboard:
Cleaning your mechanical keyboard is essential to maintain its performance and longevity. Here's a step-by-step guide to help you keep your keyboard in top shape:
1. Unplug your keyboard: Before starting the cleaning process, make sure to unplug your keyboard from your computer to avoid any accidental key presses.
2. Remove keycaps: Gently remove the keycaps from your keyboard. You can use a keycap puller or carefully lift them with your fingers. Place the keycaps in a bowl of warm water mixed with mild soap or a keycap cleaning solution.
3. Clean the keycaps: Use a soft brush or a cloth to scrub the keycaps gently. Rinse them thoroughly with clean water and let them air dry. Avoid using hot water or harsh chemicals as they can damage the keycaps.
4. Clean the switches: This step is optional but highly recommended for a deep clean. To clean the switches, you can use a switch opener tool to remove the key switches from the keyboard. Once removed, use compressed air or a small brush to remove any dust or debris from the switches. Be careful not to damage the switches while cleaning.
5. Clean the keyboard frame: Use a soft cloth or a brush to wipe down the keyboard frame. You can also use a small amount of isopropyl alcohol on a cloth to remove any stubborn stains or grime. Make sure to dry the keyboard thoroughly before plugging it back in.
6. Reassemble the keyboard: Once everything is dry, reattach the keycaps to the switches. Ensure that each keycap is properly aligned and securely attached.
7. Test your keyboard: Plug your keyboard back into your computer and test each key to ensure they are functioning correctly.
Remember to clean your mechanical keyboard regularly to prevent the buildup of dirt and debris. The frequency of cleaning depends on your usage, but a general recommendation is to clean it every few months or as needed.
Note: The latest point of view suggests using ultraviolet (UV) light sanitizers to kill bacteria and viruses on your keyboard. These devices use UV-C light to disinfect surfaces without the need for chemicals. However, it's important to note that UV light can cause discoloration or damage to certain materials, so it's essential to follow the manufacturer's instructions and use caution when using UV sanitizers on your keyboard.
4、 Cleaning the Keyboard Plate
Cleaning your mechanical keyboard is essential to maintain its performance and longevity. Over time, dust, dirt, and debris can accumulate between the keys and affect the keyboard's functionality. Here's a step-by-step guide on how to clean your mechanical keyboard:
1. Unplug your keyboard: Before starting the cleaning process, make sure to unplug your keyboard from your computer to avoid any accidental keystrokes or damage.
2. Remove the keycaps: Gently remove the keycaps from your keyboard. You can use a keycap puller or carefully lift them with your fingers. Be cautious not to apply excessive force to prevent damaging the switches.
3. Clean the keycaps: Fill a bowl with warm water and add a mild detergent. Place the keycaps in the soapy water and let them soak for a few minutes. Use a soft brush or toothbrush to scrub away any dirt or grime. Rinse the keycaps thoroughly with clean water and let them air dry.
4. Clean the keyboard plate: Use a can of compressed air to blow away any loose debris or dust from the keyboard plate. Alternatively, you can use a small vacuum cleaner attachment to gently suck up the dirt.
5. Wipe the switches: Moisten a lint-free cloth or cotton swab with isopropyl alcohol. Gently wipe the switches and the surrounding areas to remove any stubborn dirt or residue. Avoid using excessive liquid to prevent damage to the switches.
6. Reassemble the keyboard: Once everything is dry, reattach the keycaps to their respective switches. Ensure that each keycap is properly aligned and securely in place.
It's important to note that the process may vary slightly depending on the keyboard model and manufacturer's recommendations. Always refer to the user manual or manufacturer's website for specific cleaning instructions.
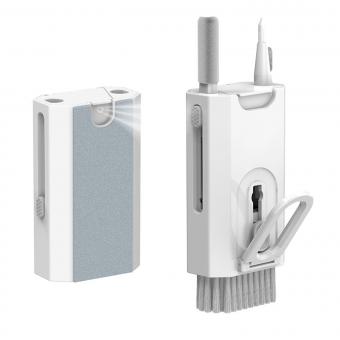
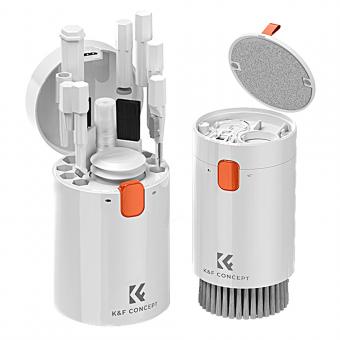
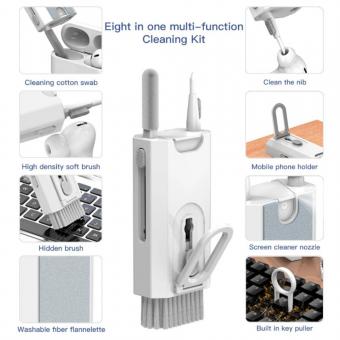
In recent years, there has been a rise in the popularity of keyboard cleaning kits that include specialized brushes, cleaning solutions, and keycap pullers. These kits can provide a more thorough and efficient cleaning experience.
Regularly cleaning your mechanical keyboard will not only keep it looking pristine but also ensure optimal performance and a satisfying typing experience.

