How To Connect Camcorder To Laptop ?
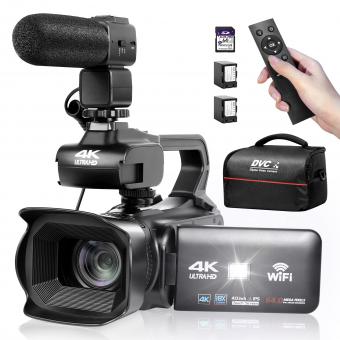
To connect a camcorder to a laptop, you will typically need a USB cable or an HDMI cable. First, ensure that your camcorder and laptop have the necessary ports for connection. If your camcorder has a USB port, connect one end of the USB cable to the camcorder and the other end to a USB port on your laptop. If your camcorder has an HDMI port, connect one end of the HDMI cable to the camcorder and the other end to an HDMI port on your laptop. Once connected, turn on your camcorder and set it to the appropriate mode for transferring or streaming video. Your laptop should automatically detect the camcorder and may prompt you to install any necessary drivers or software. Follow the on-screen instructions to complete the setup. Once connected, you can use video editing software or media players on your laptop to access and manage the video files from your camcorder.
1、 USB connection: Transfer videos using a USB cable.
To connect a camcorder to a laptop, the most common method is through a USB connection. This allows you to transfer videos from the camcorder to your laptop for editing, storage, or sharing purposes. Here's a step-by-step guide on how to connect your camcorder to a laptop using a USB cable:
1. Ensure that your camcorder is powered off before connecting it to the laptop.
2. Locate the USB port on your camcorder. It is usually labeled as "USB" or has a symbol that represents USB.
3. Connect one end of the USB cable to the USB port on your camcorder.
4. Locate the USB port on your laptop. It is typically found on the sides or back of the laptop.
5. Connect the other end of the USB cable to the USB port on your laptop.
6. Power on your camcorder.
7. Your laptop should recognize the camcorder and automatically install the necessary drivers. If prompted, follow the on-screen instructions to complete the driver installation.
8. Once the drivers are installed, your camcorder should appear as a removable storage device on your laptop.
9. Open the file explorer on your laptop and navigate to the camcorder's storage.
10. You can now transfer videos from the camcorder to your laptop by simply dragging and dropping the files to a desired location on your laptop's storage.
It's important to note that some camcorders may require specific software or applications to be installed on your laptop for video transfer. In such cases, refer to the camcorder's user manual or manufacturer's website for detailed instructions.
Additionally, it's worth mentioning that with the advancements in technology, some newer camcorders may offer wireless connectivity options such as Wi-Fi or Bluetooth. These methods allow for more convenient and seamless video transfer without the need for physical cables.
2、 HDMI connection: Connect camcorder to laptop via HDMI cable.
HDMI connection: Connect camcorder to laptop via HDMI cable.
To connect your camcorder to your laptop, one of the most common and convenient methods is through an HDMI connection. HDMI (High-Definition Multimedia Interface) allows for high-quality audio and video transmission between devices.
Here's a step-by-step guide on how to connect your camcorder to your laptop using an HDMI cable:
1. Check the ports: Ensure that both your camcorder and laptop have HDMI ports. Most modern laptops have an HDMI port, while camcorders may have either a mini HDMI or micro HDMI port. If your laptop doesn't have an HDMI port, you can use an HDMI to USB adapter.
2. Get the right cable: Purchase an HDMI cable that matches the ports on your camcorder and laptop. If your camcorder has a mini HDMI port, you'll need a mini HDMI to HDMI cable. If it has a micro HDMI port, you'll need a micro HDMI to HDMI cable.
3. Connect the cable: Plug one end of the HDMI cable into the HDMI port on your camcorder and the other end into the HDMI port on your laptop. Make sure the connections are secure.
4. Set up your camcorder: Turn on your camcorder and set it to the appropriate mode for video playback or live streaming. Refer to your camcorder's manual for specific instructions.
5. Configure your laptop: On your laptop, go to the display settings and select the HDMI input as the video source. You may need to adjust the resolution and aspect ratio settings to match your camcorder's output.
6. Start recording or streaming: Once the connection is established, you can start recording videos or streaming live footage from your camcorder to your laptop.
It's worth noting that some laptops may require additional software or drivers to recognize the camcorder. Check the manufacturer's website for any necessary updates or downloads.
In conclusion, connecting your camcorder to your laptop via HDMI cable is a straightforward process. It allows for high-quality video transfer and is widely supported by most modern devices.
3、 Firewire connection: Use Firewire cable to connect camcorder and laptop.
To connect a camcorder to a laptop, one of the most common methods is using a Firewire connection. This method allows for high-speed data transfer and is widely supported by both camcorders and laptops.
To connect your camcorder to your laptop using a Firewire connection, you will need a Firewire cable. First, ensure that your laptop has a Firewire port. If it doesn't, you may need to use an adapter or consider alternative connection methods such as USB.
Once you have confirmed that your laptop has a Firewire port, follow these steps:
1. Power off both your camcorder and laptop.
2. Locate the Firewire port on your camcorder. It is usually labeled as "DV" or "IEEE 1394."
3. Connect one end of the Firewire cable to the Firewire port on your camcorder.
4. Connect the other end of the Firewire cable to the Firewire port on your laptop.
5. Power on your camcorder and set it to "Playback" or "VCR" mode.
6. Power on your laptop and wait for it to recognize the camcorder.
7. Once the connection is established, you can transfer videos or use video editing software to capture footage directly from your camcorder.
It's worth noting that Firewire ports are becoming less common on newer laptops, as USB and wireless connections have become more prevalent. Therefore, it's important to check the specifications of your laptop and camcorder to ensure compatibility. If your laptop doesn't have a Firewire port, you may need to use alternative methods such as USB or HDMI connections, depending on the available ports on your devices.
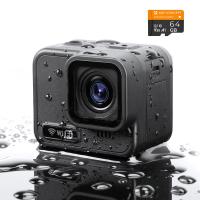
4、 Wi-Fi connection: Connect camcorder and laptop wirelessly using Wi-Fi.
How to connect a camcorder to a laptop can be done in various ways, but one of the most convenient methods is through a Wi-Fi connection. This allows you to connect your camcorder and laptop wirelessly, eliminating the need for any physical cables.
To establish a Wi-Fi connection between your camcorder and laptop, follow these steps:
1. Ensure that both your camcorder and laptop have Wi-Fi capabilities. Most modern camcorders and laptops come with built-in Wi-Fi functionality.
2. Turn on the Wi-Fi feature on your camcorder. This can usually be done through the settings menu or a dedicated Wi-Fi button on the camcorder.
3. On your laptop, enable Wi-Fi and search for available networks. Your camcorder should appear as a Wi-Fi network option. Select it to establish a connection.
4. Once connected, you may need to install any necessary software or drivers on your laptop to enable communication between the camcorder and laptop. Check the manufacturer's website for any specific software requirements.
5. Once the connection is established and any required software is installed, you should be able to access and transfer files between your camcorder and laptop wirelessly.
It's important to note that the specific steps may vary depending on the make and model of your camcorder and laptop. Therefore, it's always recommended to consult the user manuals or online resources provided by the manufacturers for detailed instructions.
Wi-Fi connectivity offers the advantage of convenience and flexibility. You can transfer files, stream live footage, or even control your camcorder remotely from your laptop. However, it's worth mentioning that Wi-Fi connections may introduce some latency or signal interference, which can affect the quality of the connection. Therefore, it's advisable to be in close proximity to your camcorder and ensure a stable Wi-Fi signal for optimal performance.
