How To Connect Camcorder To Pc?
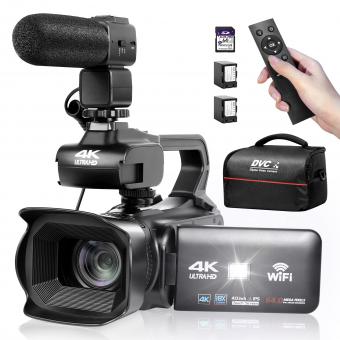
To connect a camcorder to a PC, you will need to use a USB cable or Firewire cable, depending on the type of camcorder you have. Once you have the appropriate cable, simply connect one end to the camcorder and the other end to a USB or Firewire port on your PC. After the connection is made, your PC should recognize the camcorder as a removable storage device, allowing you to transfer videos and other media files from the camcorder to your computer. If your camcorder uses a memory card, you can also remove the card from the camcorder and use a card reader to transfer the files to your PC.
1、 Camcorder Connection Types
To connect a camcorder to a PC, you can use various connection types depending on the camcorder's available ports and the PC's input options. The most common methods include using a USB cable, HDMI cable, Firewire, or SD card reader.
If your camcorder has a USB port, you can simply connect it to your PC using a USB cable. This allows you to transfer videos and photos directly to your computer. Some camcorders also support HDMI output, which can be connected to the PC's HDMI input for video transfer.
For older camcorders, Firewire (IEEE 1394) can be used to connect to a PC with a Firewire port. This method provides high-speed data transfer, making it ideal for video editing. Additionally, if your camcorder uses SD cards, you can remove the card and insert it into your PC's SD card reader to transfer files.
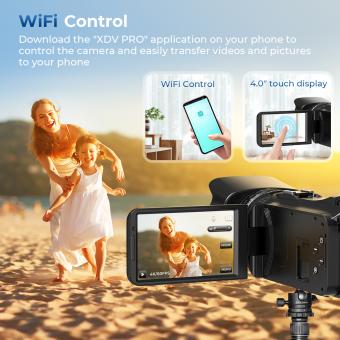
In the latest point of view, wireless connectivity options such as Wi-Fi and Bluetooth are becoming more common in modern camcorders. Some camcorders now offer the ability to connect to a PC wirelessly, allowing for seamless file transfer without the need for physical cables.
Overall, the method of connecting your camcorder to a PC will depend on the specific ports and features of your camcorder, as well as the input options available on your PC. Always refer to the user manual of your camcorder for specific instructions on how to connect it to a PC.
2、 Required Cables and Adapters
To connect a camcorder to a PC, you will need the required cables and adapters. The specific cables and adapters you need will depend on the type of camcorder you have and the ports available on your PC. Here are the general steps and the latest point of view on this topic:
1. Determine the type of connection: First, identify the type of ports available on your camcorder and PC. Common connections include HDMI, USB, Firewire, and AV ports.
2. Select the appropriate cables and adapters: Once you know the type of ports on your camcorder and PC, you can select the necessary cables and adapters. For example, if your camcorder has an HDMI port and your PC has a USB-C port, you will need an HDMI to USB-C adapter or cable.
3. Connect the camcorder to the PC: After obtaining the required cables and adapters, connect the camcorder to the PC using the appropriate ports. Ensure that the connections are secure to avoid any data transfer issues.
4. Transfer files or stream content: Once the camcorder is connected to the PC, you can transfer video files from the camcorder to the PC for editing or storage. You can also use the connection to stream live content from the camcorder to the PC for broadcasting or video conferencing.
The latest point of view on connecting a camcorder to a PC emphasizes the importance of high-speed data transfer and compatibility with the latest USB and HDMI standards. Additionally, wireless options such as Wi-Fi Direct and Bluetooth are becoming more prevalent, providing convenient alternatives to physical cable connections. Always ensure that the cables and adapters you choose are compatible with both your camcorder and PC to achieve optimal performance.
3、 Software and Drivers Installation
To connect a camcorder to a PC, you will need to follow a few steps to ensure a successful connection and transfer of data. Here's a guide on how to connect a camcorder to a PC:
1. Check the camcorder's output ports: Most camcorders have a USB or HDMI output port. If your camcorder has a USB port, you can directly connect it to your PC using a USB cable. If it has an HDMI port, you will need an HDMI cable and an HDMI input on your PC.
2. Turn on the camcorder: Before connecting the camcorder to the PC, ensure that the camcorder is powered on and in the correct mode for data transfer.
3. Connect the camcorder to the PC: Use the appropriate cable to connect the camcorder to the PC. If using a USB cable, simply plug it into the USB port on the camcorder and the USB port on the PC. If using an HDMI cable, connect one end to the camcorder and the other end to the HDMI input on the PC.
4. Transfer data: Once the camcorder is connected to the PC, you can transfer data by accessing the camcorder as a removable storage device or by using video editing software to import the footage.
Software and Drivers Installation:
If your PC does not automatically recognize the camcorder when connected, you may need to install the appropriate software and drivers. Check the manufacturer's website for the latest drivers and software updates for your camcorder model. Download and install the necessary drivers and software on your PC to ensure seamless connectivity and data transfer.
In the latest point of view, with the advancement of technology, many modern camcorders are designed to be plug-and-play, meaning they can be recognized by the PC without the need for additional drivers or software installation. However, it's always a good practice to check for any firmware updates or compatibility issues to ensure smooth connectivity between the camcorder and the PC.
4、 Connecting and Configuring Audio
To connect a camcorder to a PC, you will need to follow a few steps to ensure a successful connection and configuration of audio. Here's how to do it:
1. Check the camcorder's output ports: Most camcorders have a USB or HDMI output port. If your camcorder has a USB port, you can simply connect it to your PC using a USB cable. If it has an HDMI port, you will need an HDMI cable and an HDMI input on your PC.
2. Install necessary drivers: Once the camcorder is connected to the PC, you may need to install specific drivers to enable the PC to recognize the camcorder as a connected device. Check the manufacturer's website for the latest drivers and follow the installation instructions.
3. Configure audio settings: After the camcorder is connected and recognized by the PC, you will need to configure the audio settings. This may involve selecting the camcorder as the default audio input device in the PC's sound settings.
4. Transfer and edit videos: Once the camcorder is connected and the audio is configured, you can transfer videos from the camcorder to the PC for editing or storage.
From a latest point of view, some modern camcorders may also support wireless connectivity, allowing you to connect to the PC via Wi-Fi or Bluetooth. In such cases, you can follow the manufacturer's instructions for wireless connection and audio configuration. Additionally, with the rise of USB-C ports, newer camcorders may use this interface for faster data transfer and audio connectivity to PCs. Always refer to the camcorder's user manual for the most up-to-date information on connecting and configuring audio with a PC.


