How To Make A Camera Tripod Stand ?
To make a camera tripod stand, you will need a few materials. Start by gathering three sturdy and equal-length rods or pipes. These can be made of metal or wood. Next, you will need three adjustable clamps or brackets to connect the rods together at the top. These clamps should allow for easy adjustment and tightening. Finally, you will need a camera mount or tripod head to attach your camera to the top of the stand.
To assemble the tripod stand, attach the clamps or brackets to the top of each rod, ensuring they are securely tightened. Then, connect the rods together at the top, forming a stable tripod shape. Adjust the clamps to ensure the legs are evenly spread apart and the stand is stable. Finally, attach the camera mount or tripod head to the top of the stand, making sure it is securely fastened.
Remember to test the stability of the tripod stand before using it with your camera. Adjust the legs and tighten the clamps as needed to ensure a secure and stable base for your camera.
1、 Choosing the right tripod for your camera setup
Choosing the right tripod for your camera setup is crucial for achieving stable and professional-looking photographs. A camera tripod stand provides stability and eliminates camera shake, allowing you to capture sharp images even in low light conditions or when using longer exposure times. Here are some key factors to consider when selecting a tripod:
1. Weight and Portability: If you frequently travel or shoot on location, a lightweight and compact tripod is essential. Look for materials like carbon fiber, which offer a good balance between weight and stability.
2. Load Capacity: Ensure that the tripod can support the weight of your camera and any additional equipment, such as lenses or external flashes. It's always better to choose a tripod with a higher load capacity than you currently need, as it allows for future equipment upgrades.
3. Height and Stability: Consider the maximum and minimum height of the tripod, as well as its stability when fully extended. Look for features like adjustable leg angles and a center column hook for added stability in windy conditions.
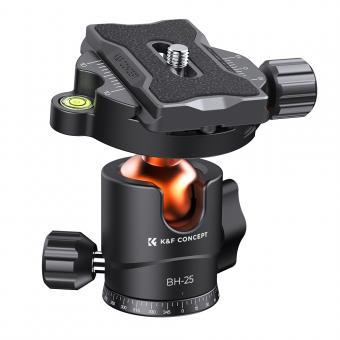
4. Head Type: The tripod head is responsible for holding your camera securely and allowing for smooth movements. There are various types available, including ball heads, pan-tilt heads, and gimbal heads. Choose one that suits your shooting style and needs.
5. Additional Features: Some tripods offer extra features like built-in levels, quick-release plates, or monopod conversion. These can enhance your shooting experience and make setup and adjustments easier.
In terms of making a camera tripod stand, it is recommended to purchase one from a reputable manufacturer. However, if you prefer a DIY approach, there are numerous online tutorials and resources available that provide step-by-step instructions on building a camera tripod stand using common materials like PVC pipes or wood. Just ensure that the DIY tripod is sturdy and stable enough to support your camera setup safely.
In conclusion, selecting the right tripod for your camera setup is essential for achieving sharp and professional photographs. Consider factors like weight, load capacity, height, stability, head type, and additional features when making your decision. Whether you choose to purchase a tripod or make one yourself, prioritize stability and safety to ensure optimal results.
2、 Adjusting the tripod height and leg angles for stability
To make a camera tripod stand, you will need a few materials and tools. Here is a step-by-step guide on how to create one:
1. Materials needed:
- Three sturdy metal or wooden rods (around 3-4 feet long)
- A tripod head or mount
- Screws or bolts
- A drill or screwdriver
- A saw (if necessary to cut the rods to size)
- Sandpaper (to smooth any rough edges)
2. Start by cutting the rods to your desired height using a saw. Make sure they are all the same length for stability.
3. Use sandpaper to smooth any rough edges on the rods.
4. Attach the tripod head or mount to the top of one of the rods using screws or bolts. This will be the central rod of your tripod.
5. Take the other two rods and drill holes near the top, about an inch from the end. These holes should be large enough to fit the central rod through.
6. Slide the two drilled rods onto the central rod, making sure they are evenly spaced apart.
7. Secure the drilled rods in place by tightening screws or bolts through the holes you drilled.
8. Test the stability of your tripod by adjusting the height and leg angles. This can be done by extending or retracting the legs and tightening the leg locks.
Adjusting the tripod height and leg angles is crucial for stability. To achieve this, most tripods have adjustable legs with multiple sections that can be extended or retracted. Additionally, the legs usually have locks or clamps that can be tightened to secure the desired height and leg angle.
To adjust the height, loosen the leg locks and extend or retract the legs to the desired length. Make sure all three legs are extended equally to maintain stability. Once the desired height is achieved, tighten the leg locks to secure the legs in place.
To adjust the leg angles, most tripods have hinges or joints at the top of each leg. Loosen the leg angle locks and position the legs at the desired angle. This can be done by spreading the legs wider or narrowing them. Once the desired leg angle is achieved, tighten the leg angle locks to secure the legs in place.
It is important to ensure that the tripod is on a stable surface and that all leg locks are tightened properly to prevent any wobbling or movement while using the camera.
3、 Attaching and securing your camera to the tripod head
To make a camera tripod stand, you will need a few materials and tools. Here is a step-by-step guide to help you create your own tripod stand:
1. Gather the materials: You will need three sturdy legs, such as metal or wooden rods, a tripod head, a mounting plate, screws, and a screwdriver.
2. Attach the legs: Take the three legs and position them in a triangular shape. Make sure they are evenly spaced apart. Use screws and a screwdriver to secure the legs together at the top, creating a stable base.
3. Attach the tripod head: Place the tripod head on top of the legs. The tripod head is the part that allows you to adjust the camera's position and angle. Align the holes on the tripod head with the holes on the legs and use screws to attach them securely.
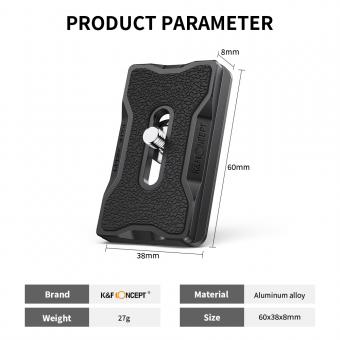
4. Mounting plate: Attach the mounting plate to the bottom of your camera. The mounting plate is the part that connects your camera to the tripod head. It usually comes with a screw that fits into the camera's tripod socket.
5. Attaching and securing your camera to the tripod head: Once the mounting plate is securely attached to your camera, place it on the tripod head. Make sure the camera is aligned properly and tighten the screw on the tripod head to secure the camera in place.
It's important to note that while making your own tripod stand can be a cost-effective option, it may not provide the same stability and durability as a professionally manufactured tripod. Additionally, ensure that the materials you choose are strong enough to support the weight of your camera.
In recent years, there have been advancements in tripod technology, such as lightweight carbon fiber materials and innovative designs that offer increased stability and flexibility. These advancements have made tripods more portable and versatile, catering to the needs of photographers and videographers in various settings.
4、 Using tripod features like pan and tilt for smooth movements
To make a camera tripod stand, you will need a few materials and tools. Here is a step-by-step guide to help you create your own tripod stand:
1. Materials needed:
- Three sturdy metal or wooden legs of equal length
- A metal or wooden plate for the camera mount
- Screws or bolts to attach the legs to the plate
- A ball head or fluid head for smooth pan and tilt movements
- Optional: rubber feet for stability and grip
2. Start by attaching the legs to the plate. Place the plate on a flat surface and position the legs evenly around it. Use screws or bolts to secure the legs to the plate, ensuring they are tightly fastened.
3. Once the legs are securely attached, you can add rubber feet to the bottom of each leg. This will provide stability and prevent the tripod from slipping on smooth surfaces.
4. Next, attach the ball head or fluid head to the top of the plate. This will allow you to pan and tilt the camera smoothly for capturing different angles and movements.
5. Adjust the height of the tripod by extending or retracting the legs. Most tripods have adjustable leg sections that can be locked into place at different heights.
Using tripod features like pan and tilt for smooth movements is essential for capturing high-quality footage or images. The ball head or fluid head allows you to rotate the camera horizontally (pan) and vertically (tilt) with ease. This feature is particularly useful when shooting videos or capturing panoramic shots.
To achieve smooth movements, it is important to use the pan and tilt handles or knobs on the tripod head. These controls allow you to make precise adjustments and avoid jerky or shaky footage. Additionally, some tripod heads come with a drag control feature that allows you to adjust the resistance of the pan and tilt movements, providing even smoother results.
In recent years, there have been advancements in tripod technology, such as the introduction of carbon fiber tripods that are lightweight yet sturdy. Additionally, some tripods now come with built-in level indicators and quick-release plates for faster setup and adjustments.
Overall, using tripod features like pan and tilt can greatly enhance the quality of your photography or videography. It allows for smooth and controlled movements, resulting in professional-looking shots.











There are no comments for this blog.