How To Make A Digital Pinhole Camera ?
To make a digital pinhole camera, you will need a digital camera, a light-proof container (such as a shoebox), a piece of aluminum foil, a needle or pin, and tape. Start by cutting a small square or rectangle on one side of the shoebox to serve as the camera's "viewfinder." Next, cover this opening with aluminum foil and secure it tightly with tape. Use the needle or pin to create a tiny hole in the center of the foil. Make sure the hole is as small as possible to create a sharper image. Place your digital camera inside the shoebox, facing the pinhole. Ensure that the camera's lens is aligned with the pinhole. Close the shoebox tightly, making sure no light can enter. Now, you can use your digital pinhole camera by taking pictures through the pinhole. Keep in mind that the images may be soft or blurry due to the nature of pinhole photography.
1、 Understanding the principles of pinhole photography
Understanding the principles of pinhole photography is essential before attempting to make a digital pinhole camera. Pinhole photography is a technique that involves capturing images without the use of a lens. Instead, it relies on a small aperture, or pinhole, to allow light to enter the camera and create an image on the film or digital sensor.
To make a digital pinhole camera, you will need a digital camera with manual settings, a body cap for the camera, and a small piece of aluminum foil or thin metal. Start by removing the lens from the camera and attaching the body cap. Next, create a small hole in the center of the body cap using a needle or pin. The size of the hole will determine the sharpness and exposure of the image, so experiment with different sizes to achieve the desired effect.
Cover the hole with the aluminum foil or thin metal, ensuring it is securely attached to the body cap. Make sure there are no gaps or light leaks around the pinhole. Set your camera to manual mode and adjust the settings for optimal exposure. Since pinhole photography requires longer exposure times, a tripod or stable surface is recommended to avoid camera shake.
Once everything is set up, you can start capturing images by removing the body cap and exposing the digital sensor to light through the pinhole. Experiment with different subjects, compositions, and exposure times to achieve unique and artistic results.
It is worth noting that the latest point of view in pinhole photography includes the use of digital cameras, which allows for instant feedback and the ability to experiment with different settings and techniques. Additionally, advancements in image processing software provide opportunities for further creativity and manipulation of pinhole photographs.
2、 Selecting the right digital camera for pinhole conversion
Selecting the right digital camera for pinhole conversion is an important step in creating a digital pinhole camera. With the advancements in technology, there are numerous options available that can be converted into a pinhole camera. Here are some factors to consider when choosing a digital camera for pinhole conversion.
Firstly, consider the camera's image sensor size. A larger image sensor will generally produce better image quality and low-light performance. Full-frame or APS-C sensors are ideal for pinhole photography as they capture more light and detail.
Secondly, look for a camera with manual exposure controls. Pinhole photography requires long exposure times, so having the ability to manually control the shutter speed and aperture is crucial. This will allow you to experiment with different exposure times and achieve the desired effects.
Additionally, consider the camera's resolution. Higher resolution cameras will produce sharper images with more detail. However, keep in mind that pinhole photography is known for its soft and dreamy aesthetic, so a lower resolution camera can also be suitable for achieving this look.
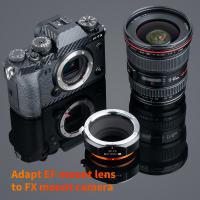
Furthermore, consider the camera's compatibility with lens adapters. Some digital cameras have interchangeable lenses, which can be advantageous for pinhole conversion. Lens adapters can be used to attach a pinhole lens to the camera, allowing for easy experimentation with different pinhole sizes and effects.
Lastly, consider the camera's size and weight. Pinhole photography is often associated with simplicity and portability, so a compact and lightweight camera can be more convenient for this purpose.
In conclusion, selecting the right digital camera for pinhole conversion involves considering factors such as image sensor size, manual exposure controls, resolution, compatibility with lens adapters, and size/weight. By carefully considering these factors, you can choose a camera that suits your needs and preferences for creating a digital pinhole camera.
3、 Creating a pinhole lens for your digital camera
Creating a pinhole lens for your digital camera is a fascinating way to explore the world of photography. It allows you to capture unique and artistic images with a distinct vintage feel. While traditional pinhole cameras are made using film, you can adapt the concept to work with your digital camera. Here's a step-by-step guide on how to make a digital pinhole camera:
1. Find a suitable camera: Choose a digital camera that allows you to manually control the aperture and shutter speed settings. This will give you more flexibility in capturing pinhole images.
2. Gather materials: You will need a body cap for your camera, a thin piece of aluminum or brass, a needle or pin, sandpaper, and black electrical tape.
3. Prepare the pinhole: Using sandpaper, gently sand one side of the aluminum or brass sheet until it becomes smooth. Then, using a needle or pin, carefully create a tiny hole in the center of the sheet. The size of the hole will determine the sharpness and exposure of your images, so experiment with different sizes to achieve the desired effect.
4. Attach the pinhole: Remove the lens from your camera and replace it with the body cap. Securely attach the pinhole sheet to the body cap using black electrical tape, ensuring that the pinhole is centered.
5. Set up your camera: Set your camera to manual mode and adjust the aperture and shutter speed settings according to the lighting conditions. Since pinhole photography requires longer exposure times, a tripod or stable surface is recommended to avoid camera shake.
6. Capture images: Frame your shot and press the shutter button. Keep in mind that pinhole photography often results in soft focus and vignetting, which adds to the charm of the images.
By creating a pinhole lens for your digital camera, you can explore the unique and artistic possibilities of this traditional photography technique while enjoying the convenience and instant results of digital photography.
4、 Adjusting exposure settings for pinhole photography
Adjusting exposure settings for pinhole photography is an essential aspect of capturing the perfect image. Whether you are using a traditional pinhole camera or a digital one, understanding how to control exposure is crucial for achieving the desired results.
In a digital pinhole camera, the exposure settings can be adjusted in a few different ways. Firstly, you can manipulate the ISO setting. Increasing the ISO will make the camera more sensitive to light, resulting in brighter images. However, higher ISO settings can also introduce more noise or graininess to the image. It is important to find the right balance for your desired aesthetic.
Another way to control exposure is by adjusting the shutter speed. In a digital pinhole camera, this can be done by changing the exposure time. Longer exposure times allow more light to enter the camera, resulting in brighter images. However, longer exposures can also lead to motion blur if there is any movement in the scene. Experimenting with different exposure times will help you find the perfect balance between brightness and sharpness.
Lastly, you can also adjust the aperture size in a digital pinhole camera. The aperture controls the amount of light that enters the camera. A smaller aperture will result in a larger depth of field, meaning more of the image will be in focus. On the other hand, a larger aperture will create a shallower depth of field, allowing for selective focus. Finding the right aperture size will depend on the specific effect you want to achieve in your photograph.
As technology advances, digital pinhole cameras offer more flexibility and control over exposure settings. However, it is important to remember that pinhole photography is an art form that often embraces imperfections and unpredictability. Experimentation and creativity are key to capturing unique and captivating images.
