How To Make Thermal Camera At Home ?
Making a thermal camera at home requires some technical knowledge and equipment. You would need an infrared sensor, such as a thermopile or microbolometer, to detect thermal radiation. This sensor would need to be connected to a microcontroller or a computer for data processing. Additionally, you would need a lens to focus the infrared radiation onto the sensor. The sensor and lens would need to be housed in a protective enclosure.
To create a functional thermal camera, you would also need to develop or use software that can interpret the data from the sensor and display it as an image. This software would need to convert the temperature readings into a visual representation, typically using a color scale.
It's important to note that building a thermal camera at home can be a complex and challenging project, requiring expertise in electronics, programming, and optics. It may be more practical and cost-effective to purchase a commercially available thermal camera if you require one for specific applications.
1、 Understanding Infrared Radiation and Its Detection
Understanding Infrared Radiation and Its Detection
Infrared radiation is a form of electromagnetic radiation that is invisible to the human eye but can be detected and measured using specialized equipment such as thermal cameras. These cameras are widely used in various fields, including security, industrial applications, and even in medical diagnostics.
To make a thermal camera at home, you would need a few key components. Firstly, you would require an infrared sensor or detector that can detect and convert infrared radiation into an electrical signal. These sensors are typically made of materials such as indium antimonide or mercury cadmium telluride, which have high sensitivity to infrared radiation.
Next, you would need an imaging system to capture and display the thermal image. This can be achieved by using a microbolometer array, which consists of thousands of tiny heat-sensitive pixels. Each pixel measures the temperature of the corresponding area and creates a thermal image based on the temperature differences.
To process and display the thermal image, you would need a microcontroller or a computer with appropriate software. The software would convert the electrical signals from the infrared sensor into temperature values and then map them onto a color scale to create a visual representation of the thermal image.
It is important to note that building a thermal camera at home can be a complex and challenging task, requiring a good understanding of electronics and programming. Additionally, the components required for a high-quality thermal camera may be expensive and not easily accessible.
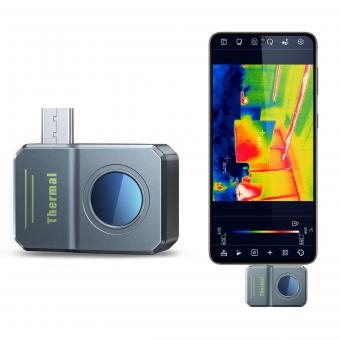
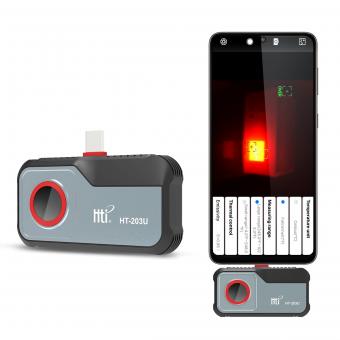
In recent years, there have been advancements in thermal camera technology, including the development of smaller, more affordable sensors and cameras. This has led to the availability of consumer-grade thermal cameras that can be connected to smartphones or other devices, making thermal imaging more accessible to the general public.
In conclusion, understanding infrared radiation and its detection is crucial for building a thermal camera at home. While it is possible to create a basic thermal camera with the right components and knowledge, it is important to consider the complexity and cost involved. Alternatively, one can explore the option of purchasing a consumer-grade thermal camera for personal use.
2、 Selecting the Right Image Sensor for Thermal Imaging
Selecting the Right Image Sensor for Thermal Imaging
Thermal imaging has become increasingly popular in various fields, including security, industrial inspections, and even home automation. The ability to detect and visualize heat signatures can provide valuable insights and enhance safety. When it comes to building a thermal camera at home, selecting the right image sensor is crucial for accurate and reliable thermal imaging.
One option for creating a thermal camera at home is to use a microbolometer sensor. Microbolometers are uncooled thermal sensors that can detect long-wave infrared radiation. They are cost-effective and widely available, making them a popular choice for DIY thermal imaging projects. These sensors work by measuring the temperature difference between objects and their surroundings, converting it into an electrical signal that can be processed and displayed as an image.
When selecting a microbolometer sensor, several factors should be considered. The resolution of the sensor determines the level of detail in the thermal images. Higher resolutions provide clearer images but may come at a higher cost. The thermal sensitivity of the sensor is also important, as it determines the smallest temperature difference that can be detected. Additionally, the field of view and frame rate should be considered based on the intended application of the thermal camera.
It is worth noting that building a thermal camera at home requires technical knowledge and expertise in electronics and programming. Various online resources and tutorials are available to guide enthusiasts through the process. Additionally, some companies offer DIY thermal camera kits that include all the necessary components and instructions.
In conclusion, selecting the right image sensor is crucial when building a thermal camera at home. Microbolometer sensors, such as those based on microelectromechanical systems (MEMS) technology, are a popular choice due to their affordability and availability. Considering factors such as resolution, thermal sensitivity, field of view, and frame rate will help ensure accurate and reliable thermal imaging.
3、 Designing the Optics for a Homemade Thermal Camera
Designing the Optics for a Homemade Thermal Camera
Creating a thermal camera at home can be an exciting and rewarding project for those interested in exploring the world of infrared imaging. While it may seem daunting, with the right knowledge and resources, it is possible to design the optics for a homemade thermal camera.
The first step in designing the optics is to understand the basic principles of thermal imaging. Thermal cameras detect infrared radiation emitted by objects and convert it into a visible image. To achieve this, the camera requires a lens that can focus the infrared radiation onto a sensor.
One option for designing the optics is to repurpose an existing camera lens. Many older digital cameras have removable lenses that can be adapted for thermal imaging. However, it is important to note that not all camera lenses are suitable for this purpose. Look for lenses with a wide aperture and low dispersion to ensure optimal performance.
Another option is to build a lens from scratch using materials such as germanium or silicon. These materials have high transmission rates for infrared radiation and can be shaped into lenses. However, this approach requires advanced knowledge of optics and access to specialized equipment.
In recent years, there have been advancements in 3D printing technology that allow for the creation of custom lenses. This opens up new possibilities for designing optics for homemade thermal cameras. By using computer-aided design software, it is possible to create lens designs optimized for thermal imaging and then 3D print them using materials with suitable infrared transmission properties.
It is important to note that designing the optics is just one aspect of building a homemade thermal camera. Other components, such as the sensor and image processing software, also play crucial roles in the overall performance of the camera. Therefore, it is essential to research and understand these aspects as well.
In conclusion, designing the optics for a homemade thermal camera requires a solid understanding of thermal imaging principles and access to suitable materials and equipment. Whether repurposing existing camera lenses, building lenses from scratch, or utilizing 3D printing technology, there are various approaches to explore. As technology continues to advance, new possibilities for designing optics for homemade thermal cameras may emerge.
4、 Building the Circuitry and Signal Processing for Thermal Imaging
Building a thermal camera at home can be a fascinating project for those interested in electronics and imaging technology. While it may not be as advanced as commercial thermal cameras, it can still provide a basic level of thermal imaging capability. Here is a general overview of how to make a thermal camera at home:
1. Choose a thermal sensor: Select a suitable thermal sensor, such as the MLX90640, which is affordable and readily available. This sensor can detect infrared radiation and convert it into temperature values.
2. Build the circuitry: Connect the thermal sensor to a microcontroller, such as an Arduino or Raspberry Pi, using appropriate wiring and soldering techniques. The microcontroller will act as the brain of the thermal camera, processing the sensor data and generating the thermal image.
3. Develop the signal processing algorithm: Write a program that reads the temperature values from the thermal sensor and converts them into a visual representation. This can be done using various signal processing techniques, such as mapping temperature values to different colors or creating a heat map.
4. Display the thermal image: Connect a display, such as an LCD screen or a computer monitor, to the microcontroller to visualize the thermal image. Ensure that the display can handle the resolution and refresh rate required for the project.
5. Calibrate the thermal camera: To improve accuracy, calibrate the thermal camera by comparing its readings with a known temperature source. This can be done by placing objects with known temperatures in the camera's field of view and adjusting the algorithm accordingly.
It is important to note that building a thermal camera at home will not yield the same level of performance and accuracy as commercial-grade cameras. However, it can serve as a great learning experience and an introduction to the world of thermal imaging. Additionally, it is essential to prioritize safety and follow proper guidelines when working with electrical components and soldering.











There are no comments for this blog.