How To Measure Under A Microscope ?
To measure under a microscope, you can use the eyepiece graticule or a stage micrometer. The eyepiece graticule is a small ruler-like scale that is placed in the eyepiece of the microscope. By calibrating the graticule using a stage micrometer, you can determine the size of objects observed under the microscope. The stage micrometer is a glass slide with a precise scale etched onto it. By comparing the scale on the stage micrometer with the scale on the eyepiece graticule, you can calculate the size of the objects being observed. Additionally, some microscopes have built-in measurement tools or software that allow for direct measurement of objects on the screen.
1、 Magnification: Determining the level of enlargement achieved by the microscope.
How to measure under a microscope:
One of the key aspects of using a microscope is the ability to measure objects accurately. Measuring under a microscope involves determining the size or dimensions of the object being observed. The most fundamental measurement in microscopy is magnification, which determines the level of enlargement achieved by the microscope.
Magnification is typically expressed as a ratio, such as 100x or 1000x, indicating how many times larger the object appears compared to its actual size. To measure under a microscope, start by calibrating the eyepiece or ocular lens using a stage micrometer, which is a glass slide with a finely divided scale. By comparing the divisions on the stage micrometer to the divisions seen through the microscope, you can determine the magnification of the eyepiece.
Once the eyepiece is calibrated, you can measure the object of interest by using the stage micrometer as a reference. Place the object on the microscope stage and focus on it using the appropriate objective lens. Then, move the stage micrometer into the field of view and align it with the object. By counting the number of divisions on the stage micrometer that correspond to the object's size, you can calculate the actual dimensions of the object.
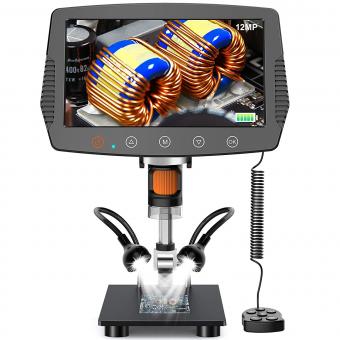
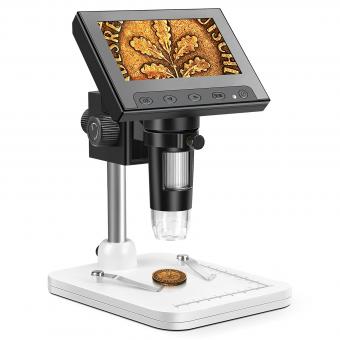
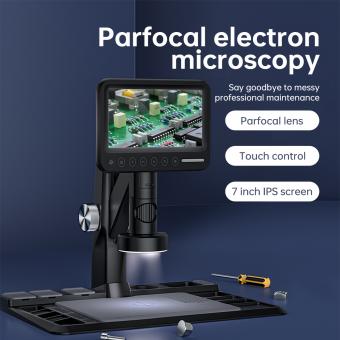
It is important to note that measuring under a microscope requires careful attention to the calibration of the eyepiece and the accuracy of the stage micrometer. Additionally, advancements in technology have led to the development of digital microscopes that offer more precise and automated measurement capabilities. These microscopes often come with software that allows for direct measurement on the computer screen, eliminating the need for manual calculations.
In conclusion, measuring under a microscope involves determining the magnification achieved by the microscope and using a stage micrometer as a reference to calculate the actual dimensions of the object. However, with the advent of digital microscopes, measuring has become more accurate and convenient through the use of software-based measurement tools.

2、 Resolution: Assessing the ability to distinguish fine details and structures.
Resolution is a crucial aspect when it comes to measuring under a microscope. It refers to the ability of the microscope to distinguish fine details and structures. To accurately measure under a microscope, the following steps can be followed:
1. Calibrate the microscope: Before starting any measurements, it is important to calibrate the microscope. This involves ensuring that the microscope is properly aligned and the objective lenses are correctly focused.
2. Choose the appropriate magnification: Select the appropriate objective lens to achieve the desired level of magnification. Higher magnification allows for finer details to be observed and measured.
3. Focus on the specimen: Adjust the focus knobs to obtain a clear and sharp image of the specimen. This is crucial for accurate measurements.
4. Use a calibrated eyepiece graticule: An eyepiece graticule is a measuring scale that can be inserted into the eyepiece of the microscope. It allows for direct measurements of the specimen. Ensure that the graticule is properly calibrated using a stage micrometer, which is a slide with a known scale.
5. Measure using the stage micrometer: If the specimen does not have a suitable scale, a stage micrometer can be used. By comparing the scale on the stage micrometer to the scale on the specimen, measurements can be made.
6. Consider the limitations: It is important to be aware of the limitations of the microscope's resolution. The resolution is determined by factors such as the numerical aperture of the objective lens and the wavelength of light used. The latest advancements in microscopy techniques, such as super-resolution microscopy, have pushed the limits of resolution even further, allowing for the visualization and measurement of structures at the nanoscale.
In conclusion, measuring under a microscope requires careful calibration, appropriate magnification, and the use of calibrated scales. Understanding the limitations of resolution is also crucial for accurate measurements. With the latest advancements in microscopy, researchers can now measure and analyze structures with unprecedented detail and precision.

3、 Field of View: Measuring the area visible through the microscope.
Field of View: Measuring the area visible through the microscope.
When using a microscope, it is often necessary to measure the size of objects or the area being observed. One way to do this is by measuring the field of view, which refers to the area visible through the microscope at a given magnification. Measuring the field of view can be useful in various scientific disciplines, such as biology, medicine, and materials science.
To measure the field of view, you will need a microscope with a calibrated eyepiece or a stage micrometer. Here is a step-by-step guide on how to measure the field of view:
1. Start by placing a stage micrometer, which is a microscope slide with a scale of known dimensions, on the microscope stage. Ensure that the micrometer is properly aligned with the microscope's optical axis.
2. Adjust the microscope's focus until the scale on the micrometer is clear and in focus.
3. Look through the eyepiece and note the number of divisions on the micrometer scale that are visible across the field of view. Each division represents a known distance, such as 0.1 mm or 0.01 mm, depending on the micrometer used.
4. Calculate the field of view by multiplying the number of divisions visible by the known distance represented by each division. For example, if you can see 10 divisions on the micrometer scale, and each division represents 0.1 mm, then the field of view would be 1 mm.
It is important to note that the field of view can vary depending on the magnification of the microscope. Higher magnifications generally result in smaller fields of view. Additionally, different microscopes may have different eyepieces or stage micrometers, so it is crucial to use the appropriate equipment for accurate measurements.
In recent years, advancements in digital imaging and software have made it possible to measure the field of view more precisely. Some microscopes now come with built-in measurement tools that allow for direct measurements on the captured images. These tools can automatically calculate the field of view based on the magnification and provide accurate measurements of objects within the field.
In conclusion, measuring the field of view is an essential technique when using a microscope. It allows scientists and researchers to accurately determine the size and dimensions of objects under observation. With the latest advancements in digital imaging, measuring the field of view has become even more precise and convenient.

4、 Calibration: Establishing a reference scale for accurate measurements.
Calibration: Establishing a reference scale for accurate measurements.
When measuring objects under a microscope, it is crucial to establish a reference scale to ensure accurate measurements. Calibration is the process of determining the relationship between the size of an object in the microscope's field of view and its actual size. This reference scale allows researchers to accurately measure and compare objects at the microscopic level.
To calibrate a microscope, several steps need to be followed. Firstly, a stage micrometer, which is a glass slide with a precise scale etched onto it, is placed on the microscope stage. The micrometer scale is typically divided into smaller units, such as micrometers or millimeters, allowing for precise measurements.
Next, the microscope is focused on the micrometer scale, and the eyepiece reticle or camera is adjusted to align with the scale divisions. The microscope's magnification settings are then adjusted to match the desired level of magnification for the object being measured.
Once the microscope is properly calibrated, measurements can be taken by comparing the size of the object of interest to the known scale on the micrometer slide. This can be done by counting the number of divisions the object spans and multiplying it by the known scale value.
It is important to note that calibration should be performed regularly, as factors such as temperature, humidity, and mechanical wear can affect the accuracy of measurements over time. Additionally, advancements in technology have led to the development of digital microscopes with built-in calibration features, making the process more automated and accurate.
In conclusion, calibration is essential for accurate measurements under a microscope. By establishing a reference scale, researchers can confidently measure and compare objects at the microscopic level, aiding in various scientific and medical applications.















There are no comments for this blog.