How To Observe Sperm Under Microscope ?
To observe sperm under a microscope, you will need a microscope with sufficient magnification (typically 400x or higher), a microscope slide, a coverslip, and a sample of semen.
First, prepare a clean microscope slide by placing a small drop of semen on it. Then, carefully place a coverslip over the drop, ensuring there are no air bubbles.
Next, place the slide on the microscope stage and adjust the focus to bring the sample into view. Start with the lowest magnification and gradually increase it until you can clearly see the sperm.
Observe the sperm under different magnifications to examine their structure and movement. You may also want to use a stain or dye to enhance the visibility of the sperm.
Take note of the sperm's size, shape, and motility. You can also count the number of sperm present in a given area to determine sperm concentration.
Remember to clean the microscope slide and coverslip thoroughly after use to maintain hygiene and prevent contamination.
1、 Sample preparation for observing sperm under a microscope
To observe sperm under a microscope, proper sample preparation is crucial. Here is a step-by-step guide on how to prepare a sample for observing sperm under a microscope:
1. Collection: Collect a semen sample in a sterile container. It is important to ensure that the sample is fresh and not contaminated.
2. Dilution: To make the sperm sample suitable for observation, it needs to be diluted. Add a drop of the semen sample to a small amount of saline solution or a specialized sperm diluent. Mix gently to ensure even distribution.
3. Mixing: Use a pipette or a glass rod to mix the diluted sample thoroughly. This helps to disperse the sperm cells evenly and prevent clumping.
4. Slide preparation: Place a clean glass microscope slide on a flat surface. Using a pipette, transfer a small drop of the diluted sample onto the center of the slide. Be careful not to overload the slide, as it may make observation difficult.
5. Cover slip: Gently place a cover slip over the drop of the sample on the slide. Avoid trapping air bubbles between the slide and the cover slip, as they can obstruct the view.
6. Observation: Place the prepared slide on the microscope stage and adjust the focus to bring the sperm cells into view. Start with a low magnification objective (e.g., 10x) to locate the sperm cells, and then switch to a higher magnification (e.g., 40x or 100x) for detailed observation.
It is worth noting that advancements in technology have led to the development of specialized techniques for observing sperm under a microscope. For instance, phase-contrast microscopy and differential interference contrast microscopy can enhance the visibility of sperm cells by providing contrast to their transparent structures. Additionally, fluorescent staining techniques can be used to label specific components of the sperm, such as DNA or proteins, allowing for more detailed analysis.
Overall, proper sample preparation and the use of appropriate microscopy techniques are essential for observing sperm under a microscope accurately.
2、 Adjusting microscope settings for optimal sperm visualization
To observe sperm under a microscope, it is important to properly adjust the microscope settings for optimal visualization. Here is a step-by-step guide on how to do so:
1. Prepare the sample: Collect a semen sample in a sterile container. Allow the sample to liquefy for about 20-30 minutes at room temperature. Mix the sample gently to ensure an even distribution of sperm.
2. Prepare a microscope slide: Place a drop of the well-mixed semen sample onto a clean glass microscope slide. Cover the sample with a coverslip to prevent drying.
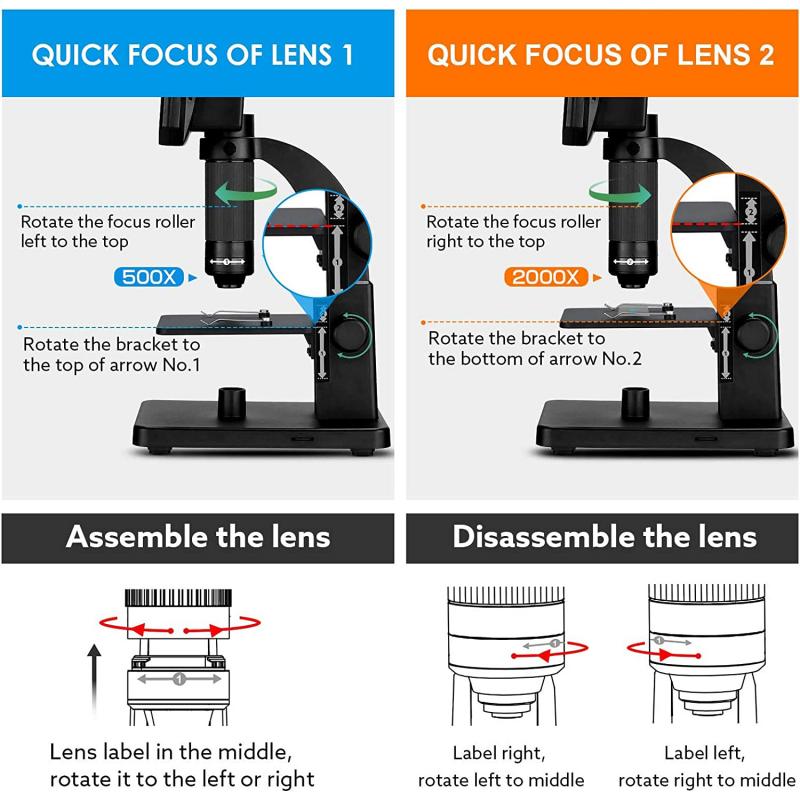
3. Set the microscope: Start by placing the slide on the microscope stage. Use the lowest magnification objective lens (usually 10x) to locate the sperm. Adjust the focus using the coarse and fine adjustment knobs until the sperm come into view.
4. Adjust the lighting: Adjust the light intensity using the iris diaphragm or the light intensity control knob. Too much light can cause the sperm to appear washed out, while too little light can make them difficult to see.
5. Increase magnification: Once the sperm are in focus, switch to a higher magnification objective lens (e.g., 40x or 100x) to observe the sperm in more detail. Use the fine adjustment knob to fine-tune the focus.
6. Stain the sample (optional): If necessary, you can use a sperm-specific stain, such as eosin-nigrosin or Giemsa, to enhance the visibility of the sperm. Follow the staining protocol carefully to avoid damaging the sperm.
7. Observe and analyze: Once the microscope settings are adjusted, observe the sperm carefully. Look for characteristics such as motility, morphology, and concentration. Record your observations and analyze the results.
It is worth noting that advancements in technology have led to the development of digital microscopy systems, which allow for automated sperm analysis. These systems use computer algorithms to analyze sperm characteristics, providing more accurate and efficient results. However, manual observation under a microscope remains a valuable technique in certain situations, such as research studies or when specific parameters need to be assessed.
3、 Identifying and distinguishing different types of sperm cells
To observe sperm under a microscope, follow these steps:
1. Prepare a clean microscope slide and cover slip. Ensure they are free from any dust or debris.
2. Collect a semen sample. This can be done through masturbation or using a special condom during sexual intercourse.
3. Place a small drop of the semen sample onto the center of the microscope slide.
4. Gently lower the cover slip onto the drop of semen, being careful to avoid trapping air bubbles.
5. Place the slide under the microscope and start with the lowest magnification objective lens.
6. Slowly increase the magnification until you can clearly see the sperm cells.
7. Observe the sperm cells under different magnifications to get a better understanding of their structure and movement.
To identify and distinguish different types of sperm cells, additional techniques may be required. One common method is staining the sperm cells with a special dye, such as eosin or hematoxylin, which can highlight different structures within the cells. This staining technique can help differentiate between normal and abnormal sperm cells, as well as identify any structural abnormalities.
Another approach is using a technique called flow cytometry, which can analyze the size, shape, and DNA content of individual sperm cells. This method allows for the identification and sorting of different types of sperm cells based on their characteristics.
It is important to note that the latest point of view in sperm analysis involves the use of advanced imaging techniques, such as high-speed video microscopy and computer-assisted sperm analysis (CASA). These technologies provide more detailed information about sperm motility, morphology, and other parameters, allowing for a more accurate assessment of sperm quality and fertility potential.
4、 Assessing sperm motility and viability through microscopic observation
To observe sperm under a microscope, follow these steps:
1. Prepare a clean microscope slide and cover slip by washing them with warm water and soap, then rinsing with distilled water. Dry them with a lint-free cloth to remove any residue.
2. Collect a semen sample in a sterile container. It is important to note that the sample should be obtained through masturbation or using a special condom that does not contain any spermicidal agents.
3. Allow the sample to liquefy at room temperature for about 20-30 minutes. This will make it easier to handle and prepare for observation.
4. Place a small drop of the liquefied semen onto the center of the microscope slide. Gently lower the cover slip onto the drop, being careful to avoid trapping air bubbles.
5. Place the slide on the microscope stage and adjust the focus to bring the sperm into view. Start with a low magnification objective (e.g., 10x) to locate the sperm, then switch to a higher magnification (e.g., 40x or 100x) for detailed observation.
6. Observe the sperm for their motility and viability. Motility refers to the ability of sperm to move, while viability refers to their ability to survive and potentially fertilize an egg. Assess the percentage of motile sperm and their movement patterns (e.g., progressive, non-progressive, or immotile). Additionally, check for any abnormalities in sperm morphology.
7. Record your observations and findings. This can be done by taking photographs or videos through the microscope or by manually documenting the results.
It is worth mentioning that advancements in technology have led to the development of computer-assisted sperm analysis (CASA) systems. These systems use specialized software to automatically analyze sperm parameters, including motility and viability. CASA can provide more accurate and objective results compared to manual observation, especially when dealing with large sample sizes. However, manual observation remains a valuable technique for basic assessment and research purposes.














There are no comments for this blog.