How To Put Camera Vertically On Tripod ?
To put a camera vertically on a tripod, first, ensure that your tripod has a vertical orientation option. Most tripods have a central column that can be adjusted to different angles. Loosen the locking mechanism on the central column and rotate it to a vertical position. Once in the vertical position, tighten the locking mechanism to secure the column in place. Then, attach your camera to the tripod head using the appropriate mounting plate or quick-release system. Make sure the camera is securely attached and tighten any necessary screws or knobs. Adjust the tripod head to the desired angle and tighten the knobs to lock it in place. Your camera is now vertically mounted on the tripod, allowing you to capture images or videos in a vertical orientation.
1、 Adjusting the tripod head for vertical orientation
To put a camera vertically on a tripod, you need to adjust the tripod head for vertical orientation. Here's how you can do it:
1. Start by loosening the tripod head's locking mechanism. This will allow you to make adjustments to the head.
2. Once the locking mechanism is loose, rotate the tripod head 90 degrees to the side. This will position the head vertically.
3. Tighten the locking mechanism to secure the tripod head in its vertical position. Make sure it is tightened enough to hold the weight of your camera securely.
4. Attach your camera to the tripod head using the camera mounting plate. Ensure that the plate is securely fastened to the camera.
5. Once the camera is attached, adjust the tripod legs to the desired height and position.
6. Use the tripod's pan and tilt controls to fine-tune the camera's framing and composition. These controls allow you to adjust the camera's position horizontally and vertically.
7. Double-check that the camera is securely attached and balanced on the tripod head. This will prevent any accidental falls or damage to your equipment.
It's important to note that some tripods may have different mechanisms for adjusting the head for vertical orientation. Always refer to the manufacturer's instructions for your specific tripod model.
In recent years, there has been an increase in the popularity of vertical photography, especially with the rise of social media platforms like Instagram. Vertical orientation allows for better framing of tall subjects, such as buildings or trees, and can also create a more immersive viewing experience on mobile devices. Many tripods now come with dedicated vertical orientation features, making it easier to switch between horizontal and vertical shooting modes.

2、 Using a vertical L-bracket or camera grip
To put a camera vertically on a tripod, you can use a vertical L-bracket or a camera grip. These accessories allow you to mount your camera in a vertical position, providing stability and flexibility for shooting in portrait orientation.
A vertical L-bracket is a versatile accessory that attaches to the bottom of your camera and provides a vertical mounting plate. It typically has two perpendicular plates that form an "L" shape, allowing you to easily switch between horizontal and vertical shooting. To use a vertical L-bracket, simply attach it to the bottom of your camera using the tripod mount screw, and then mount the bracket onto the tripod head. This setup ensures that your camera is securely attached and balanced on the tripod.
Another option is a camera grip, which is a handle-like accessory that attaches to the side of your camera. It provides a comfortable grip and also features a tripod mount on the bottom. To use a camera grip, attach it to the side of your camera and then mount the grip onto the tripod head. This setup allows you to hold the camera more securely while shooting vertically.
Both the vertical L-bracket and camera grip offer advantages depending on your shooting style and preferences. The L-bracket provides a more stable and balanced setup, especially for heavier cameras and lenses. On the other hand, a camera grip offers a more ergonomic grip and is often preferred for handheld shooting.
In recent years, some camera manufacturers have started incorporating built-in vertical shooting capabilities into their camera bodies. These cameras feature a rotating LCD screen and a dedicated vertical shutter button, eliminating the need for additional accessories. However, if your camera does not have this feature, using a vertical L-bracket or camera grip is still a reliable and convenient solution.
3、 Utilizing a ball head with a vertical tilt feature
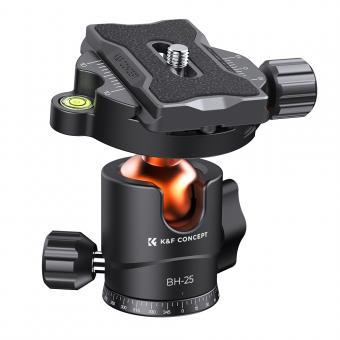
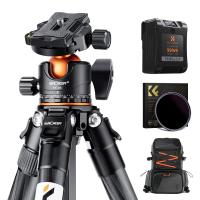
To put a camera vertically on a tripod, you can utilize a ball head with a vertical tilt feature. A ball head is a type of tripod head that allows for smooth and precise movement in multiple directions. It consists of a ball and socket joint that enables the camera to be positioned at various angles.
To begin, make sure your tripod is set up and stable. Then, attach the ball head to the tripod by screwing it onto the mounting plate. Once securely attached, loosen the ball head's locking knob to allow for movement.
Next, position your camera on the ball head's mounting plate and secure it by tightening the plate's locking knob. Ensure that the camera is securely attached and won't move or slip.
To tilt the camera vertically, locate the vertical tilt feature on the ball head. This is usually a separate knob or lever that controls the vertical movement of the ball head. Loosen the vertical tilt knob or release the lever to allow for vertical movement.
Now, carefully tilt the camera vertically to the desired angle. Once you have achieved the desired position, tighten the vertical tilt knob or re-engage the lever to lock the camera in place.
Finally, double-check that the camera is securely attached and stable. Adjust the tripod legs if necessary to ensure stability and balance.
Utilizing a ball head with a vertical tilt feature provides flexibility and ease when positioning your camera vertically on a tripod. It allows for smooth and precise adjustments, ensuring that you can capture your subject from any desired angle.
4、 Using a tripod with a center column that can be rotated
To put a camera vertically on a tripod, you can follow these steps:
1. Start by setting up your tripod on a stable surface. Make sure the legs are fully extended and locked in place.
2. Locate the center column of the tripod. This is the vertical column that connects the tripod legs to the camera mount.
3. Check if your tripod has a center column that can be rotated. Many tripods have this feature, allowing you to easily change the orientation of your camera.
4. If your tripod has a rotating center column, loosen the locking mechanism that holds it in place. This is usually a knob or lever located near the base of the column.
5. Once the locking mechanism is loosened, you can rotate the center column to a vertical position. This will allow you to mount your camera vertically on the tripod.
6. After rotating the center column, tighten the locking mechanism to secure it in place. Make sure it is firmly locked to prevent any movement or instability.
7. Mount your camera onto the tripod head as you normally would, but this time, position it vertically. Most tripod heads have a quick-release plate that attaches to the camera, allowing for easy mounting and dismounting.
8. Adjust the tripod head to ensure your camera is level and properly framed in the vertical position.
Remember to always check the stability of your tripod and ensure it can support the weight of your camera in the vertical position. Additionally, be cautious of any potential balance issues that may arise when shooting vertically, as the weight distribution may differ from shooting horizontally.
