How To Repair Digital Camera Lens ?
Repairing a digital camera lens can be a complex task and is best left to professionals. It is recommended to contact the manufacturer or an authorized service center for assistance. Attempting to repair the lens yourself may cause further damage and void any warranty.
1、 Troubleshooting common lens issues in digital cameras
Troubleshooting common lens issues in digital cameras is essential for any photographer or camera enthusiast. While repairing a digital camera lens can be a complex task, there are a few steps you can take to potentially fix some common issues.
1. Clean the lens: Dust, fingerprints, or smudges on the lens can affect image quality. Use a microfiber cloth or lens cleaning solution to gently clean the lens surface. Be careful not to scratch the lens.
2. Check for autofocus problems: If your camera's autofocus is not working correctly, try switching to manual focus and see if that resolves the issue. If not, it could be a more significant problem that requires professional repair.
3. Inspect for physical damage: Examine the lens for any visible signs of damage, such as cracks or dents. If you notice any, it is best to consult a professional technician for repair.
4. Reset the camera: Sometimes, a simple reset can fix minor glitches. Consult your camera's manual to learn how to perform a factory reset.
5. Update firmware: Check if there are any firmware updates available for your camera model. Updating the firmware can sometimes resolve software-related issues.
It is important to note that repairing a digital camera lens can be challenging and requires technical expertise. If the above steps do not resolve the problem, it is recommended to contact the manufacturer or a professional camera repair service. Attempting to repair the lens yourself without proper knowledge and tools may cause further damage.

2、 Cleaning and maintaining the lens of a digital camera
Cleaning and maintaining the lens of a digital camera is essential for ensuring optimal image quality and prolonging the lifespan of your camera. While repairing a digital camera lens can be a complex task that often requires professional assistance, there are several steps you can take to clean and maintain your lens at home.
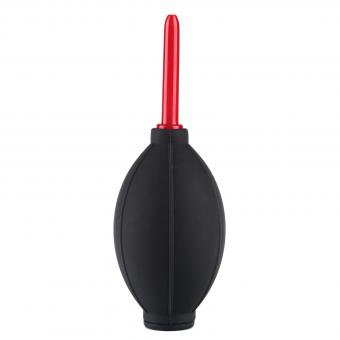
Firstly, start by removing any dust or debris from the lens surface using a soft brush or blower. Avoid using compressed air as it can potentially damage the lens coating. Next, use a microfiber cloth or lens cleaning tissue to gently wipe the lens in a circular motion, starting from the center and moving towards the edges. Be careful not to apply excessive pressure, as this can scratch the lens.
For stubborn smudges or fingerprints, dampen the cloth or tissue with a small amount of lens cleaning solution or isopropyl alcohol. Again, be cautious not to use too much liquid, as it can seep into the lens and cause damage. Additionally, avoid using household cleaning products, as they may contain chemicals that can harm the lens coating.
In terms of maintenance, it is important to store your camera in a clean and dry environment when not in use. Consider investing in a protective case or bag to shield the camera from dust, moisture, and accidental bumps. Regularly check the lens mount for any signs of wear or damage, and if necessary, consult a professional for repair or replacement.
It is worth noting that some camera lenses have complex internal mechanisms that may require professional repair. If you notice any issues such as blurry images, strange noises, or difficulty focusing, it is advisable to seek assistance from a certified technician or the camera manufacturer.
In conclusion, cleaning and maintaining the lens of a digital camera is crucial for optimal performance. By following these steps and being mindful of proper storage and handling, you can ensure that your camera lens remains in good condition for years to come.
3、 Replacing a damaged lens in a digital camera
Replacing a damaged lens in a digital camera is often the most effective solution when it comes to repairing a camera lens. While there are some minor repairs that can be done to fix certain issues, such as cleaning smudges or adjusting loose components, more serious damage usually requires a lens replacement.
To begin the process of replacing a damaged lens, it is important to first identify the specific model of the camera and the type of lens that needs to be replaced. This information can usually be found in the camera's user manual or by contacting the manufacturer directly. Once the correct lens has been obtained, the camera will need to be turned off and the battery removed to ensure safety during the repair process.
Next, the damaged lens can be removed by carefully unscrewing it from the camera body. It is important to exercise caution during this step to avoid causing further damage to the camera. Once the damaged lens has been removed, the new lens can be attached by screwing it into place.
After the new lens has been securely attached, the camera can be turned back on to test its functionality. It is recommended to take a few test shots to ensure that the new lens is working properly and producing clear, sharp images.
In some cases, it may be more cost-effective to have a professional repair technician replace the lens, especially if the camera is still under warranty. Additionally, some camera manufacturers offer lens replacement services for a fee.
It is worth noting that with the rapid advancements in technology, some newer digital cameras have lenses that are not easily replaceable. In these cases, it may be more practical to replace the entire camera rather than attempting to repair the lens.
In conclusion, while there are some minor repairs that can be done to fix certain issues with a digital camera lens, replacing a damaged lens is often the most effective solution. It is important to follow the proper steps and exercise caution during the replacement process to avoid causing further damage to the camera.
4、 Fixing autofocus problems in a digital camera lens
Fixing autofocus problems in a digital camera lens can be a frustrating task, but with some patience and the right techniques, it is possible to repair the lens and restore its functionality. Here are some steps to help you fix autofocus problems in a digital camera lens:
1. Clean the lens: Start by cleaning the lens thoroughly using a microfiber cloth or lens cleaning solution. Dust or smudges on the lens can interfere with autofocus performance.
2. Check the autofocus settings: Ensure that the autofocus settings on your camera are correctly configured. Sometimes, the problem may be due to incorrect settings rather than a faulty lens.
3. Reset the camera: If the autofocus problem persists, try resetting your camera to its factory settings. This can help resolve any software glitches that may be causing the issue.
4. Update firmware: Check if there are any firmware updates available for your camera. Manufacturers often release firmware updates to address autofocus issues and improve overall performance.
5. Calibrate the lens: Some cameras allow you to calibrate the autofocus system. Refer to your camera's manual to learn how to perform this calibration process. It involves adjusting the autofocus settings to ensure accurate focusing.
6. Seek professional help: If none of the above steps work, it may be time to seek professional assistance. Contact the manufacturer or a reputable camera repair service to have your lens inspected and repaired.
It is important to note that not all autofocus problems can be fixed by the user. In some cases, the lens may require professional repair or replacement. Additionally, the latest point of view suggests that as technology advances, camera manufacturers are continuously improving autofocus systems to provide faster and more accurate focusing capabilities. Therefore, it is advisable to keep your camera's firmware up to date to benefit from these advancements.


















There are no comments for this blog.