How To Set Microscope ?
To set up a microscope, start by placing it on a stable surface. Make sure the microscope is turned off and the stage is lowered. Next, plug in the microscope and turn it on. Adjust the light intensity using the control knob. Place a slide on the stage and secure it with the stage clips. Use the coarse focus knob to bring the slide into rough focus. Then, use the fine focus knob to bring the image into sharp focus. Adjust the condenser and diaphragm to optimize the lighting. Finally, adjust the magnification using the objective lenses and the eyepiece.
1、 Adjusting the focus and magnification settings
To set up a microscope, you need to follow a few steps to ensure proper focus and magnification settings. Here is a guide on how to set up a microscope:
1. Start by placing the microscope on a stable surface, ensuring it is level and secure. This will prevent any vibrations or movement that could affect your observations.
2. Next, turn on the microscope's light source. Adjust the intensity of the light to a comfortable level for viewing.
3. Adjust the interpupillary distance, which is the distance between the eyepieces, to match the distance between your eyes. This will provide a clear and comfortable view.
4. Place a slide on the stage of the microscope. Use the stage clips to secure the slide in place.
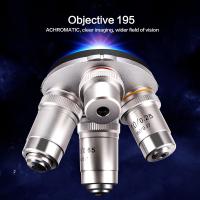
5. Begin with the lowest magnification objective lens. Rotate the nosepiece to select the desired lens.
6. Look through the eyepieces and use the coarse adjustment knob to bring the specimen into focus. This knob moves the stage up and down, allowing you to focus on the sample.
7. Once the specimen is roughly in focus, use the fine adjustment knob to fine-tune the focus. This knob provides smaller, more precise movements to achieve a clear image.
8. If needed, adjust the diaphragm to control the amount of light passing through the specimen. This can help enhance contrast and visibility.
9. Once you have achieved the desired focus and clarity, you can switch to higher magnification lenses by rotating the nosepiece and repeating the focusing process.
It is important to note that different microscopes may have slight variations in their setup procedures. Therefore, it is always recommended to consult the manufacturer's instructions for specific guidance.
In recent years, advancements in microscope technology have led to the development of digital microscopes. These microscopes often come with built-in cameras and software that allow for easy image capture and analysis. Additionally, some microscopes now offer motorized focusing systems, which provide precise and automated focusing capabilities.
Overall, setting up a microscope involves adjusting the focus and magnification settings to obtain clear and detailed images of the specimen. By following the steps outlined above, you can ensure a proper setup and optimize your viewing experience.
2、 Properly positioning and securing the microscope slide
To properly set up a microscope, one of the crucial steps is to position and secure the microscope slide correctly. This ensures that the specimen is in focus and stable during observation. Here is a step-by-step guide on how to achieve this:
1. Start by cleaning the microscope slide thoroughly to remove any dust or debris that may interfere with the observation. Use lens paper or a lint-free cloth to gently wipe the slide.
2. Place the cleaned slide on the stage of the microscope. The stage is the flat platform where the slide rests for observation. Ensure that the slide is centered and aligned with the stage clips or mechanical stage, if available.
3. If your microscope has stage clips, gently slide them over the edges of the slide to secure it in place. Make sure the slide is held firmly but not too tight to avoid damaging the slide or specimen.
4. If your microscope has a mechanical stage, adjust the knobs to position the slide accurately. The mechanical stage allows for precise movement of the slide in both the x and y directions, making it easier to navigate the specimen.
5. Once the slide is secured, lower the objective lens to the lowest magnification (usually 4x or 10x) and use the coarse focus knob to bring the specimen into rough focus. This helps to locate the area of interest before fine-tuning the focus.
6. Finally, use the fine focus knob to sharpen the focus of the specimen. Adjust the lighting and any other necessary settings to optimize the image quality.
It is important to note that different microscopes may have slight variations in their setup procedures. Therefore, it is always recommended to refer to the manufacturer's instructions for your specific microscope model.
In recent years, advancements in microscope technology have led to the development of digital microscopes. These microscopes often come with built-in cameras or can be connected to external cameras or computers. This allows for real-time imaging and analysis of specimens, providing researchers with more efficient and accurate results. Additionally, some digital microscopes offer features such as image stitching and measurement tools, further enhancing the capabilities of microscopic observation.

3、 Calibrating the light source and adjusting the brightness
To set up a microscope, one of the crucial steps is calibrating the light source and adjusting the brightness. This ensures optimal illumination and clarity of the specimen being observed. Here's a step-by-step guide on how to accomplish this:
1. Start by turning on the microscope and allowing it to warm up for a few minutes. This ensures stable lighting conditions.
2. Locate the light source, which is typically located at the base of the microscope. Adjust the intensity control knob to the lowest setting.
3. Place a slide with a specimen on the stage and secure it in place using the stage clips.
4. Look through the eyepiece and slowly increase the intensity of the light source by turning the intensity control knob clockwise. Observe the specimen as you adjust the brightness.
5. Adjust the diaphragm, which controls the amount of light passing through the specimen. Begin by opening the diaphragm fully, allowing maximum light to pass through. Then, gradually close it until the image becomes clearer and sharper. This helps to reduce glare and improve contrast.
6. Fine-tune the brightness by using the condenser adjustment knob, if available. This knob moves the condenser lens up and down, altering the focus of the light on the specimen. Adjust it until the image is evenly illuminated.
7. Take note of any adjustments made to the light source, diaphragm, and condenser settings for future reference.
It is important to note that the specific steps for calibrating the light source and adjusting the brightness may vary depending on the microscope model. Therefore, it is always recommended to consult the microscope's user manual for detailed instructions.
In recent years, advancements in microscope technology have led to the development of automated systems that can calibrate the light source and adjust the brightness automatically. These systems use sensors and algorithms to optimize illumination and ensure consistent results. Such advancements have greatly simplified the process and improved the accuracy and reproducibility of microscope observations.
4、 Using the condenser and diaphragm to control illumination
To set up a microscope, one must first ensure that the microscope is placed on a stable surface and that the objective lenses are properly attached. Once this is done, the condenser and diaphragm can be used to control illumination.
The condenser is a lens system located beneath the stage of the microscope. Its purpose is to focus light onto the specimen, providing a clear and bright image. To adjust the condenser, start by opening the diaphragm fully. Then, adjust the height of the condenser using the condenser focus knob until the light is focused on the specimen. This will help improve the resolution and contrast of the image.
The diaphragm, located within the condenser, controls the amount of light passing through the specimen. By adjusting the diaphragm, one can control the brightness and contrast of the image. Opening the diaphragm fully allows more light to pass through, resulting in a brighter image. Closing the diaphragm partially or fully reduces the amount of light, which can be useful when observing highly transparent specimens.
It is important to note that the latest point of view in microscopy emphasizes the use of Köhler illumination. This technique involves aligning the light source, condenser, and diaphragm to achieve optimal illumination. Köhler illumination provides even and uniform lighting, enhancing the quality of the image. To achieve Köhler illumination, one must adjust the condenser height and diaphragm aperture until the light is evenly distributed across the field of view.
In conclusion, setting up a microscope involves using the condenser and diaphragm to control illumination. Adjusting the condenser height and diaphragm aperture can improve the resolution, contrast, and brightness of the image. Implementing Köhler illumination techniques can further enhance the quality of the illumination.
