How To Set Up Aomekie Telescope ?
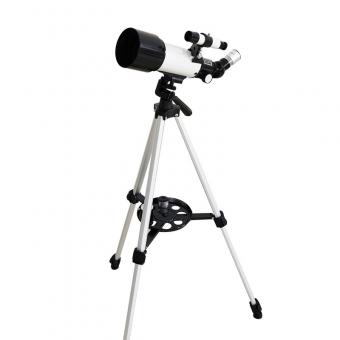
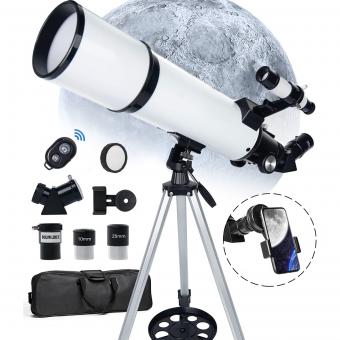
To set up an Aomekie telescope, start by finding a suitable location with a clear view of the sky. Place the tripod on a stable surface and extend its legs to the desired height. Attach the equatorial mount to the tripod and ensure it is securely fastened.
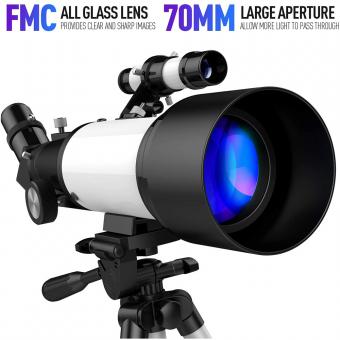
Next, attach the telescope tube to the mount using the dovetail bar and tighten the screws to secure it in place. Insert the eyepiece into the focuser and adjust the focus knob until the image appears clear.
To align the telescope, point it towards a distant object during the daytime, such as a building or tree. Use the slow-motion controls to center the object in the field of view. Once aligned, you can switch to observing celestial objects at night.
Remember to familiarize yourself with the telescope's manual and instructions for specific details on setting up and operating your Aomekie telescope.
1、 Assembling the Aomekie Telescope: Step-by-step guide for beginners.
Assembling the Aomekie Telescope: Step-by-step guide for beginners.
Setting up a telescope can be an exciting yet daunting task, especially for beginners. However, with the right guidance, it can be a rewarding experience. Here is a step-by-step guide on how to set up an Aomekie telescope:
1. Unpack the telescope: Start by carefully unpacking all the components of the Aomekie telescope. Ensure that all parts are present and undamaged.
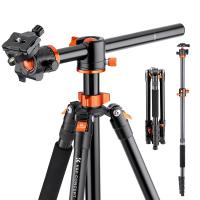
2. Attach the tripod: Extend the tripod legs and securely attach the mount head to the top. Make sure the tripod is stable and level on the ground.
3. Attach the telescope tube: Slide the telescope tube into the mount head and tighten the screws to secure it in place. Ensure that the tube is aligned with the mount.
4. Install the finderscope: Attach the finderscope to the telescope tube using the provided brackets. Align the finderscope with the main telescope by adjusting the screws until the crosshairs are centered.
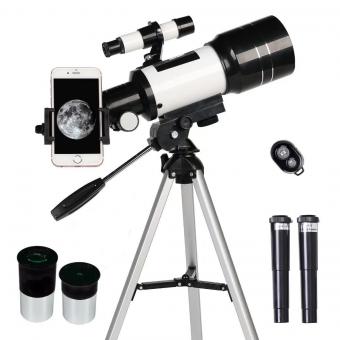
5. Insert the eyepiece: Choose an appropriate eyepiece based on your desired magnification and insert it into the focuser. Secure it in place by tightening the thumbscrew.
6. Calibrate the finder: During daylight, point the telescope at a distant object and center it in the finderscope. Adjust the screws on the finderscope until the object is centered in the main telescope as well.
7. Align the mount: Turn on the telescope's motorized mount and follow the manufacturer's instructions to align it with the celestial objects you wish to observe. This step may vary depending on the specific model of the Aomekie telescope.
8. Start observing: Once the telescope is set up and aligned, you are ready to start observing the night sky. Use the mount's controls to track and adjust the telescope as needed.
Remember, practice makes perfect. It may take some time to become familiar with the Aomekie telescope and its features. Don't hesitate to consult the user manual or online resources for additional guidance. Enjoy exploring the wonders of the universe with your Aomekie telescope!
2、 Aligning the Aomekie Telescope: Achieving proper celestial tracking.
Aligning the Aomekie Telescope: Achieving proper celestial tracking.
Setting up the Aomekie telescope requires a few key steps to ensure proper alignment and celestial tracking. By following these instructions, you can maximize your viewing experience and capture stunning images of the night sky.
1. Assemble the telescope: Start by carefully unpacking all the components of the Aomekie telescope. Follow the manufacturer's instructions to assemble the tripod, mount, and optical tube. Make sure all connections are secure and stable.
2. Level the tripod: Place the tripod on a flat and stable surface. Adjust the tripod legs to ensure it is level. Use a bubble level if necessary to achieve perfect horizontal alignment.
3. Attach the mount: Securely attach the mount to the tripod. Ensure that it is firmly in place and does not wobble.
4. Balance the telescope: Properly balancing the telescope is crucial for smooth tracking. Adjust the counterweights on the mount to achieve a balanced setup. This will prevent strain on the motors and ensure accurate tracking.
5. Align the finderscope: The finderscope helps you locate objects in the sky. Align it with the main telescope by pointing it at a distant object during daylight. Adjust the screws on the finderscope until the object is centered in both the finderscope and the main telescope.
6. Polar alignment: For accurate celestial tracking, polar alignment is necessary. Use a polar alignment scope or a smartphone app to align the mount with the North Star (Polaris). Adjust the mount's altitude and azimuth controls until the North Star is centered in the scope.
7. Calibrate the tracking: Once the telescope is aligned, calibrate the tracking system. This can be done through the telescope's control panel or software. Follow the manufacturer's instructions to ensure accurate tracking.
By following these steps, you can set up your Aomekie telescope for optimal performance and enjoy the wonders of the night sky. Remember to consult the latest user manual or online resources for any specific instructions or updates related to your telescope model.

3、 Focusing and Adjusting the Aomekie Telescope: Sharpening your view.
Focusing and Adjusting the Aomekie Telescope: Sharpening your view.
Setting up a telescope can be an exciting and rewarding experience, especially when it comes to the Aomekie Telescope. This telescope offers great features and capabilities for both beginners and more experienced astronomers. To ensure you get the most out of your Aomekie Telescope, it is important to properly focus and adjust it for optimal viewing.
1. Assembly: Begin by assembling the telescope according to the manufacturer's instructions. This typically involves attaching the tripod, mounting the telescope tube, and attaching any accessories such as finderscopes or eyepieces.
2. Aligning the Finder Scope: The finder scope is a small telescope mounted on top of the main telescope tube. It helps you locate objects in the sky. To align it, choose a distant object, such as a tree or building, and center it in the finder scope. Then, adjust the screws on the finder scope until the object is also centered in the main telescope's eyepiece.
3. Focusing: Start by using a low-power eyepiece, which typically has a longer focal length. Look through the eyepiece and adjust the focus knob until the image appears sharp. If the image is still blurry, try adjusting the focus in small increments until it becomes clear. Once you have achieved focus, you can switch to higher-power eyepieces for more detailed views.
4. Adjusting the Mount: The Aomekie Telescope usually comes with an alt-azimuth mount, which allows for easy movement in both vertical (altitude) and horizontal (azimuth) directions. Use the mount's control knobs to adjust the telescope's position and track objects as they move across the sky.
5. Calibrating the Tracking: Some Aomekie Telescope models have motorized mounts that can automatically track celestial objects. If your telescope has this feature, follow the manufacturer's instructions to calibrate and align the tracking system for accurate tracking.
Remember, practice makes perfect when it comes to using a telescope. Experiment with different eyepieces, try observing different objects in the sky, and take your time to familiarize yourself with the Aomekie Telescope's features. With patience and practice, you will be rewarded with breathtaking views of the cosmos.

4、 Using Eyepieces and Filters with the Aomekie Telescope: Enhancing observations.
Using Eyepieces and Filters with the Aomekie Telescope: Enhancing observations
Setting up the Aomekie telescope is a straightforward process that can be done by following a few simple steps. Here is a guide on how to set up the Aomekie telescope for optimal viewing:
1. Find a suitable location: Choose a location away from bright lights and obstructions that may hinder your view. A clear, open area with minimal light pollution is ideal.
2. Assemble the telescope: Start by attaching the tripod to the telescope mount. Ensure that all screws are tightened securely. Then, attach the telescope tube to the mount, making sure it is aligned properly.
3. Align the finder scope: The finder scope is a smaller telescope attached to the main telescope. Align it by pointing it at a distant object and adjusting the screws until the object is centered in the finder scope.
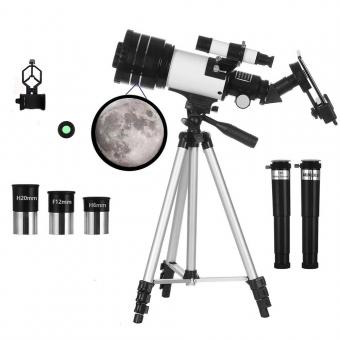
4. Insert the eyepiece: Choose an eyepiece based on the desired magnification level. Insert it into the focuser and secure it in place. Start with a lower magnification eyepiece to locate objects easily, then switch to higher magnification for detailed observations.
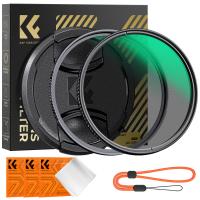
5. Use filters for enhanced observations: Filters can be used to enhance specific features or reduce glare. For example, a moon filter can reduce the brightness of the moon, allowing for better observation of lunar details. Additionally, a nebula filter can enhance the visibility of nebulae.
6. Focus the telescope: Adjust the focus knob until the observed object appears sharp and clear. Fine-tune the focus as needed.
7. Observe and enjoy: Once everything is set up, you can start exploring the night sky. Take your time to observe different celestial objects and enjoy the wonders of the universe.
It is important to note that the latest point of view in using eyepieces and filters with the Aomekie telescope is to experiment and explore different combinations to find what works best for your specific observations. Additionally, staying up to date with the latest advancements in telescope technology and understanding the characteristics of different eyepieces and filters can further enhance your viewing experience.
