How To Set Up Trail Camera ?
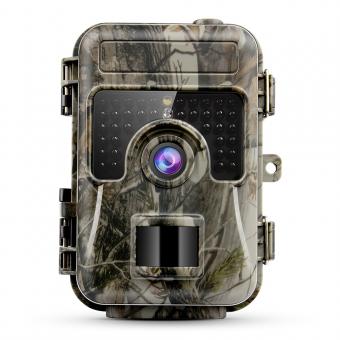
To set up a trail camera, first, choose a suitable location where you want to monitor wildlife or capture images. Look for areas with animal activity, such as game trails, feeding areas, or water sources. Next, mount the camera securely on a tree or post using straps or a mounting bracket. Ensure that the camera is positioned at the desired height and angle for optimal coverage.
Before turning on the camera, insert batteries or connect it to a power source if available. Adjust the camera settings, such as date and time, image resolution, and trigger sensitivity, according to your preferences. Some trail cameras may also have additional features like video recording or time-lapse mode.
Finally, test the camera by walking in front of it to check if it captures images or videos properly. Make any necessary adjustments to the camera's position or settings if needed. Remember to regularly check the camera and replace batteries or memory cards as required.
1、 Camera Placement: Finding the ideal location for your trail camera.
Camera Placement: Finding the ideal location for your trail camera.
Setting up a trail camera is an essential step in capturing wildlife activity and monitoring your surroundings. To ensure the best results, it is crucial to find the ideal location for your camera. Here are some tips on how to set up a trail camera and find the perfect spot.
1. Research and scout the area: Before setting up your trail camera, it is important to research the target species and their habits. Look for signs of animal activity such as tracks, droppings, or feeding areas. This will help you determine the best location to capture their movements.
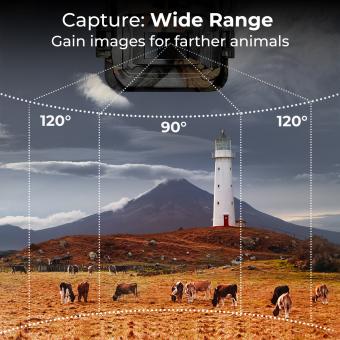
2. Choose the right height and angle: Mount your trail camera at a height that allows for a clear view of the target area. Make sure it is angled correctly to capture the desired field of view. Adjust the camera's settings to ensure optimal image quality and clarity.
3. Consider the surroundings: Look for natural features that can enhance your camera's effectiveness. Trees, rocks, or water sources can attract wildlife and provide interesting backgrounds for your photos or videos. Avoid placing the camera directly facing the sun, as it can cause glare and affect image quality.
4. Test and adjust: Before leaving your camera unattended, test it to ensure it is capturing the desired area. Walk in front of the camera to check the detection range and adjust the settings if necessary. Regularly check the camera's battery life and memory capacity to avoid missing out on important footage.
5. Security and camouflage: To prevent theft or tampering, consider using a security box or cable lock to secure your camera. Additionally, camouflage your camera with natural materials such as leaves or branches to make it less noticeable to both wildlife and potential thieves.
In conclusion, setting up a trail camera requires careful consideration of the location, height, angle, and surroundings. By following these tips, you can increase your chances of capturing valuable wildlife footage and monitoring your environment effectively.
2、 Camera Settings: Adjusting the necessary configurations for optimal performance.
Setting up a trail camera is a relatively straightforward process that requires a few key steps to ensure optimal performance. Here's a guide on how to set up a trail camera and adjust the necessary configurations:
1. Choose the right location: Select a spot where wildlife activity is likely to occur, such as game trails, feeding areas, or water sources. Ensure that the camera is mounted securely and at the right height for capturing the desired field of view.
2. Insert batteries and memory card: Most trail cameras operate on AA batteries, so make sure to insert fresh ones. Additionally, insert a compatible memory card with sufficient storage capacity to capture the desired number of photos or videos.
3. Configure camera settings: Access the camera's menu and adjust the necessary configurations. This typically includes setting the date and time, selecting the desired photo or video resolution, and choosing the appropriate trigger speed and sensitivity settings. Some cameras also offer additional features like time-lapse mode or burst mode, which can be adjusted as per your requirements.
4. Test the camera: Before leaving the camera unattended, perform a test to ensure it is capturing images or videos correctly. Walk in front of the camera's field of view to trigger it and then review the captured footage to ensure it meets your expectations.
5. Mount the camera securely: Use straps or mounting brackets to secure the camera to a tree or post. Ensure it is stable and won't be easily knocked or moved by animals or weather conditions.
6. Regularly check and maintain the camera: Visit the camera periodically to check the battery life and memory card capacity. Also, clean the lens and sensor to ensure clear and accurate captures.
From a latest point of view, some trail cameras now offer wireless connectivity options, allowing you to remotely access and control the camera settings through a smartphone app. This feature provides convenience and real-time monitoring capabilities, making it easier to manage multiple cameras or adjust settings without physically visiting each location.
In conclusion, setting up a trail camera involves selecting the right location, configuring the necessary settings, and ensuring the camera is securely mounted. Regular maintenance and the use of advanced features like wireless connectivity can enhance the overall performance and convenience of trail cameras.
3、 Power Source: Selecting and managing the power supply for your camera.
Power Source: Selecting and managing the power supply for your trail camera is a crucial aspect of setting it up effectively. The power source you choose will determine the longevity and reliability of your camera's operation. Here are some key points to consider when setting up your trail camera's power source.
1. Battery Life: Opting for a power source with a long battery life is essential to ensure your camera remains operational for extended periods. Lithium batteries are often recommended due to their longer lifespan compared to alkaline batteries. Additionally, consider using rechargeable batteries to reduce waste and save money in the long run.
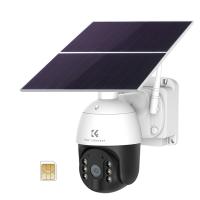
2. Solar Power: Utilizing solar power as a supplementary or primary power source is becoming increasingly popular. Solar panels can be attached to the trail camera, allowing it to recharge during daylight hours. This option is environmentally friendly and eliminates the need for frequent battery replacements.
3. External Power Banks: Another option is to connect your trail camera to an external power bank. This provides a continuous power supply and eliminates the need for battery changes altogether. Ensure the power bank is compatible with your camera and has sufficient capacity to last for extended periods.
4. Power Management Settings: Many trail cameras offer power management settings that allow you to conserve battery life. These settings include adjusting the camera's sensitivity, trigger interval, and sleep mode duration. By optimizing these settings, you can extend the camera's battery life and reduce the frequency of power source maintenance.
5. Regular Maintenance: Regardless of the power source you choose, regular maintenance is essential. Check the battery levels frequently and replace or recharge them as needed. Clean the camera's connections and solar panels to ensure optimal performance.
In conclusion, selecting and managing the power supply for your trail camera is crucial for its effective operation. Consider factors such as battery life, solar power, external power banks, power management settings, and regular maintenance to ensure your camera remains functional for extended periods. Stay updated with the latest advancements in power source technology to make informed decisions and maximize the efficiency of your trail camera setup.
4、 Memory Management: Understanding storage options and organizing captured data.
Memory Management: Understanding storage options and organizing captured data.
Setting up a trail camera is a relatively straightforward process, but understanding memory management is crucial for efficient data storage and organization. Here's a step-by-step guide on how to set up a trail camera and effectively manage the captured data.
1. Choose the right memory card: Ensure that your trail camera is compatible with the memory card you plan to use. Opt for high-capacity cards with fast write speeds to accommodate large amounts of data and capture high-resolution images or videos.
2. Format the memory card: Before using a new memory card, format it in the trail camera itself. This ensures compatibility and eliminates any potential issues with the card's file system.
3. Set up the camera: Follow the manufacturer's instructions to mount the camera securely in your desired location. Adjust the settings according to your preferences, such as resolution, sensitivity, and interval between captures.
4. Organize captured data: Create a folder structure on your computer or external storage device to store the captured data. Organize the files by date, location, or any other relevant criteria to easily locate specific images or videos later.
5. Backup your data: Regularly transfer the captured data from the memory card to your computer or external storage device. This prevents data loss in case of card failure or accidental deletion.
6. Delete unwanted files: After backing up the data, delete unnecessary files from the memory card to free up space for future captures. Be cautious not to delete any important files accidentally.
7. Maintain the camera: Periodically check the camera and memory card for any signs of damage or wear. Clean the lens and ensure the memory card slot is free from debris to avoid any potential issues with data storage.
In recent years, advancements in trail camera technology have introduced wireless connectivity options. Some trail cameras now offer the ability to transfer data directly to a smartphone or cloud storage, eliminating the need for physical memory cards. This allows for real-time monitoring and remote access to the captured data, providing convenience and flexibility to users.
In conclusion, setting up a trail camera involves selecting the right memory card, formatting it, and configuring the camera settings. Effective memory management includes organizing captured data, backing it up, and regularly maintaining the camera and storage devices. With the latest advancements in trail camera technology, wireless connectivity options have made data management even more convenient.









There are no comments for this blog.