How To Shoot Top Down Video With Tripod ?
To shoot top-down video with a tripod, first, ensure that your tripod is stable and securely set up. Position the tripod directly above the subject or area you want to capture. Adjust the height and angle of the tripod to achieve the desired top-down perspective. Make sure the camera is securely attached to the tripod head.
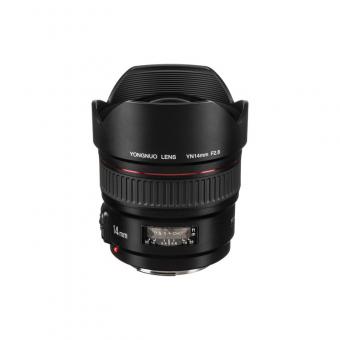
Next, set up your camera settings according to your desired video outcome. Adjust the exposure, focus, and white balance settings as needed. Consider using a wide-angle lens to capture a larger area.
Once everything is set up, start recording your video. Keep an eye on the framing and composition to ensure that the subject or area remains in the frame throughout the recording. Use a remote shutter release or a timer function to minimize camera shake when starting and stopping the recording.
After shooting, review the footage to ensure it meets your requirements. If necessary, make any adjustments to the camera position or settings and reshoot as needed.
1、 Camera positioning and angle for top-down shots with tripod
Camera positioning and angle for top-down shots with a tripod is crucial to achieve the desired effect. Here's a step-by-step guide on how to shoot top-down video with a tripod:
1. Set up your tripod: Choose a sturdy tripod that can hold the weight of your camera and position it on a stable surface. Make sure the tripod is at a comfortable height for shooting.
2. Attach your camera: Securely attach your camera to the tripod head using the appropriate mounting plate or screw. Ensure that the camera is tightly fastened to avoid any accidental movement during shooting.
3. Adjust the tripod height: Extend or retract the tripod legs to adjust the height according to your desired shooting angle. For top-down shots, you'll want to position the tripod higher than your subject.
4. Tilt the tripod head: Tilt the tripod head downwards to achieve a straight top-down angle. Use the tripod's tilt adjustment knob or lever to control the angle. Ensure that the camera is directly facing the subject.
5. Frame your shot: Use the camera's LCD screen or viewfinder to frame your shot accurately. Make sure the subject is centered and properly aligned within the frame.
6. Fine-tune the composition: Adjust the tripod's position and angle as needed to capture the entire subject within the frame. Consider the lighting, background, and any other elements that may enhance the shot.
7. Lock the tripod: Once you're satisfied with the composition, lock the tripod's position and angle to prevent any accidental movement during shooting.
8. Start recording: Press the record button on your camera to start capturing the top-down video. Monitor the shot throughout the recording to ensure everything remains in frame.
Remember to experiment with different camera heights, angles, and compositions to find the most visually appealing top-down shot. Additionally, consider using a remote shutter release or a timer function to minimize camera shake when starting and stopping the recording.
As for the latest point of view, advancements in technology have made shooting top-down videos easier than ever. Some tripods now come with adjustable arms or boom extensions that allow for greater flexibility in positioning the camera directly above the subject. This can be particularly useful when shooting flat lay videos or capturing intricate details. Additionally, some tripods now offer smartphone mounts, making it possible to shoot top-down videos using your smartphone. This opens up new possibilities for content creators who want to create professional-looking videos without investing in expensive camera equipment.
2、 Adjusting tripod height and stability for top-down video shooting
To shoot top-down video with a tripod, you need to follow a few steps to ensure proper height adjustment and stability. Here's a guide on how to do it effectively:
1. Choose the right tripod: Look for a tripod that has a center column that can be tilted horizontally or a tripod arm that can be extended horizontally. This will allow you to position the camera directly above your subject.
2. Set up your tripod: Find a stable surface to place your tripod on. Make sure the legs are fully extended and locked securely in place. Adjust the tripod height to a comfortable level for shooting.
3. Attach your camera: Mount your camera securely onto the tripod head. Ensure that it is tightly fastened to prevent any movement or wobbling during shooting.
4. Adjust the tripod height: Extend the center column or tripod arm to position the camera directly above your subject. This will give you the desired top-down perspective. Make sure the camera is at a height that allows you to capture the entire subject without any obstructions.
5. Stabilize the tripod: To minimize any vibrations or movement, use a tripod weight or hang a bag from the center column. This will add stability and prevent the tripod from tipping over.
6. Fine-tune the composition: Use the tripod's pan and tilt controls to adjust the camera angle and framing. Ensure that the subject is centered and in focus.
7. Test and adjust: Before starting your actual recording, test the stability of the tripod by gently tapping the surface it's placed on. If there is any noticeable movement, readjust the tripod legs or add more weight for stability.
In addition to these steps, it's important to consider the latest point of view when shooting top-down videos. This could include incorporating creative angles, experimenting with different lighting techniques, or using additional equipment such as a remote shutter release or a smartphone app for remote control. Always keep in mind the desired outcome and adapt your shooting techniques accordingly.
3、 Choosing the right camera settings for top-down video recording
To shoot top-down video with a tripod, follow these steps:
1. Set up your tripod: Choose a sturdy tripod that can hold the weight of your camera and position it securely on a flat surface. Make sure the tripod is at a height that allows you to capture the desired top-down angle.
2. Mount your camera: Attach your camera securely to the tripod head. Ensure that it is level and stable.
3. Adjust the camera settings: Set your camera to manual mode to have full control over the settings. Start by setting the ISO to the lowest possible value to minimize noise. Adjust the aperture to control the depth of field, depending on the desired effect. For top-down shots, a smaller aperture (higher f-stop number) is generally preferred to keep the entire frame in focus. Set the shutter speed according to the lighting conditions and the desired amount of motion blur.
4. Frame your shot: Position your subject or scene in the frame, making sure it is centered and well-composed. Consider using a grid overlay on your camera's LCD screen to help with alignment.
5. Focus: Use manual focus to ensure that the subject is sharp. If your camera has focus peaking or magnification features, utilize them to achieve precise focus.
6. White balance: Set the white balance according to the lighting conditions to ensure accurate color reproduction.
7. Start recording: Once everything is set up, press the record button and start capturing your top-down video.
In addition to these steps, it's worth mentioning that the latest point of view in top-down video recording is the use of motorized tripod heads or camera sliders. These tools allow for smooth and controlled movements, adding a dynamic element to your shots. They can be particularly useful when capturing time-lapse videos or creating cinematic effects. Experimenting with different camera angles, lighting setups, and editing techniques can also help enhance the overall quality and creativity of your top-down videos.
4、 Lighting considerations for top-down video shooting with a tripod
Lighting considerations for top-down video shooting with a tripod are crucial to ensure high-quality footage. Here are some tips to help you achieve the best results:
1. Natural light: Whenever possible, utilize natural light as your primary source. Position your setup near a window or in a well-lit area to take advantage of the soft, diffused light. Avoid direct sunlight, as it can create harsh shadows.
2. Artificial lighting: If natural light is insufficient or unavailable, supplement it with artificial lighting. Use softbox lights or LED panels to create a balanced and even illumination. Position the lights at a 45-degree angle from the subject to minimize shadows.
3. Light diffusion: To further soften the light, consider using diffusers or light modifiers. These can help reduce harsh shadows and create a more pleasing aesthetic. Diffusers can be attached to your artificial lights or placed between the light source and the subject.
4. White balance: Ensure proper white balance to maintain accurate colors. Use a white balance card or adjust the settings on your camera to match the lighting conditions. This will prevent any unwanted color casts in your footage.
5. Avoid glare and reflections: Be mindful of any reflective surfaces in your setup, such as glass or shiny objects. Position your lights and camera angles to minimize glare and unwanted reflections.
6. Experiment and adjust: Lighting setups can vary depending on the subject, environment, and desired mood. Take test shots and make adjustments as needed to achieve the desired look.
It's important to stay up-to-date with the latest trends and techniques in top-down video shooting. Keep an eye on industry blogs, YouTube channels, and social media platforms for new ideas and inspiration. Additionally, consider investing in lighting equipment that offers adjustable color temperature and intensity, as this can provide more flexibility in achieving the desired lighting setup.
