How To Turn Camcorder Into Webcam Windows 8 ?
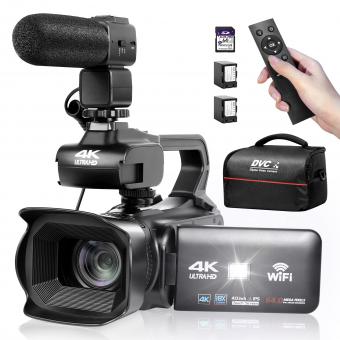
To turn a camcorder into a webcam on Windows 8, you will need to connect the camcorder to your computer using a USB cable or HDMI cable, depending on the available ports on your camcorder and computer. Once connected, you may need to install any necessary drivers or software provided by the camcorder manufacturer. After the drivers are installed, you can open the webcam software on your computer and select the camcorder as the video source. This will allow you to use the camcorder as a webcam for video conferencing, live streaming, or other applications that require a webcam.
1、 Check compatibility of camcorder with Windows 8 for webcam use.
To turn a camcorder into a webcam on Windows 8, you will need to check the compatibility of your camcorder with the operating system. Not all camcorders are designed to function as webcams, so it is important to verify if your specific model supports this feature.
First, consult the user manual or visit the manufacturer's website to determine if your camcorder has webcam functionality. If it does, follow the instructions provided by the manufacturer to set it up as a webcam. This may involve installing specific drivers or software onto your computer.
If your camcorder does not have built-in webcam capabilities, you may still be able to use it as a webcam by utilizing third-party software. There are various software options available that can capture the video feed from your camcorder and make it accessible as a webcam input on your computer. Some popular software options include ManyCam, OBS Studio, and XSplit.
It is important to note that the latest point of view is that many modern camcorders are not designed to function as webcams. With the rise of smartphones and dedicated webcams, the demand for camcorders as webcams has decreased. Therefore, it is recommended to invest in a dedicated webcam if you require high-quality video for video conferencing, streaming, or other online activities. Dedicated webcams are specifically designed for this purpose and offer better image quality and compatibility with various operating systems, including Windows 8.
2、 Install necessary drivers or software for camcorder as webcam.
To turn a camcorder into a webcam on Windows 8, you will need to install the necessary drivers or software for your specific camcorder model. Here is a step-by-step guide on how to do it:
1. Check compatibility: Ensure that your camcorder is compatible with being used as a webcam. Some camcorders have this feature built-in, while others may require additional software or drivers.
2. Connect the camcorder: Use a USB cable to connect your camcorder to your computer. Make sure the camcorder is turned on and set to the appropriate mode for webcam use.
3. Install drivers or software: Visit the manufacturer's website and search for the latest drivers or software for your camcorder model. Download and install them on your Windows 8 computer. These drivers or software will enable your computer to recognize the camcorder as a webcam.
4. Configure settings: Once the drivers or software are installed, open the webcam application on your computer. You may need to access the settings or preferences menu to select your camcorder as the video source. Adjust any other settings, such as resolution or frame rate, as desired.
5. Test the webcam: Open a video conferencing or streaming application on your computer, such as Skype or Zoom, and check if your camcorder is recognized as a webcam. You should be able to select it as the video input source within the application.
It's important to note that not all camcorders can be used as webcams, and the availability of drivers or software may vary depending on the manufacturer. Therefore, it's recommended to consult the user manual or contact the manufacturer for specific instructions and support.
3、 Connect camcorder to computer using appropriate cables.
To turn a camcorder into a webcam on Windows 8, you can follow these steps:
1. Connect camcorder to computer using appropriate cables: The first step is to connect your camcorder to your computer using the appropriate cables. Most camcorders have an HDMI or USB output that can be used to connect to your computer. Check the ports on your camcorder and computer to determine which cable you need.
2. Install any necessary drivers: Depending on your camcorder, you may need to install specific drivers to enable it to work as a webcam. Check the manufacturer's website for any available drivers and download and install them on your computer.
3. Set up the camcorder as a webcam: Once the camcorder is connected and any necessary drivers are installed, you need to set it up as a webcam. Open the settings on your computer and navigate to the webcam settings. Look for an option to select the camcorder as the default webcam. Select the camcorder from the list of available devices.
4. Test the camcorder: After setting up the camcorder as a webcam, it's important to test it to ensure it's working properly. Open a video conferencing or streaming application on your computer and check if the camcorder is recognized as the webcam. You should be able to see the video feed from the camcorder in the application.
It's worth noting that some camcorders may not be compatible with Windows 8 or may not have the necessary drivers available. In such cases, you may need to consider alternative methods or use a separate webcam for your computer. Additionally, always refer to the user manual or manufacturer's website for specific instructions and troubleshooting tips for your camcorder model.
4、 Configure camcorder settings for webcam functionality.
To turn your camcorder into a webcam on Windows 8, you can follow these steps:
1. Check compatibility: Ensure that your camcorder supports webcam functionality. Some camcorders have this feature built-in, while others may require additional software or drivers.
2. Connect the camcorder: Use a USB cable to connect your camcorder to your computer. Make sure the camcorder is powered on.
3. Configure camcorder settings: Access the settings menu on your camcorder and look for an option related to webcam functionality. Enable this option to allow your camcorder to function as a webcam.
4. Install drivers or software: If your camcorder requires additional drivers or software, visit the manufacturer's website and download the necessary files. Install them on your computer following the provided instructions.
5. Set up the webcam: Open the webcam software on your computer. In Windows 8, you can access the webcam settings by searching for "Camera" in the Start menu. Once open, select your camcorder as the video source.
6. Adjust settings: Configure the webcam settings according to your preferences. You can adjust the resolution, frame rate, and other parameters to optimize the video quality.
7. Test the webcam: Open a video conferencing or streaming application, such as Skype or Zoom, and check if your camcorder is recognized as a webcam. Start a video call or stream to confirm that the camcorder is functioning properly.
It's important to note that not all camcorders are designed to function as webcams. If your camcorder does not have this capability, you may need to consider purchasing a separate webcam for your Windows 8 computer.










There are no comments for this blog.