How To Use Gnd Filter ?
To use a graduated neutral density (GND) filter, follow these steps:
1. Attach the GND filter to your camera lens. Make sure it is securely mounted and aligned properly.
2. Set up your camera on a tripod to ensure stability.
3. Compose your shot and determine the area of the scene that requires exposure balancing.
4. Adjust the position of the GND filter within the filter holder to align the darkened portion with the brighter area of the scene.
5. Take a test shot and review the exposure. If needed, adjust the position of the GND filter to achieve the desired effect.
6. Once you are satisfied with the composition and exposure, capture the final image.
7. Remember to remove the GND filter when not in use to avoid any unwanted effects on other shots.
Using a GND filter helps balance the exposure between the bright and dark areas of a scene, particularly in landscape photography where the sky may be significantly brighter than the foreground.
1、 Types of GND Filters and Their Uses
A graduated neutral density (GND) filter is a versatile tool used in photography to balance the exposure between the sky and the foreground in high-contrast scenes. It is particularly useful in landscape photography where the sky is often much brighter than the ground.
To use a GND filter, follow these steps:
1. Attach the filter holder to the front of your lens. Make sure it is securely fastened.
2. Slide the GND filter into the filter holder. Position it so that the dark portion of the filter covers the sky, while the clear portion covers the foreground.
3. Adjust the position of the filter within the holder to achieve the desired effect. You can slide it up or down to control the transition between the dark and clear portions.
4. Take a test shot and review the exposure. If necessary, make further adjustments to the position of the filter to achieve the desired balance between the sky and the foreground.
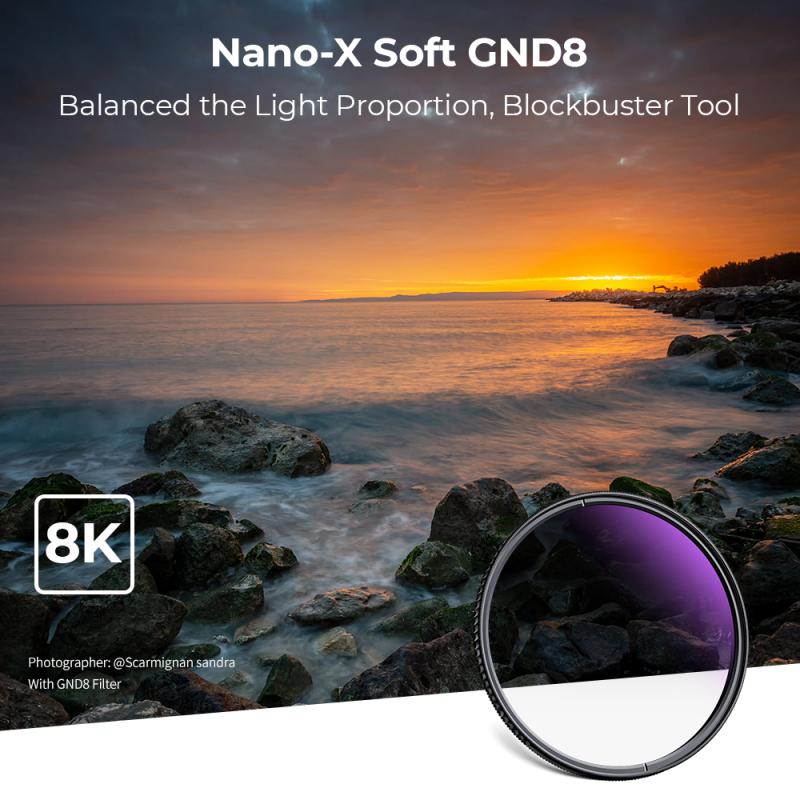
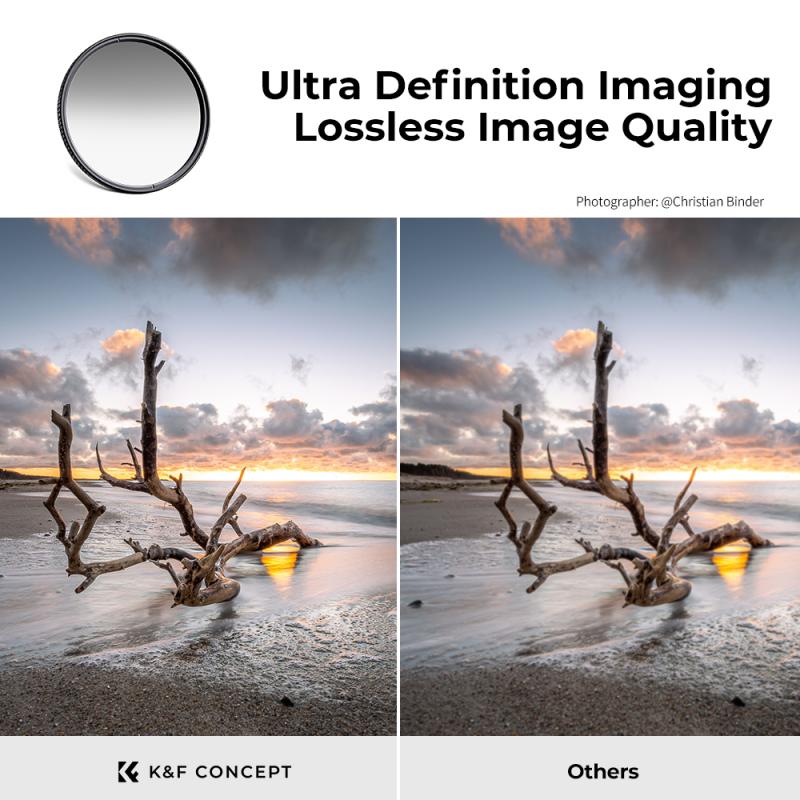
There are different types of GND filters available, including hard-edge, soft-edge, and reverse GND filters. Hard-edge filters have a distinct transition line between the dark and clear portions, making them ideal for scenes with a clear horizon. Soft-edge filters have a gradual transition, making them suitable for scenes with uneven horizons. Reverse GND filters are designed for sunrise or sunset shots, where the brightest part of the sky is near the horizon.
In recent years, some photographers have started using digital techniques to achieve similar effects as GND filters. This involves capturing multiple exposures of the scene and blending them together in post-processing. While this method can be effective, using a physical GND filter in-camera often produces more natural and pleasing results.
In conclusion, using a GND filter is a simple yet effective way to balance exposure in high-contrast scenes. Experiment with different types of GND filters and their positions to achieve the desired effect in your landscape photography.
2、 Proper Placement and Alignment of GND Filters
To properly use a Graduated Neutral Density (GND) filter, it is essential to understand its purpose and how to correctly place and align it. GND filters are primarily used in landscape photography to balance the exposure between the bright sky and the darker foreground. They have a gradient that transitions from clear to dark, allowing you to darken the sky while maintaining proper exposure for the rest of the scene.
Here are the steps to effectively use a GND filter:
1. Assess the scene: Determine the exposure difference between the sky and the foreground. If the difference is significant, a GND filter is likely needed.
2. Choose the right filter: GND filters come in various strengths, such as soft, hard, and reverse. Select the appropriate one based on the scene's characteristics and the desired effect.
3. Attach the filter holder: Mount the filter holder onto your lens. Ensure it is securely attached to prevent any light leaks.
4. Position the filter: Slide the GND filter into the filter holder, aligning the dark portion with the sky. The transition area should cover the horizon line or any other natural division between the sky and the foreground.
5. Adjust the filter: Gradually move the filter up or down within the holder to achieve the desired effect. Take test shots and make adjustments as necessary.
6. Fine-tune the exposure: Use the camera's exposure compensation or manual mode to adjust the overall exposure if needed. This will help balance the brightness levels between the sky and the foreground.
7. Capture the image: Once you have achieved the desired exposure balance, take the shot. Be mindful of any potential color casts caused by the filter and adjust white balance settings accordingly.
It is worth noting that some photographers prefer to use digital blending or post-processing techniques to achieve similar results without using physical filters. However, GND filters remain a popular choice for photographers who prefer to capture the scene as accurately as possible in-camera.
In recent years, advancements in camera technology, such as high dynamic range (HDR) capabilities, have provided alternative methods for achieving balanced exposures. These techniques involve capturing multiple exposures and blending them together in post-processing. While this approach can be effective, it may not always produce the same natural and seamless results as using a GND filter.
Ultimately, the proper placement and alignment of a GND filter require careful observation and experimentation. Practice and experience will help you master the technique and achieve stunning landscape photographs.
3、 Adjusting Exposure with GND Filters
To use a Graduated Neutral Density (GND) filter for adjusting exposure, follow these steps:
1. Choose the right filter: GND filters come in different strengths, such as 1-stop, 2-stop, or 3-stop. Select the appropriate filter based on the scene's dynamic range and the amount of exposure adjustment required.
2. Attach the filter holder: GND filters are typically square or rectangular in shape and require a filter holder system. Attach the filter holder to the front of your lens securely.
3. Position the filter: Slide the GND filter into the filter holder, ensuring that the dark portion of the filter is aligned with the bright area of the scene that needs exposure reduction. The transition between the dark and clear portions of the filter should be placed along the horizon line or any other desired boundary.
4. Adjust the filter position: Depending on the scene, you may need to adjust the position of the filter to achieve the desired effect. Graduated filters can be moved up or down within the holder to align the transition line with the desired area of the frame.
5. Capture the image: Once the filter is in place, compose your shot and take the photo. The GND filter will help balance the exposure between the bright and dark areas of the scene, resulting in a more evenly exposed image.
It's worth noting that advancements in digital post-processing have provided photographers with alternative methods for adjusting exposure. Techniques like High Dynamic Range (HDR) imaging and exposure blending in software can achieve similar results to using GND filters. However, GND filters still offer advantages in certain situations, such as reducing the dynamic range in-camera and preserving details in highlights and shadows without the need for extensive post-processing.

4、 Balancing Sky and Landscape with GND Filters
To use a Graduated Neutral Density (GND) filter for balancing the sky and landscape in photography, follow these steps:
1. Choose the right filter: GND filters come in different strengths, usually measured in stops. Select a filter that suits the dynamic range of the scene. For example, if the sky is much brighter than the landscape, a stronger filter may be needed.
2. Attach the filter holder: GND filters are typically square or rectangular and require a filter holder system. Attach the holder to the front of your lens securely.
3. Position the filter: Slide the GND filter into the holder, ensuring that the dark portion of the filter is covering the sky while the clear portion covers the landscape. Adjust the position of the filter to achieve the desired effect.
4. Set the exposure: Meter the scene to determine the correct exposure for the landscape. Use manual mode to lock in this exposure setting.
5. Take the shot: Compose your image and take the shot. The GND filter will help balance the exposure between the sky and landscape, resulting in a more evenly exposed photograph.
The latest point of view on using GND filters is that they are still a valuable tool for landscape photographers, despite advancements in post-processing techniques. While it is possible to balance the exposure in post-production, using a GND filter in-camera can save time and produce more natural-looking results. Additionally, GND filters can help preserve details in both the sky and landscape, which may be lost when using post-processing techniques. However, it is important to note that GND filters work best in scenes with a clear horizon line, where the transition between the sky and landscape is relatively straight. In more complex scenes, such as those with trees or mountains protruding into the sky, blending multiple exposures in post-processing may be a more effective solution.














There are no comments for this blog.