How To Use Macro Lens Adapter ?
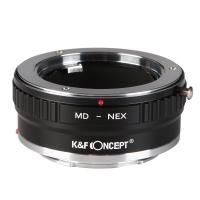
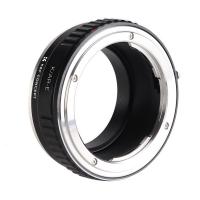
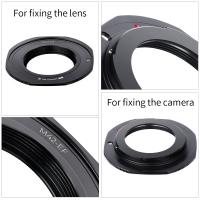
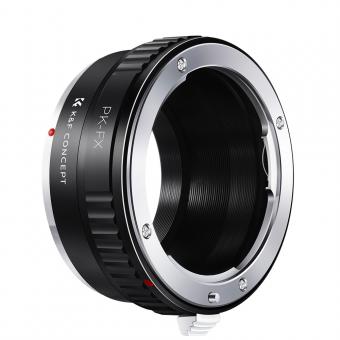
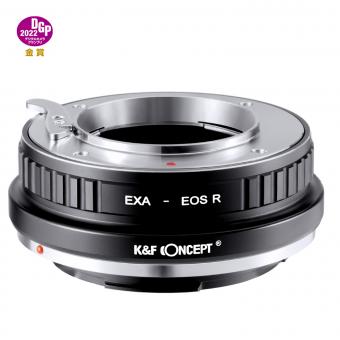
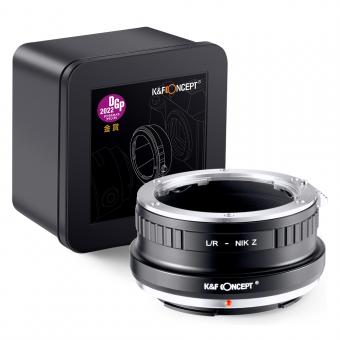
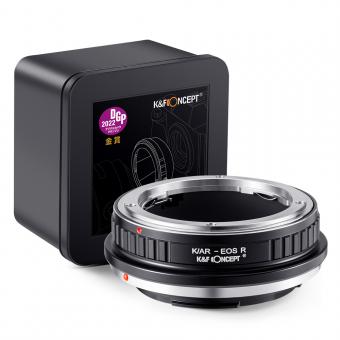
To use a macro lens adapter, first, attach the adapter to your camera body by aligning the lens mount and twisting it into place. Then, attach your macro lens to the adapter by aligning the lens mount and twisting it into place as well. Once the lens is securely attached, you can start using the macro lens adapter.
To focus on close-up subjects, adjust the focus ring on the lens until the subject appears sharp and clear. You may need to move closer or farther away from the subject to achieve the desired focus. Experiment with different distances and angles to capture unique macro shots.
Keep in mind that using a macro lens adapter may affect the overall image quality and autofocus performance. It is recommended to use a tripod or other stabilization methods to minimize camera shake, as macro photography often requires precise focusing and stability. Additionally, consider using a smaller aperture to increase the depth of field and ensure that your subject is fully in focus.
1、 Choosing the Right Macro Lens Adapter for Your Camera
To use a macro lens adapter, follow these steps:
1. Choose the right adapter: There are various macro lens adapters available in the market, so it's important to select one that is compatible with your camera model. Consider factors such as lens mount type and compatibility with your camera's autofocus system.
2. Attach the adapter to your camera: Start by removing the lens from your camera body. Align the adapter with the camera's lens mount and twist it gently until it locks into place. Ensure that it is securely attached to avoid any damage or misalignment.
3. Mount the lens onto the adapter: Once the adapter is attached to the camera, you can now mount the macro lens onto the adapter. Line up the lens with the adapter's mount and rotate it clockwise until it clicks into place. Make sure it is firmly attached to prevent any wobbling or movement.
4. Adjust the settings: Depending on your camera model, you may need to adjust certain settings to enable the use of the macro lens adapter. This could include changing the focus mode or enabling manual focus. Consult your camera's user manual for specific instructions.
5. Start shooting: With the macro lens adapter attached, you can now start capturing close-up shots of small subjects with enhanced magnification. Experiment with different focal lengths, apertures, and lighting conditions to achieve the desired results.
It's worth noting that the latest macro lens adapters often come with advanced features such as electronic contacts for transmitting data between the lens and camera, allowing for autofocus and aperture control. These adapters can provide a seamless shooting experience and improved image quality. However, they may be more expensive compared to basic adapters. Consider your budget and specific requirements before making a purchase.
2、 Attaching the Macro Lens Adapter to Your Camera
Attaching the Macro Lens Adapter to Your Camera
Using a macro lens adapter is a great way to enhance your photography skills and capture stunning close-up shots. Here's a step-by-step guide on how to attach a macro lens adapter to your camera:
1. Choose the right adapter: Ensure that the macro lens adapter you have is compatible with your camera model. Different cameras may require different types of adapters, so it's important to check the specifications before purchasing.
2. Remove the lens cap: Before attaching the adapter, remove the lens cap from your camera to expose the lens mount.
3. Align the adapter: Line up the adapter with the lens mount on your camera. The adapter should fit snugly and securely onto the camera body.
4. Twist and lock: Once aligned, gently twist the adapter clockwise until it locks into place. Ensure that it is securely attached to prevent any accidental detachment during use.
5. Attach the lens: After securing the adapter, you can now attach your macro lens to the adapter. Line up the lens with the adapter and twist it clockwise until it locks into place.
6. Test and adjust: Once the lens is attached, turn on your camera and test the functionality of the macro lens adapter. Adjust the focus and aperture settings as needed to achieve the desired effect.
It's worth noting that different macro lens adapters may have specific instructions or additional features, so it's always a good idea to consult the user manual provided by the manufacturer. Additionally, keep in mind that practice and experimentation are key to mastering macro photography.
3、 Adjusting the Focusing Distance with the Macro Lens Adapter
To use a macro lens adapter effectively, it is important to understand how to adjust the focusing distance. The focusing distance determines the distance between the lens and the subject, allowing you to capture detailed close-up shots.
First, attach the macro lens adapter to your camera's lens mount. Ensure that it is securely fastened to avoid any movement or instability during shooting. Once attached, you can start adjusting the focusing distance.
Most macro lens adapters have a focusing ring that allows you to manually adjust the distance. Turn the focusing ring clockwise or counterclockwise to move the lens closer or farther away from the subject. This will help you achieve the desired level of magnification and sharpness.
It is crucial to note that the focusing distance can greatly impact the depth of field. When shooting macro, a shallow depth of field can create a beautiful bokeh effect, blurring the background and emphasizing the subject. On the other hand, a larger depth of field can ensure that the entire subject is in focus.
Experimenting with different focusing distances will help you find the perfect balance between magnification and depth of field. Additionally, consider using a tripod to stabilize your camera and reduce any potential camera shake, especially when shooting at very close distances.
In recent years, some macro lens adapters have introduced electronic focusing capabilities. These adapters allow you to adjust the focusing distance using the camera's autofocus system, providing more convenience and precision. However, manual focusing still remains a popular choice among macro photographers due to the greater control it offers.
In conclusion, adjusting the focusing distance with a macro lens adapter is essential for capturing stunning close-up shots. Whether using a manual or electronic focusing system, practice and experimentation will help you master this technique and achieve impressive macro photography results.
4、 Exploring Macro Photography Techniques with the Adapter
To use a macro lens adapter, follow these steps:
1. Choose the right adapter: There are various macro lens adapters available in the market, so make sure to select one that is compatible with your camera and lens. Check the lens mount and ensure it matches your camera's mount.
2. Attach the adapter to your camera: Remove the lens from your camera and carefully attach the macro lens adapter to the camera's lens mount. Ensure it is securely fastened.
3. Attach the lens to the adapter: Once the adapter is attached to the camera, you can now attach your lens to the adapter. Align the lens with the adapter's mount and rotate it gently until it locks into place.
4. Adjust the settings: Set your camera to manual mode and adjust the aperture, shutter speed, and ISO according to your desired settings. Macro photography often requires a narrow aperture (higher f-number) to achieve a greater depth of field.
5. Focus manually: With the macro lens adapter attached, autofocus may not work as effectively. Therefore, it is recommended to switch to manual focus mode and adjust the focus ring on your lens to achieve sharp focus on your subject.
6. Experiment with different distances: Macro photography allows you to capture intricate details of small subjects. Experiment with different distances between your camera and the subject to find the optimal focus and composition.
7. Use additional lighting: Macro photography often requires additional lighting to properly illuminate the subject. Consider using a ring light, external flash, or natural light sources to enhance your images.
By using a macro lens adapter, you can explore the fascinating world of macro photography without investing in an expensive dedicated macro lens. It allows you to capture stunning close-up shots of flowers, insects, textures, and more, revealing intricate details that are often unseen by the naked eye.
In recent years, macro lens adapters have become increasingly popular due to their affordability and versatility. They offer a cost-effective solution for photographers who want to delve into macro photography without breaking the bank. With advancements in technology, some adapters even provide electronic communication between the lens and camera, allowing for automatic aperture control and image stabilization.
Remember, practice is key when it comes to macro photography. Experiment with different subjects, lighting conditions, and compositions to develop your own unique style. With patience and creativity, you can capture stunning macro images using a macro lens adapter.










![Supfoto Osmo Action 3 Screen Protector for DJI Osmo Action 3 Accessories, 9H Tempered Glass Film Screen Cover Protector + Lens Protector for DJI Osmo 3 Dual Screen [6pcs] Supfoto Osmo Action 3 Screen Protector for DJI Osmo Action 3 Accessories, 9H Tempered Glass Film Screen Cover Protector + Lens Protector for DJI Osmo 3 Dual Screen [6pcs]](https://img.kentfaith.de/cache/catalog/products/de/GW41.0076/GW41.0076-1-200x200.jpg)
